www.evolutionfury.com
26
• Usethepinspanner(provided)tohold
the outer blade flange.
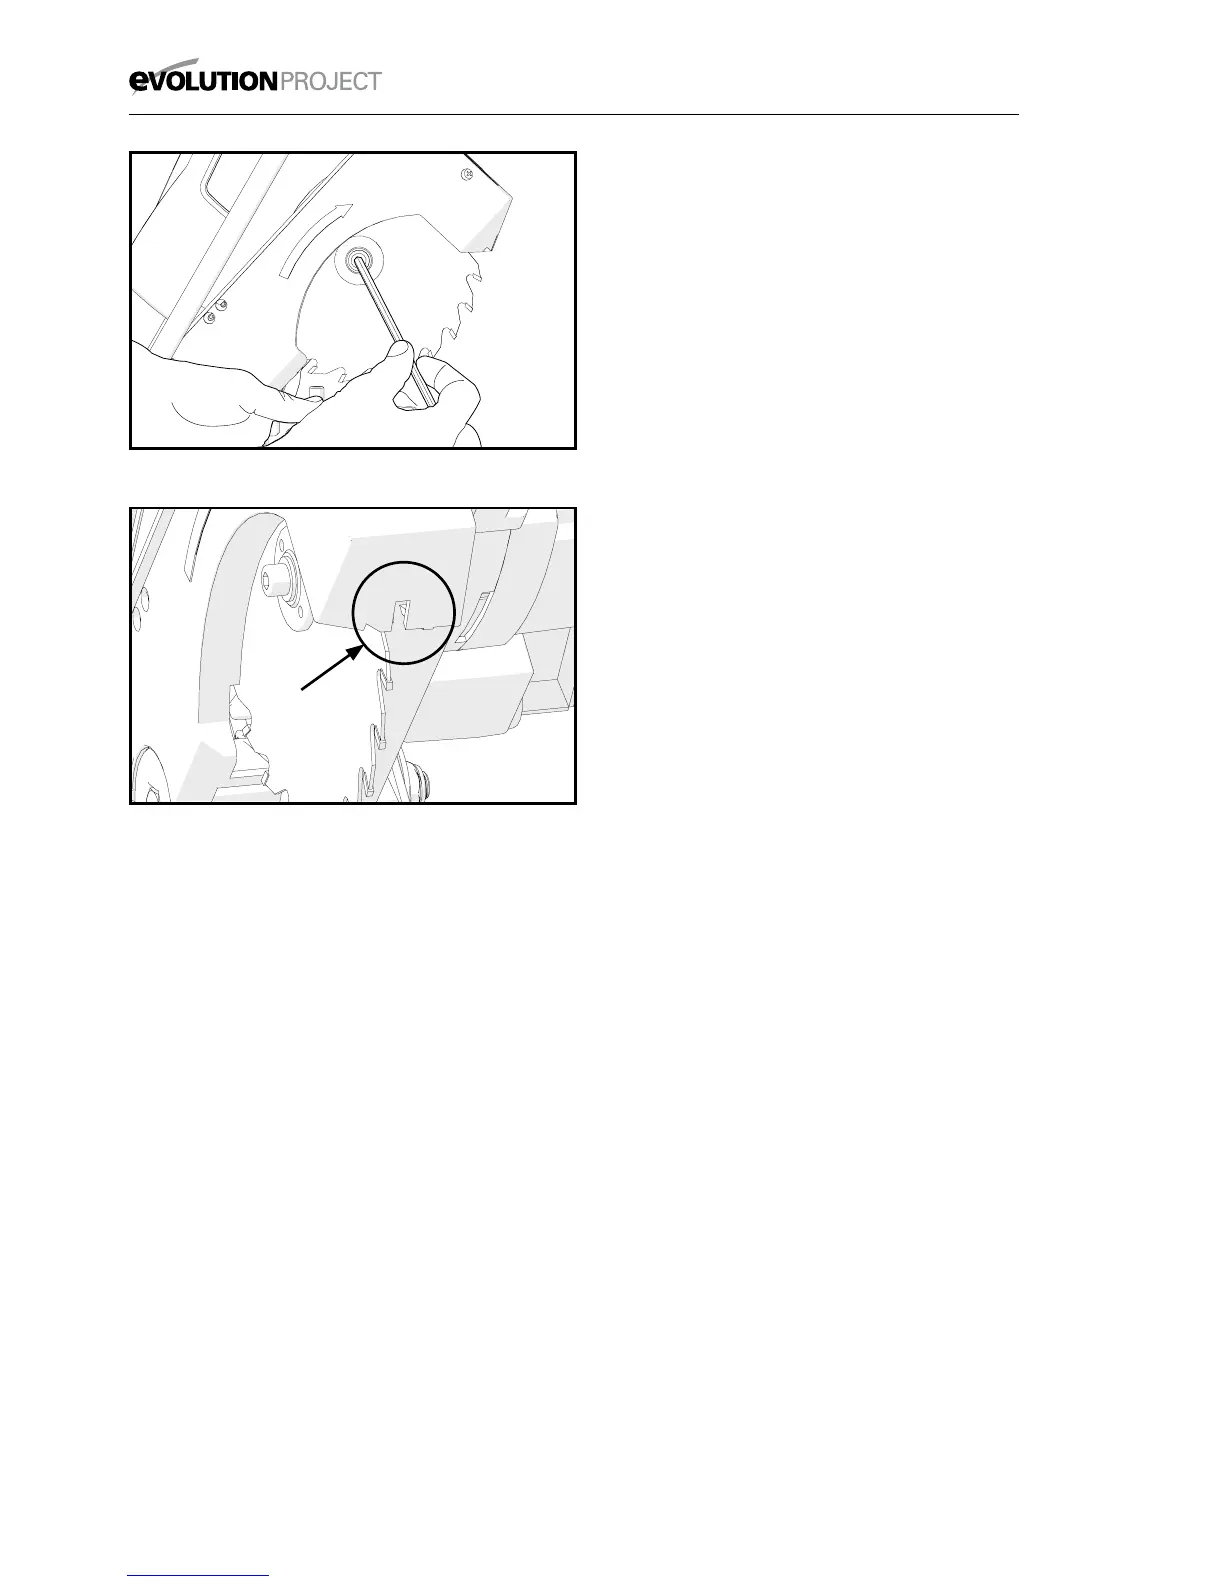
• Usethehexkey(provided)tounscrew
the arbor screw. (Fig. 29)
NOTE: The arbor screw has a Left Hand
thread. Turn clockwise to undo and
counterclockwise to tighten.
• Removethearborscrew,washerand
outer blade flange.
• ManuallyoperatetheLowerBladeGuard
and retract it fully up into the body of the
machine
• Removethebladebywithdrawingit
outwards to clear the end of the arbor and
then downwards and forwards away from
the machine.
NOTE: The 5mm blade slot at the lower
front of the Cutting Head (Fig. 30) provides
extra clearance when manoeuvring the
blade into or out of the machine.
To refit:
• Ensurethatthebladeissuitableforthis
machine.
• Ensurethatthedirectionofrotationarrow
on the blade matches the direction of
rotation arrow found on the machines Side
Blade Guard. The blade teeth should always
point downward at the front of the saw.
• Usingthebladeslottoprovidemaximum
clearance and access to the machine,
carefully and gently manoeuvre the blade
up into the machine and locate it on the
inner blade flange.
• Reinstalltheouterbladeange,washer
and arbor screw.
• Handtightentheassembly.
• Holdtheouterbladeangewiththepin
spanner.
• Tightenthearborscrewwiththehexkey.
• Checkthatthebladespinsfreelyby
rotating it by hand.
• ClosetheRetractableBladeGuard
around the blade so the blade teeth are
completely covered.
• Re-connecttheRetractableBladeGuard
Operating Lever to its service position
using the pivot screw.
• Checktheinstallation,particularlyforthe
operation of all the safety guards.
CHECKING AND SETTING OF
BEVEL ANGLES
WARNING: Before making any adjustments
ensure that the machine is disconnected
from the power supply.
NOTE: While all angular settings have been
factory set, checking and adjustment may
be required as a consequence of normal
operational wear and tear.
Fig. 29
Fig. 30