EYE-LCD4600M/W-SN18
3.2 The Remote Control
) The menu Functions of the OSD Menu can be accessed with the eyevis Remote Control Unit (RCU), see
picture below.
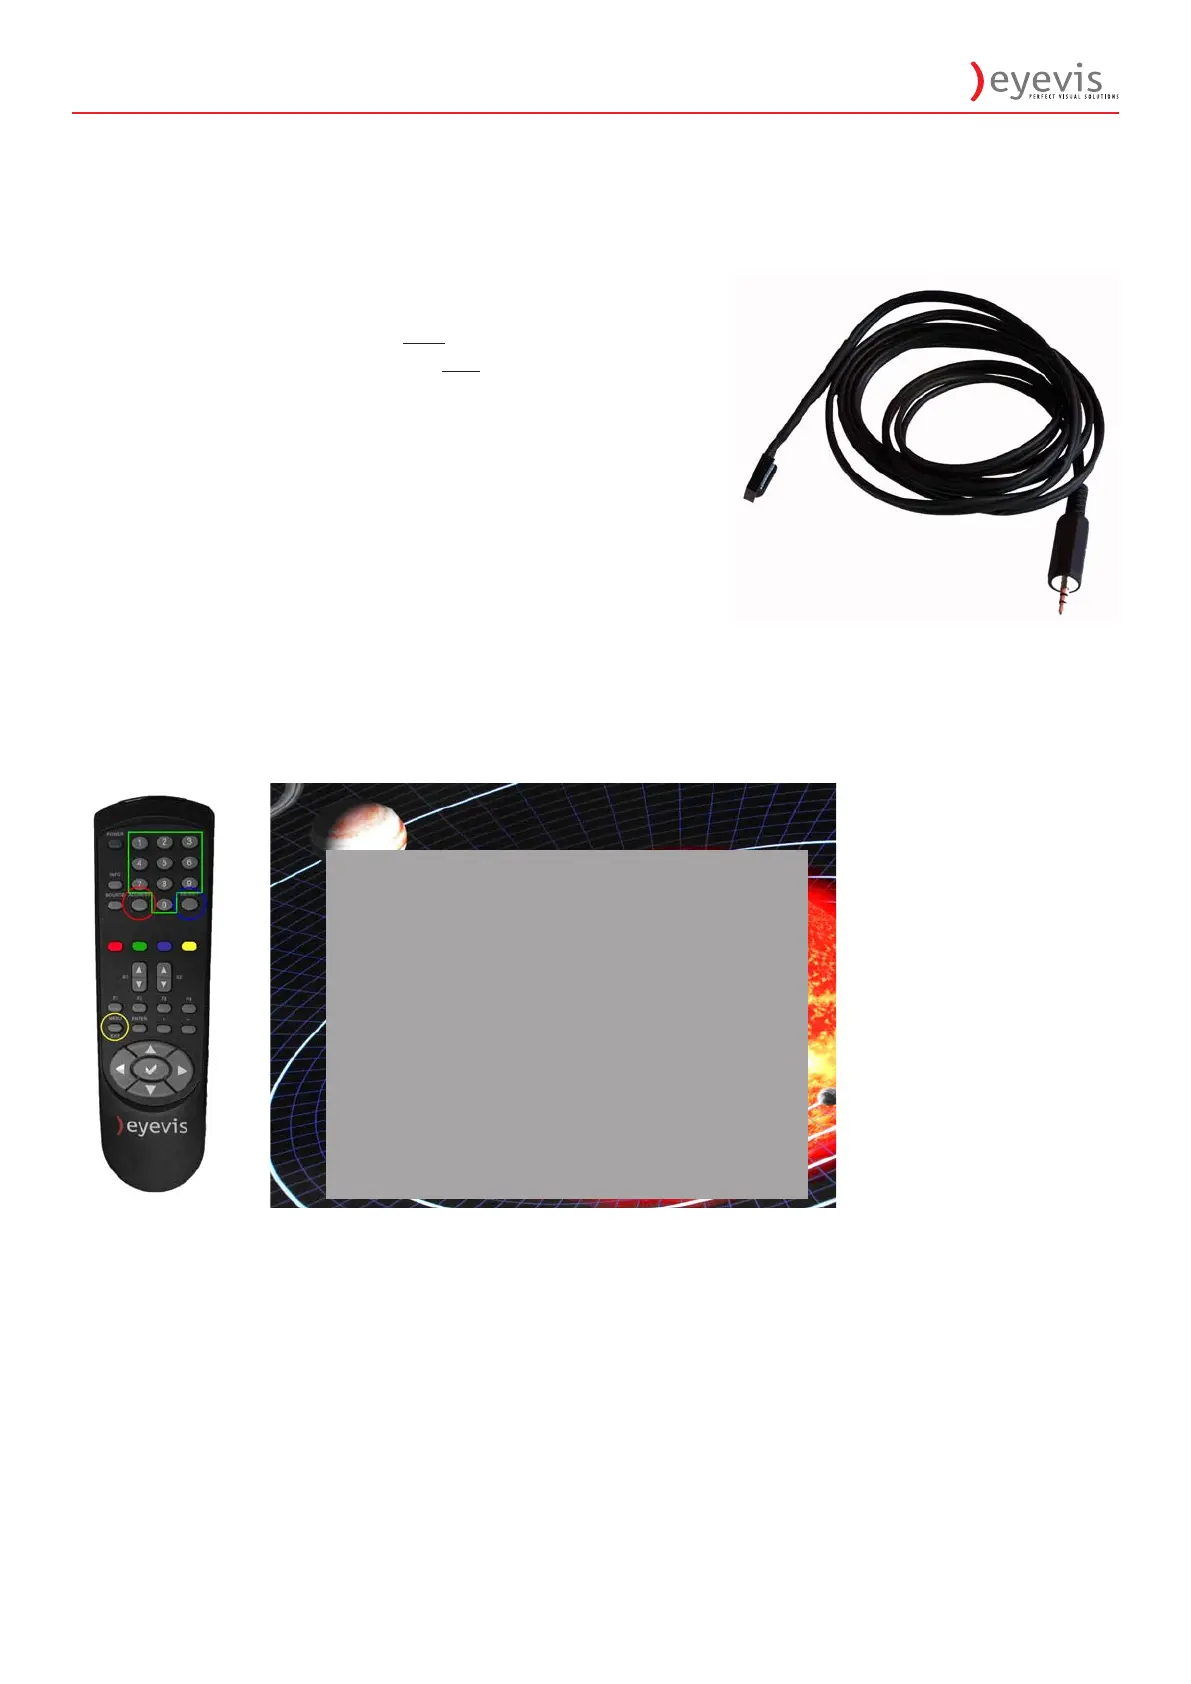
) To use the RCU connect the IR sensor (see picture on the right)
with the IR Input socket of the first LC display of the RS232
daisy-chain in the video wall. Only one IR sensor may be
connected.
Opening the On-Screen-Display
) Press the MENU/EXIT-Button to open the OSD Menu on the
currently selected screen.
) Alternatively press the ADDRESS button to directly enter
SELECT DEVICE Menu.
Navigating in the OSD-Menu
) Use the arrow buttons (►/▼/◄/▲) to navigate through the menu.
) Press the checkmark button (3) to select a menu item.
) Press MENU/EXIT to abort the current operation and return to the previous menu.
) For numerical values you can either use the up/down arrow (▼/▲) to increase or decrease values or
insert the values directly on the number block. If using the arrow buttons for entering numerical
values, holding the keys pressed will toggle larger steps.
3.2.1 Selecting a Display
) The display to be addressed can either be chosen in the main menu or by pressing the ADDRESS button
and selecting the display in the SELECT DEVICE Menu.
3.2.1 Special Keys and Key Sequences
) You can use the POWER Button to activate Standby Mode. This retains the currently used settings. To
reload the settings stored to the EEPROM either power off the device physically or use the reset key
sequence described below.
Select Device
ID
2
Select Device
002

 Loading...