Do you have a question about the EZ-ACCESS PATHWAY 3G and is the answer not in the manual?
Instructions for installing platform modules in various configurations.
Steps for attaching support tubes and feet and adjusting platform height.
Procedure for joining two platform modules to create a larger configuration.
Details for installing a 45-degree angled platform between ramps.
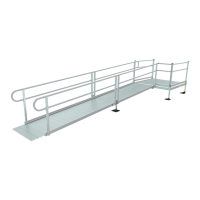
Instructions for installing an 8' x 5' platform for a turn back configuration.
Bracing a platform for stability, especially for taller installations.
Installing cross braces for added stability on taller platforms.
Procedure for joining multiple ramp sections end-to-end.
Attaching ramp sections to the installed platform modules.
Connecting the support legs to the ramp sections for stability.
Adding angle braces for stability to ramp sections.
Connecting the ramp to the ground level.
Attaching a ramp to a non-PATHWAY platform like a porch or deck.
Securing the top of the ramp to a wooden or concrete surface.
Adjusting ramp angles for connection to existing structures.
Installing handrails on the ramp sections.
Modifying existing two-line ramp handrails to vertical picket style.
Assembling horizontal picket style handrails for ramps.
Pre-assembly steps for standard platform handrails.
Attaching assembled handrails to platform posts.
Modifying two-line platform handrails to vertical or horizontal pickets.
Installing handrails for the 8' x 5' turn back platform configuration.
Installing handrails for the 45° angle platform configuration.
Installing closure for straight platform configurations.
Installing the angle post for turn configuration closures.
Attaching the angle cap to the closure post.
Connecting the ramp handrail to the platform post with the top rail.
Installing the lower rail for a two-line closure.
Installing vertical picket style closures between ramp and platform.
Installing horizontal picket style closures between ramp and platform.
Installing special closures for turn back ramp configurations.
Fastening ramp sections securely to the platform modules.
Attaching upper and lower end loops to the ramp handrails.
Placing protective caps on any open ends of the handrails.
Blending scratches on architecturally finished handrails.
Verifying all fasteners, level, slope, and handrail coverage.
Supplemental support for ramp ends using support top brackets.
Spanning wider gaps or accommodating misalignment with lower transition.
Using a bridge plate to span small gaps between surfaces.
Using a landing pad to assist mobility on soft ground.
Attaching platforms to existing structures for stability.
Grounding the ramp system for electrical safety.
Anchoring the system to resist seismic and wind loads.
Installing the modular gate for access control.
Guidelines for regular maintenance and safe operation of the ramp system.
| Category | Home Safety Product |
|---|---|
| Product | EZ-ACCESS PATHWAY 3G |
| Ramp Width | 36 inches |
| Weight Capacity | 800 lbs |
| Material | Aluminum |
| Foldable | No |
| Product Type | Modular Ramp |
| Surface Type | Non-slip surface |