Page 23 of 72
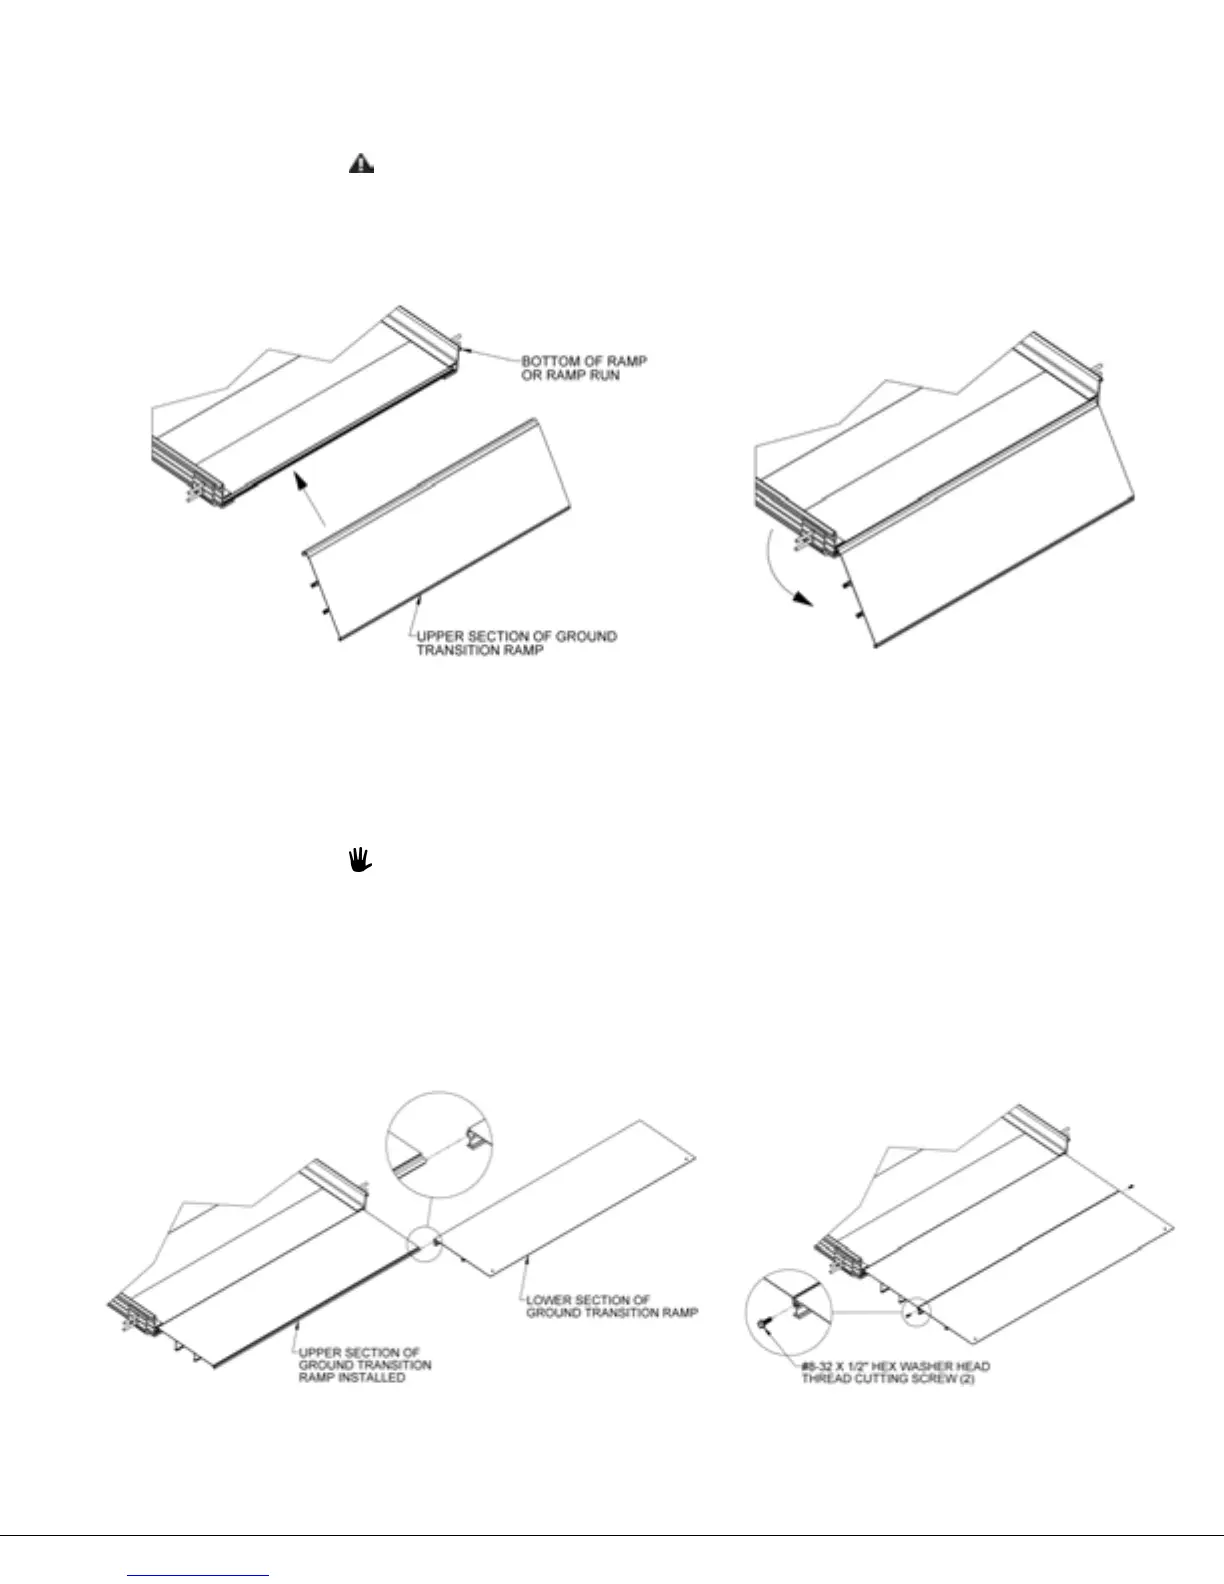
3.4. INSTALL GROUND TRANSITION RAMP
3.4.1. The PRGT (RAMP GROUND TRANSITION) consists of two sections that need to be installed
into the ramp and connected together.
The PRGT (RAMP GROUND TRANSITION) is only designed to transition from the
lowest ramp in the run to the ground. Do NOT USE in any other location.
3.4.2. Lift the lowest end of the ramp/ramp run and bring the upper section PRGT into the ramp
end tread until the “hook” is engaged FIG. 3.9), then rotate into place (FIG. 3.10) and set
back on the ground.
3.4.3. Slide the lower section ground transition ramp into upper section (FIG. 3.11).
3.4.4. Install #8-32 x 1/2” hex washer head thread cutting screws into the screw slots on both
sides where the sections connect (FIG. 3.12).
The hex washer head screws will keep the sections from sliding with respect to each
other but the sections can still be separated until they are installed in the ramp and
resting on the ground.
3.4.5. Holes and fasteners are included for anchoring into wood or concrete. Other methods
may be used when anchoring into other surfaces.
3.4.6. If connecting the lowest end of the ramp to a PLP (LANDING PAD) use a PRLT (RAMP
LOWER TRANSITION) instead of a RAMP GROUND TRANSITION. Please see ‘OPTIONAL
EQUIPMENT’ section for instructions.