Page 20 of 72
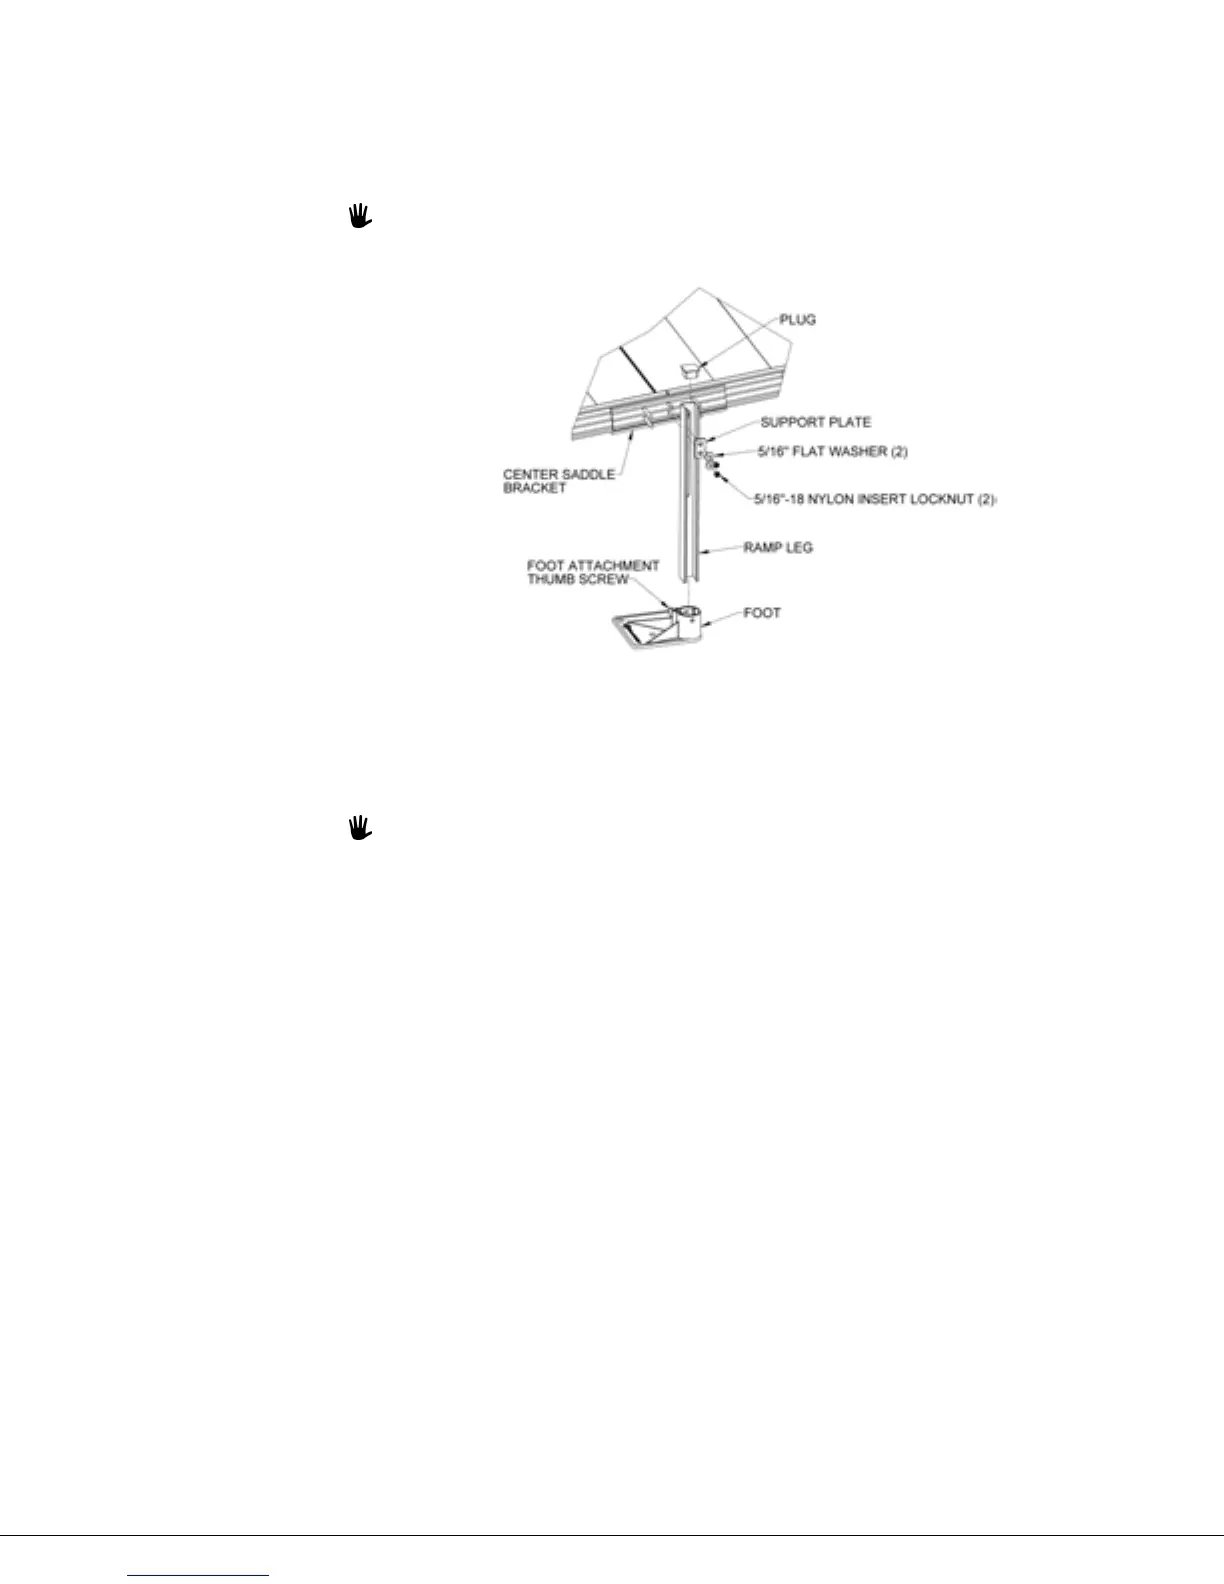
3.3. ATTACH RAMP LEGS TO RAMPS
3.3.1. Locate the appropriate PRLxxPR (RAMP LEG PAIR where “xx” denotes the leg length) for
the location. Insert the leg into a foot. Make sure the leg is fully engaged in the foot and
the foot will be oriented so it extends under the ramp once installed. Tighten the thumb
screw on each foot securely (FIG. 3.5).
If installing on soft soil it may be necessary to set the foot on a concrete pad.
FIG. 3.5
3.3.2. Place the slot in the ramp leg over the two shorter studs in the middle of the center
saddle bracket, install the support plate over both studs then install 5/16”-18 nylon insert
locknuts and 5/16” flat washers on each stud but do not tighten fully. Repeat on the
opposite side (FIG 3.5)
In situations where the lower end of a ramp or ramp run is too close to the ground
to install normal feet and feet are needed due to ground or other conditions, special
welded low profile feet (part no. PRLPRLP). are available (FIG 3.6).
3.3.3. Remove the 5/16”-18 nylon insert locknuts and 5/16” flat washers attaching the ramp
handrail post (if already installed), position the low profile foot so the foot is oriented
under the ramp and the channel leg wraps around the ramp post. Reinstall the locknuts
and flat washers, adjust height as described below then tighten fasteners securely.
Repeat on the opposite side (FIG. 3.6).