2.1 Preliminary Checks
The condition of the gate structure directly affects the reliabil-
ity and safety of the automated system. Before installing the
415 operator, prepare the gate by performing the following:
• Make sure that the gate structure is solidly built. Add rein-
forcing crosspieces to the gate leaves if necessary.
• Make sure that the gate moves smoothly on its hinges
without excessive friction by swinging it opened and
closed by hand. If necessary, lubricate all the gate’s
moving parts.
Positive stops are not needed with the 415 operator, the built
limit switches can be used to limit the rod travel.
2. INSTALLATION
A
B
D
C
E
A
B
D
C
E
Opening
angle
A B C
D
(max)
E
90°
5 less than A
110°
less than A
Opening
angle
A B C D* E
90°
N/A less than A
110°
N/A less than A
2.2.1 Inward Opening
2.2.2 Outward Opening
2.2.3 Guidelines for Installation Dimensions
If the dimensions indicated in Fig. 4a cannot be obtained use
the following general rules to determine different installation
dimensions:
• For 90° leaf openings: A+B=rod stroke
• For leaf openings exceeding 90°: A+B<rod stroke
• Smaller A and B dimensions provide higher peripheral leaf
speed.
• Limit the difference between A and B dimensions to less than
1.5 inches. Greater differences cause speed variations during
gate opening and closing movements.
• Limit switches are triggered during the first and last 1.25 inches
of gate travel. Therefore select A and B dimensions that utilize
the entire operator travel. Short travel ranges can restrict or
cancel the limit switch adjustment range.
If pillar dimensions or hinge position do not allow the installa-
tion of the operator, cut a niche into the pillar (as shown in Fig.
5) in order to maintain the proper A dimension. The dimen-
sions of the niche should enable easy installation, rotation
and operation of the manual release device.
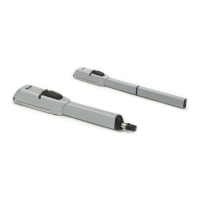
2.3 Installing the Operator
1. Fix the rear bracket in the position you previously deter-
mined in Section 2.2.
• For steel pillars, carefully weld the bracket directly onto
the pillar (Fig. 6).
• For masonry pillars, use a steel plate (not included) to
attach the rear bracket (Fig. 7). Use a suitable fastening
system then carefully weld the bracket to the plate.
While fastening the bracket use a level to ensure that it is
perfectly horizontal.
2.2 Installation Dimension
Select the installation position of the operator on the gate
referring to the dimensions in Fig 4a for inward opening or 4b
for outward opening.
In case of inward opening make sure that there is enough
clearance between the gate leaf and possible obstacles like
walls or fences.
In case of outward opening construct a steel elbow of ad-
equate size to allow the operator to be mounted as in Fig. 4b
* The dimension D is not a contraint in this configuration
7
Fig. 5
Fig. 4a
Fig. 4b