4
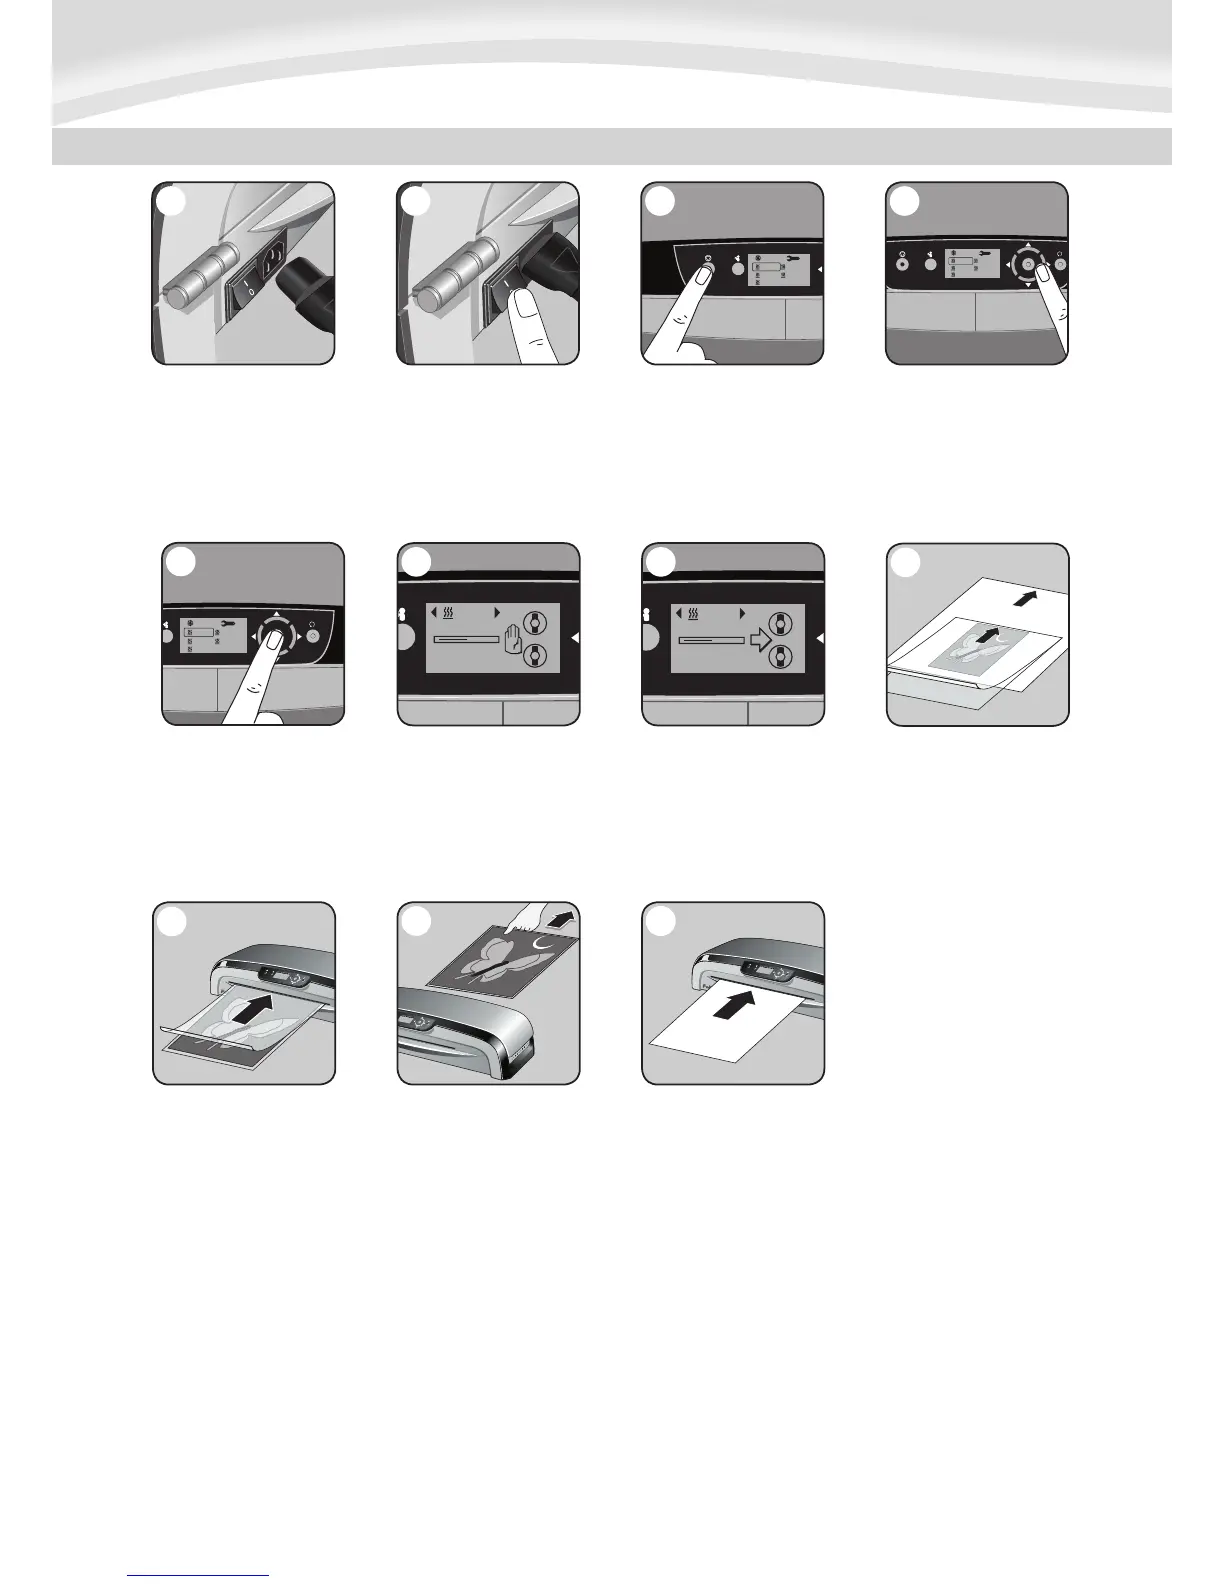
2. Switch laminator on with
Power On / Off button at back
of machine.
3. Press Stand-by button at
left of front operating panel to
switch laminator on.
4. Use navigation keys to select
setting for the hot lamination
pouch thickness (80-250
micron) you wish to laminate.
7
5. Confirm your selection by
pressing “Enter” button in the
middle of navigation keys.
Laminator will take a few minutes
for temperature adjustment.
6. During warm-up, a “wait”
symbol will appear in the
LCD screen until the required
temperature has been reached.
7. Once temperature is reached,
acoustic beep signal will sound,
a small arrow will flash in LCD
screen and roller symbols will
rotate.
8. While laminator is warming
up, please prepare item you
wish to laminate. Place the item
inside the pouch and centre it
against the sealed edge of the
pouch. To prevent jamming, use
a carrier when item is smaller
than the pouch.
8
9
10
9. Place pouch, sealed edge first,
into laminator entry. Keep pouch
straight and use the edge guide
to centre it.
10. To prevent jamming,
immediately remove laminated
item from back of machine. Let
item cool on flat surface for
several seconds.
11. Before switching off laminator,
feed empty cleaning/carrier sheet
through machine to clean unit.
11