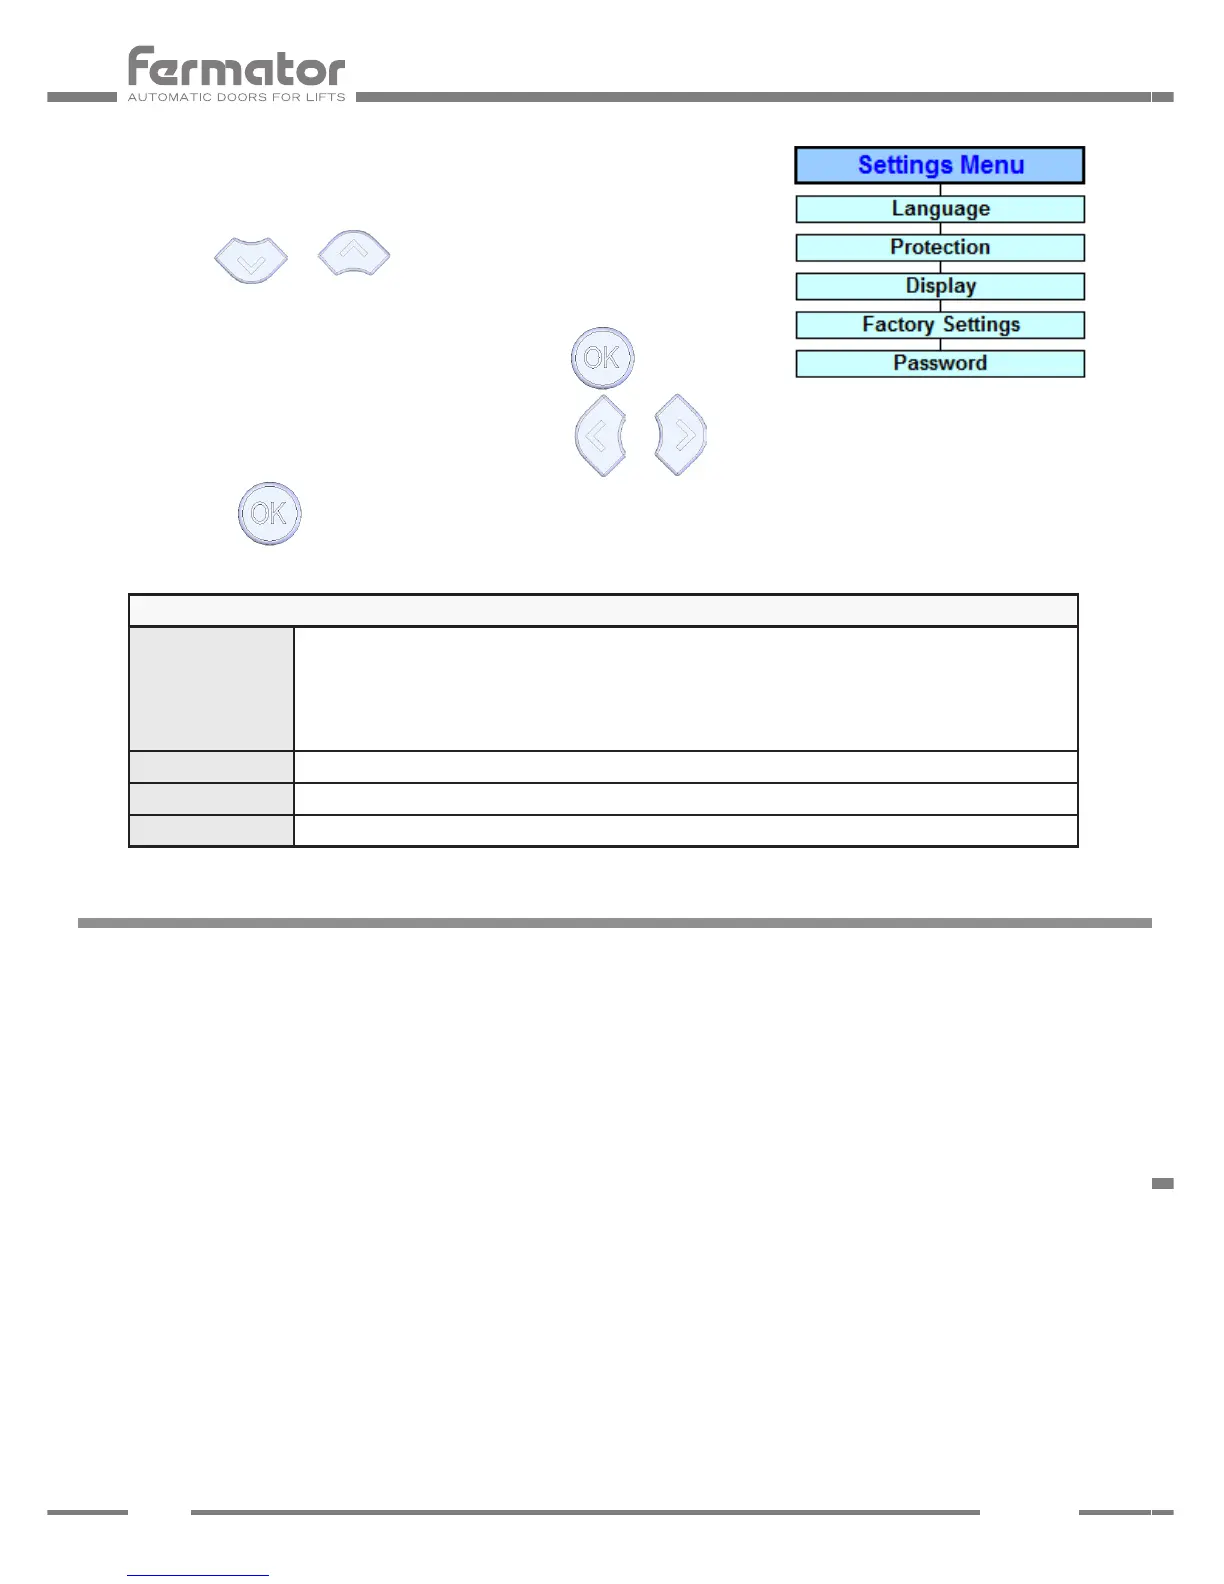
SETTINGS MENU
Settings Menu
The Settings Menu is used to change the VF conguration.
Push the or button to see the different options.
To modify an option to do the following steps:
1. Select de option to be modify and push the button to enter in
modify mode.
2. The option status will appear blinking, pus the or button to enable / disable it.
3. Push the button to save the modication.
Settings Menu
Language The unit can be programmed in the following languages:
• English.
• Spanish.
• German.
• French.
• Italian.
Display Rotates the screen display (Straight / Invert).
Factory Settings Sets all parameters to the factory value.
Password Entering the correct password the advanced menu will be unlocked.
INSTALLATION PROCESS
The whole installation process has to been done when a new circuit is installed on a door.
If the circuit is already installed only do steps 9 and 10.
• Connections.
• Connect the motor wire and encoder wire (#55, #56, #57, #58, #59).
• If it has been installed, connect the Fermator photocell (#17, #18, #19, #20).
• Disconnect all other inputs and outputs.
• Connect the 230 V AC mains supply to the controller (#5, #6, #7).
• Switch on the VF door controller button I / O in the front of the box.
• Program in ”2 INPUTS” and “MASTER”, this options are located in the Programming Options
menu in the VF7 Graphic Interface.
• Active the Motor Calibration, to detect the electrical characteristics of the motor installed,
place the door in a middle position.To perform an optimal calibration of the motor installed the
process has to be done without charge.
Never perform calibration with the car door and landing door.