22 ferrismowers.com
Adding Fuel
WARNING
Fuel and its vapors are extremely flammable and
explosive.
Fire or explosion can cause severe burns or death.
When Adding Fuel
• Turn engine off and let engine cool at least 3 minutes
before removing the fuel cap.
• Fill fuel tank outdoors or in well-ventilated area.
• Do not overfill fuel tank. To allow for expansion of the
fuel, do not fill above the bottom of the fuel tank neck.
• Keep fuel away from sparks, open flames, pilot lights,
heat, and other ignition sources.
• Check fuel lines, tank, cap, and fittings frequently for
cracks or leaks. Replace if necessary.
• If fuel spills, wait until it evaporates before starting
engine.
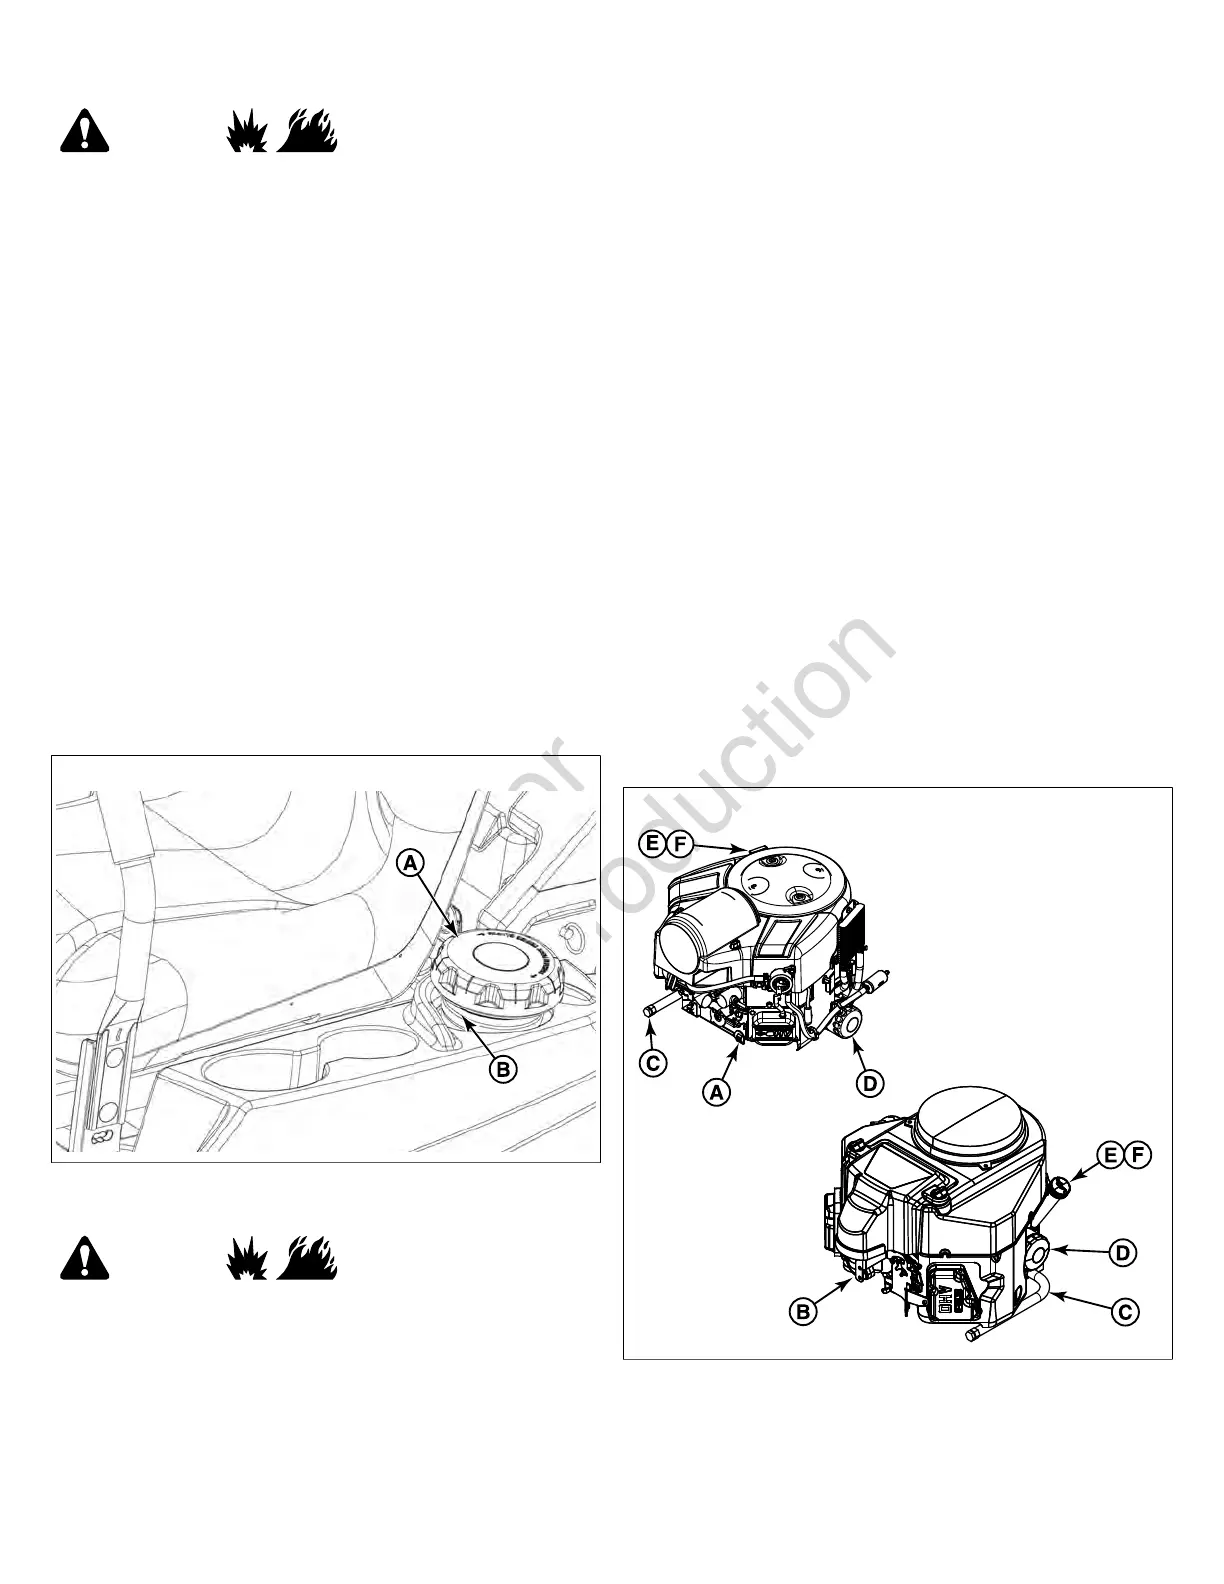
1. Clean the fuel cap area of dirt and debris. Remove the
fuel cap (A, Figure20).
2. Fill the fuel tank with fuel. To allow for expansion of the
fuel, do not fill above the bottom of the fuel tank neck (B).
3. Reinstall the fuel cap.
20
Replacing the Fuel Filter
WARNING
Fuel and its vapors are extremely flammable and
explosive.
Fire or explosion can cause severe burns or death.
Do NOT remove the fuel filter when the engine is hot, as
spilled gasoline may ignite. Do NOT spread hose clamps
further than necessary. Ensure clamps grip hoses firmly
over filter after installation.
Carbureated Models: The fuel filter is located in the fuel line
between fuel tank and carburetor, near the fuel pump.
Fuel Injected Models: The fuel filter is located in the fuel line
between the fuel tank and fuel pump.
If filter is dirty or clogged, replace as follows:
1. Disconnect the negative battery cable.
2. Place a container below the filter to catch spilled fuel.
3. Using a pliers, open and slide hose clamps from fuel filter.
4. Remove hoses from filter.
5. Install new filter in proper flow direction in fuel line.
6. Secure with hose clamps.
7. Reconnect the negative battery cable when finished.
Check Engine Oil Level
Interval: Before Each Use
Refer to the engine owners manual for dipstick and oil fill
locations and specific engine oil check and fill procedures.
Changing the Engine Oil and Filter
This series of mower has different engine options: Briggs &
Stratton Commercial Turf (A, Figure 21) and Kawasaki FR
Series (B). Please reference figure 21 as the location of the
components listed for this procedure may vary by specific
engine option.
21
1. Warn the engine by running it for a few minutes. (Refer to
the engine operator's manual for oil and filter replacement
instructions.)
2. Remove the oil drain hose (C) from it's storage position
and route the hose so that when the oil drain cap is
removed the oil can be drained into a small pan.
 Loading...