OWNERS MANUAL 4
Open the rear end of the foot control by bending the
soft cover upwards and gain thereby access to the
rechargeable batteries. Connect the batteries and fold
back to cover. Charge the batteries before use (see
page 12)
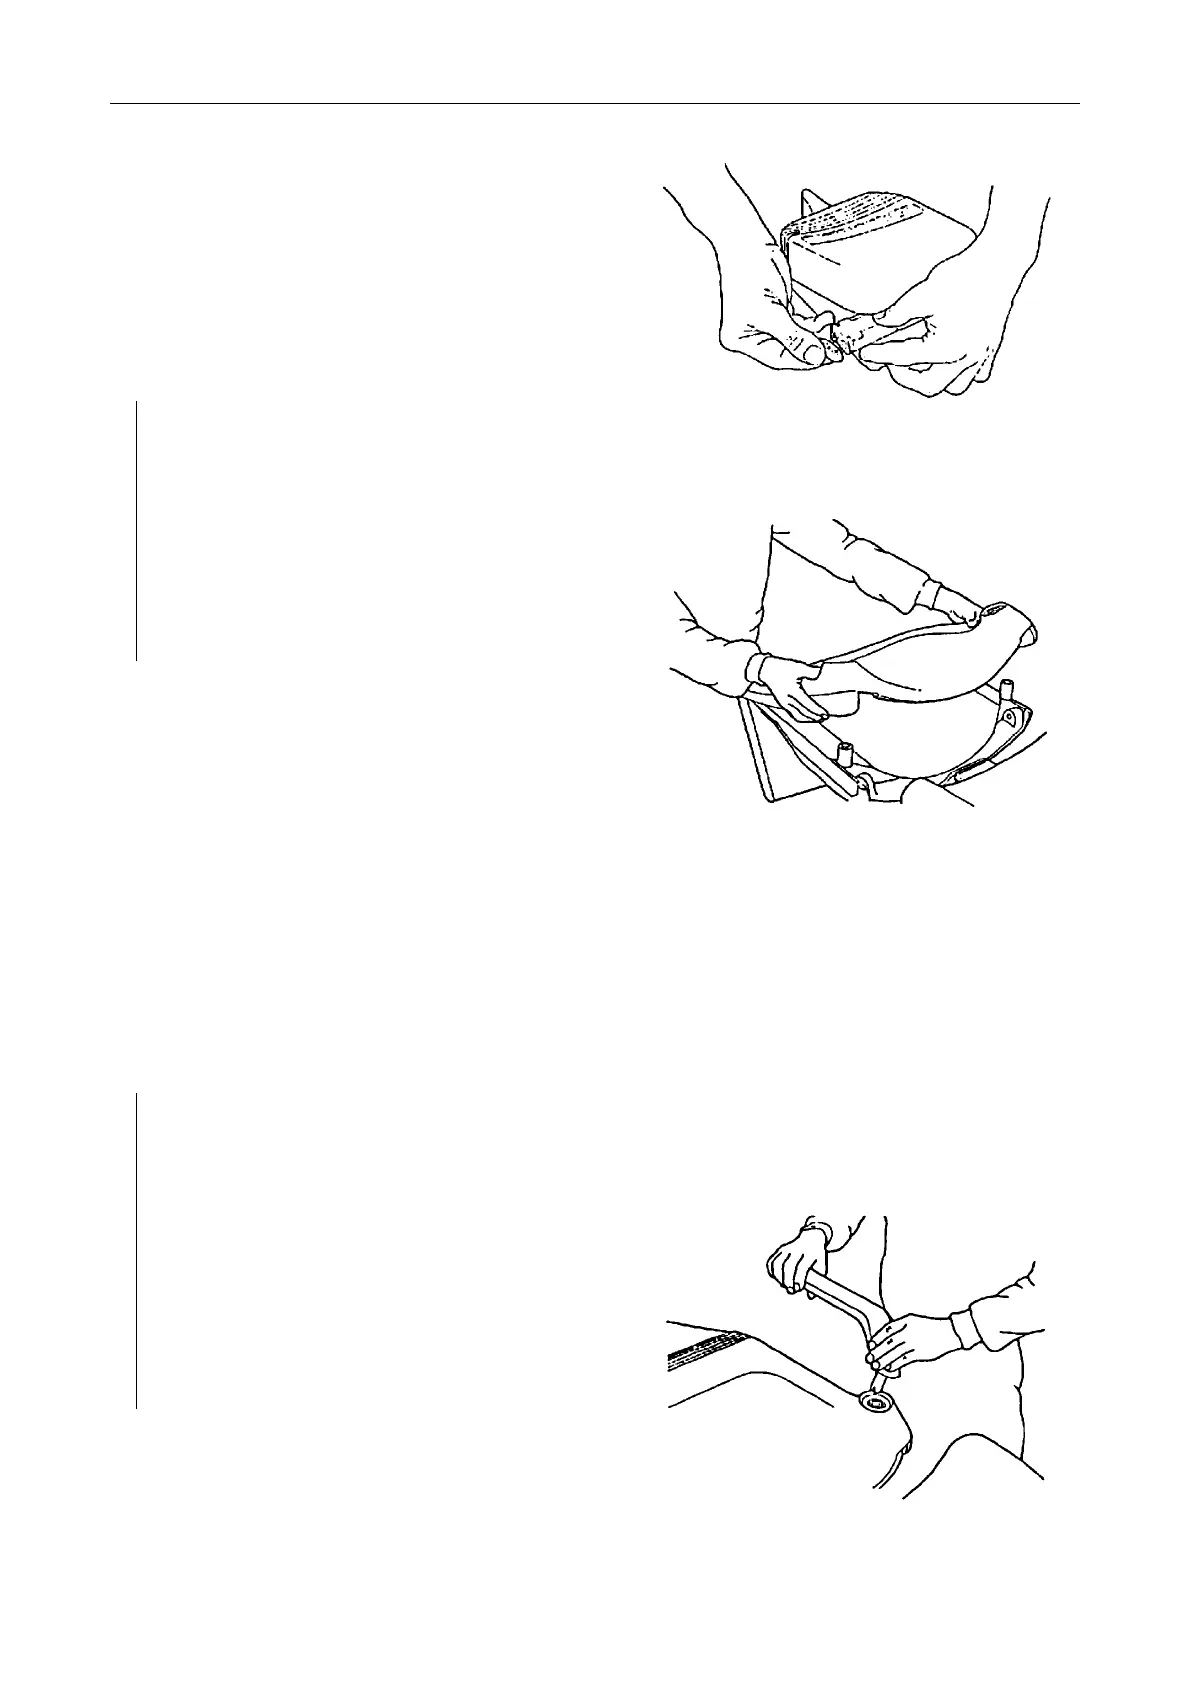
If there is a unit:
Remove the upholstery by undoing the locking
rings at the armrest attachments by means of
rotating the plastic locking ring anticlockwise. Lift
the upholstery upwards and slide forward.
Remove the sheet metal by opening two screws
and pull the plate away. Connect the wires coming
from the F1 E unit color-to-color in terminal block
and attach the flat cable in it’s counterpart.
Connect the power supply in a grounded wall socket.
Be sure that the voltage rating is same in the wall
socket and in power supply.
Turn on the power by means of the switch on the
power supply. The green pilot lamp will now light up.
Wait approx. 30 seconds before operating the chair.
The built-in microprocessor checks that all functions
and controls are in order.
If there is a unit:
Raise the chair approx. 15 cm (6 inches) by means
of the foot control (push the right-side button for
lift) and fit the unit in its adapter iron located
beside and below the chair seat. Adjust the
position of the unit by using adjustment screws in
the adapter iron and tight the unit firmly in its
place. (Refer to a separate “Quick Installation
Quide”.
Restore upholstery and lock it in its place by using
plastic locking rings.
Attach the armrests to the chair.