PRE-INSTALLATION
6.
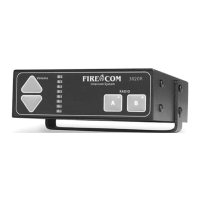
Before installing the Firecom 3010R Series Intercom System, it is
VERY IMPORTANT to
take a little time and plan the installation. This section will provide information to assist in
planning the installation. You should read AND UNDERSTAND all of the information
contained in this section as well as the sections on the System Orientation (page 1) and
Installation (page 12) BEFORE installing the 3010R Series Intercom onto the apparatus.
Taking a little time to plan the installation BEFORE installing the 3010R Series Intercom
System may prevent many installation errors which could result in improper system
operation.
If you have any questions regarding the information contained in this section, contact your
local Firecom Dealer for clarification BEFORE proceeding with the installation.
INTERCOM LOCATION
When choosing a location to mount the 3010R Series Intercom Unit, the following conditions
should be considered:
• The intercom should not be mounted close to the 2-way radio antenna on the vehicle.
• Allow for at least 3 inches clearance on the sides and rear of the intercom unit for
service and installation.
• The intercom should be placed where it will be easy to route all the CA Cables
from the Headset Modules.
• The intercom should be placed where the controls may be easily accessed.
• Do not mount the intercom directly above or below the radio transceiver.
• Remote mounting of the intercom box should not be piggy backed to radio
transceiver unit by screws or velcro.
• Power cable should be routed to buss bar power and properly grounded to chassis
on a clean surface with no more than 4.0Ω difference in chassis ground and
selected spot for Firecom ground.
IMPORTANT
• If the intercom cannot be located where it is easily accessible, a remote head
can be used to allow the base unit to be mounted out of the way yet still have
control access where it's more convenient.