SYSTEM TEST
20.
This procedure tests all functions of the 3010R Series Intercom System and should be used to
test the system for proper operation after installation. In the event of a system failure, it may
also be used to help identify and isolate the exact symptoms before troubleshooting a prob-
lem, and to test the system after repair work has been performed.
POWER ON
1. Turn on the apparatus master switch.
2. Confirm that power is applied to the intercom by observing that at least one
Volume Indicator LED (Figure 23) is lit.
3. Using the Up and Down Buttons, adjust the Volume Control (Figure 23) to
TEST INTERCOM OPERATION
4. Plug a headset into the appropriate Headset Module.
5. Turn the headset Volume Control all the way down (counterclockwise).
6. Put a headset on your head and adjust the headband/headstrap for a
comfortable fit.
7. Adjust the microphone boom to place the microphone in front of your mouth and
approximately 1/8” from your lips.
8. Speak into the microphone to confirm intercom operation. You should hear your
self through the headset speakers.
• If the headset is a UH-20 or FH-20, press and hold the black Push-To-Talk
(PTT) button on the ear dome while speaking into the microphone.
• If the headset is a UH-40 or FH-40, you may need to press, and release, the
yellow PTT button on the ear dome to turn the microphone on before
speaking into the headset.
9. Turn the headset Volume Control fully clockwise.
10. While speaking into the microphone, adjust the volume control on the intercom
unit slightly louder than a comfortable listening level.
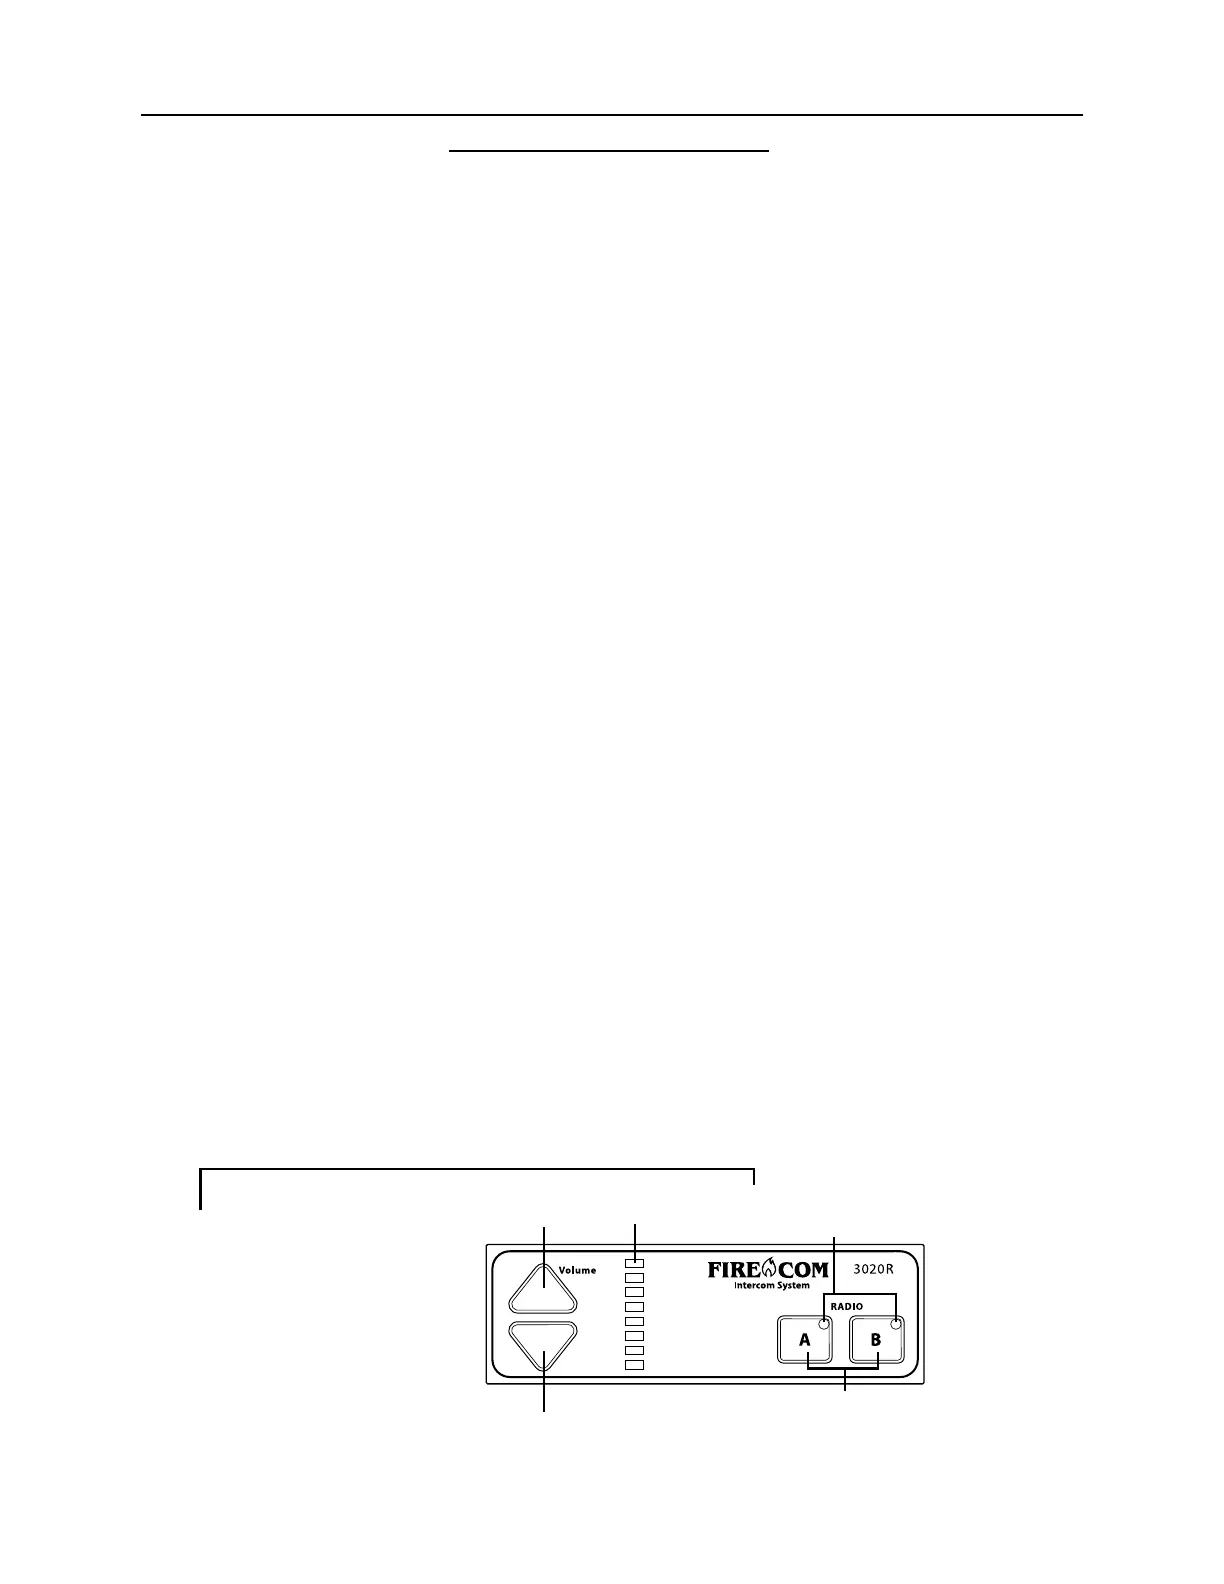
FIGURE 23:
3020R Face Panel
Volume
Down
Button
Volume
Up Button
Volume
Indicator
LED's
Radio
Select
LED's
Radio Select
Buttons
the middle of its range.