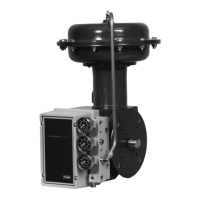
Type 1051 & 1052 Styles H & J
10
Table 4. Approximate Actuator Weights
TYPE
1051
TYPE 1052 TOP-MOUNTED HANDWHEEL
SIZE
Lb Kg Lb Kg Lb Kg
30
40
60
70
47
74
160
–––
21
34
73
–––
58
90
108
252
26
41
49
114
11
16
24
47
5.0
7.3
11
21
Figure 6. Center of Gravity Dimensions
19A1459-B
A3255/IL
Note
For an actuator with an H mounting
adaptation and a 7/8 through 1-1/2 inch
(22.2 through 38.1 mm) output shaft,
find dimensions and center of gravity
information in figures 4, 5, and 6, and
approximate weights in table 4. This in-
formation is required for proper fabrica-
tion of the user-provided bracket and
coupling.
1. For an actuator with an H mounting adaptation,
attach an appropriate mounting bracket (not provided)
to the mounting plate (key 22) with the cap screws
(key 78). See figures 4 and 5 for mounting dimensions
on the mounting plate. Tighten the cap screws to 17
foot-pounds torque (23 Nm) for 7/8-inch (22.2 mm)
output shafts, 30 foot-pounds torque (41 Nm) for 1-1/8
inch (28.6 mm) output shafts, and 75 foot-pounds
torque (102 Nm) for 1-1/2 and 2-inch (38.1 and 50.8
mm) output shafts.
2. Consult figure 7 for available mounting styles and
positions. The actuator is normally positioned vertically
with the valve body or other equipment in a horizontal
pipeline.
Note
If the milled flats or the coupling on the
end of the actuator output shaft (key 87)
are oriented such that the output shaft
cannot accommodate the operated
equipment shaft, refer to the Changing
Positions portion of the Changing Ac-
tuator Mounting section. This procedure
describes how the output shaft can be
repositioned to accommodate the oper-
ated equipment shaft.
3. If using an actuator with a J mounting adaptation,
note that the valve shaft coupling (key 90) is furnished
with two keyways lettered A and B as shown in figure
8 (letters C and D on the coupling are not used and
can be disregarded). Align the appropriate keyway
with the keyway in the operated equipment shaft. If
using a Fisher butterfly valve body, align the appropri-
ate keyway on the coupling with the valve shaft key-
way indicated in table 5. Then install the woodruff key
(key 91) in the shaft keyseat, and slide the coupling
onto the shaft. It is helpful to apply a light coat of
grease to the inside of the coupling before sliding it
onto the shaft.
4. For an actuator with a J mounting adaptation, se-
cure the mounting yoke (key 22) to the valve body with
the cap screws (key 78, not shown). Tighten the cap
screws to 30 foot-pounds torque (41 Nm) for 3/8
through 1-inch (9.5 through 25.4 mm) valve shafts and
to 100 foot-pounds torque (135 Nm) for 1-1/4 and
1-1/2 inch (31.8 and 38.1mm) valve shafts. For 1-1/4
and 1-1/2 inch (31.8 and 38.1 mm) valve shafts, also
place the two spacers (key 92, not shown) between
the mounting yoke and valve body during this step.

 Loading...