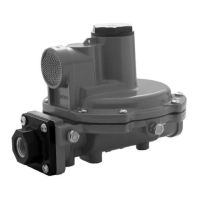
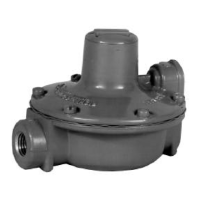
Type 1051 & 1052 Styles H & J
14
If the actuator has been disassembled or if the spring
adjustment was changed, and it is desired to match
the initial compression stated on the nameplate, make
sure the rod end bearing (key 17, figure 11) has been
disconnected from the lever (key 27, figure 11). Adjust
the spring so that the diaphragm rod just starts to trav-
el at the spring set pressure specified on the name-
plate. Be sure the rod end bearing does not hit the
lever as the diaphragm and diaphragm rod move away
from the up travel stop. To adjust the spring, insert a
round rod into one of the slots in the lower bearing
seat (key 73, figure 11). Slot diameter is 3/8-inch (9.5
mm) for size 30 and 40 actuators, 5/8-inch (15.9 mm)
for size 60 actuators, and 3/4-inch (19.1 mm) for size
70 actuators.
Rotate the bearing seat to move it toward the casings
(keys 1 and 2, figure 11) to increase initial compres-
sion or away from the casings to decrease initial com-
pression.
Stroking Range
The initial spring set listed on the nameplate has been
determined to be the optimum setting, and it is not rec-
ommended to make spring adjustments that will cause
this value to change or be exceeded. For push-down-
to-open action, the initial spring set is normally the
maximum allowable to provide the maximum spring
closing force. Any increase of this setting could over-
stress the spring at full travel. For push-down-to-close
action, the initial spring set has been determined to be
the optimum balance between the air to close and the
spring to open breakout torque.
If the Type 1052 actuator is to be changed from one
action to another (i.e., push-down-to-close to push-
down-to-open), first refer to the initial spring compres-
sion values listed in the parts list table (key 11) of this
manual to determine the proper initial spring setting,
then adjust the unit according to the procedures in the
Initial Compression portion of the Type 1052 Spring
Adjustment section.
Principle of Operation
The diaphragm rod moves down as loading pressure
is increased on top of the diaphragm. As the loading
pressure is decreased, the spring forces the dia-
phragm rod upward.
The spring and diaphragm have been selected to meet
the requirements of the application and, in service, the
actuator should produce full travel of the valve or other
operated equipment with the diaphragm pressure as
indicated on the nameplate (shown in figure 3).
Consult the separate positioner instruction manual for
actuator principle of operation with positioner.
Maintenance
Actuator parts are subject to normal wear and must be
inspected and replaced as necessary. The frequency
of inspection and replacement depends upon the se-
verity of service conditions. Instructions are given be-
low for disassembly and assembly of parts. Key num-
bers referenced in the following steps are shown in
figure 10 for Type 1051 actuators and in figure 11 for
Type 1052 actuators unless otherwise specified.
WARNING
Avoid personal injury or property dam-
age from sudden release of pressure or
uncontrolled process fluid. Before start-
ing disassembly:
D Isolate the valve or other operated
equipment from the process,
D Release process pressure, and
D Vent the actuator loading pressure.
Disassembly
The following procedure describes how the actuator
can be completely disassembled. Then inspection or
repairs are required, perform only those steps neces-
sary to accomplish the procedure. Do not under ordi-
nary circumstances remove the cap screws (keys 7,8,
and 21).
CAUTION
Cap screw (key 18) must be disengaged
from the lever (key 27) before removing
the diaphragm casing (key 1). Failure to
do so will allow the spring precompres-
sion to rotate the valve body or other
operated equipment beyond its fully
open or closed position. This could
cause damage to the operated equip-
ment.
1. Bypass the valve body or other operated equip-
ment. Relieve all actuator loading pressure, and re-
move the tubing or pipe from the top of the actuator.
2. Remove the positioner, if one is used.
3. Mark the orientation of the travel indicator (key 37)
with respect to the travel indicator scale (key 35).
Then, unscrew the cap screws and washers (keys 34
and 63), and remove the cover (key 33).
4. Remove the retaining ring (key 30), and then re-
move the hub (key 29) from the cover.
5. Check the condition of the bearing (key 31). If re-
placement of the bearing is necessary, the travel indi-

 Loading...