Type 399A-161-112
19
Note
The regulator may remain in the pipeline
during maintenance procedures unless
the main valve body (key 1) is replaced
or removed for repairs.
Disassembly
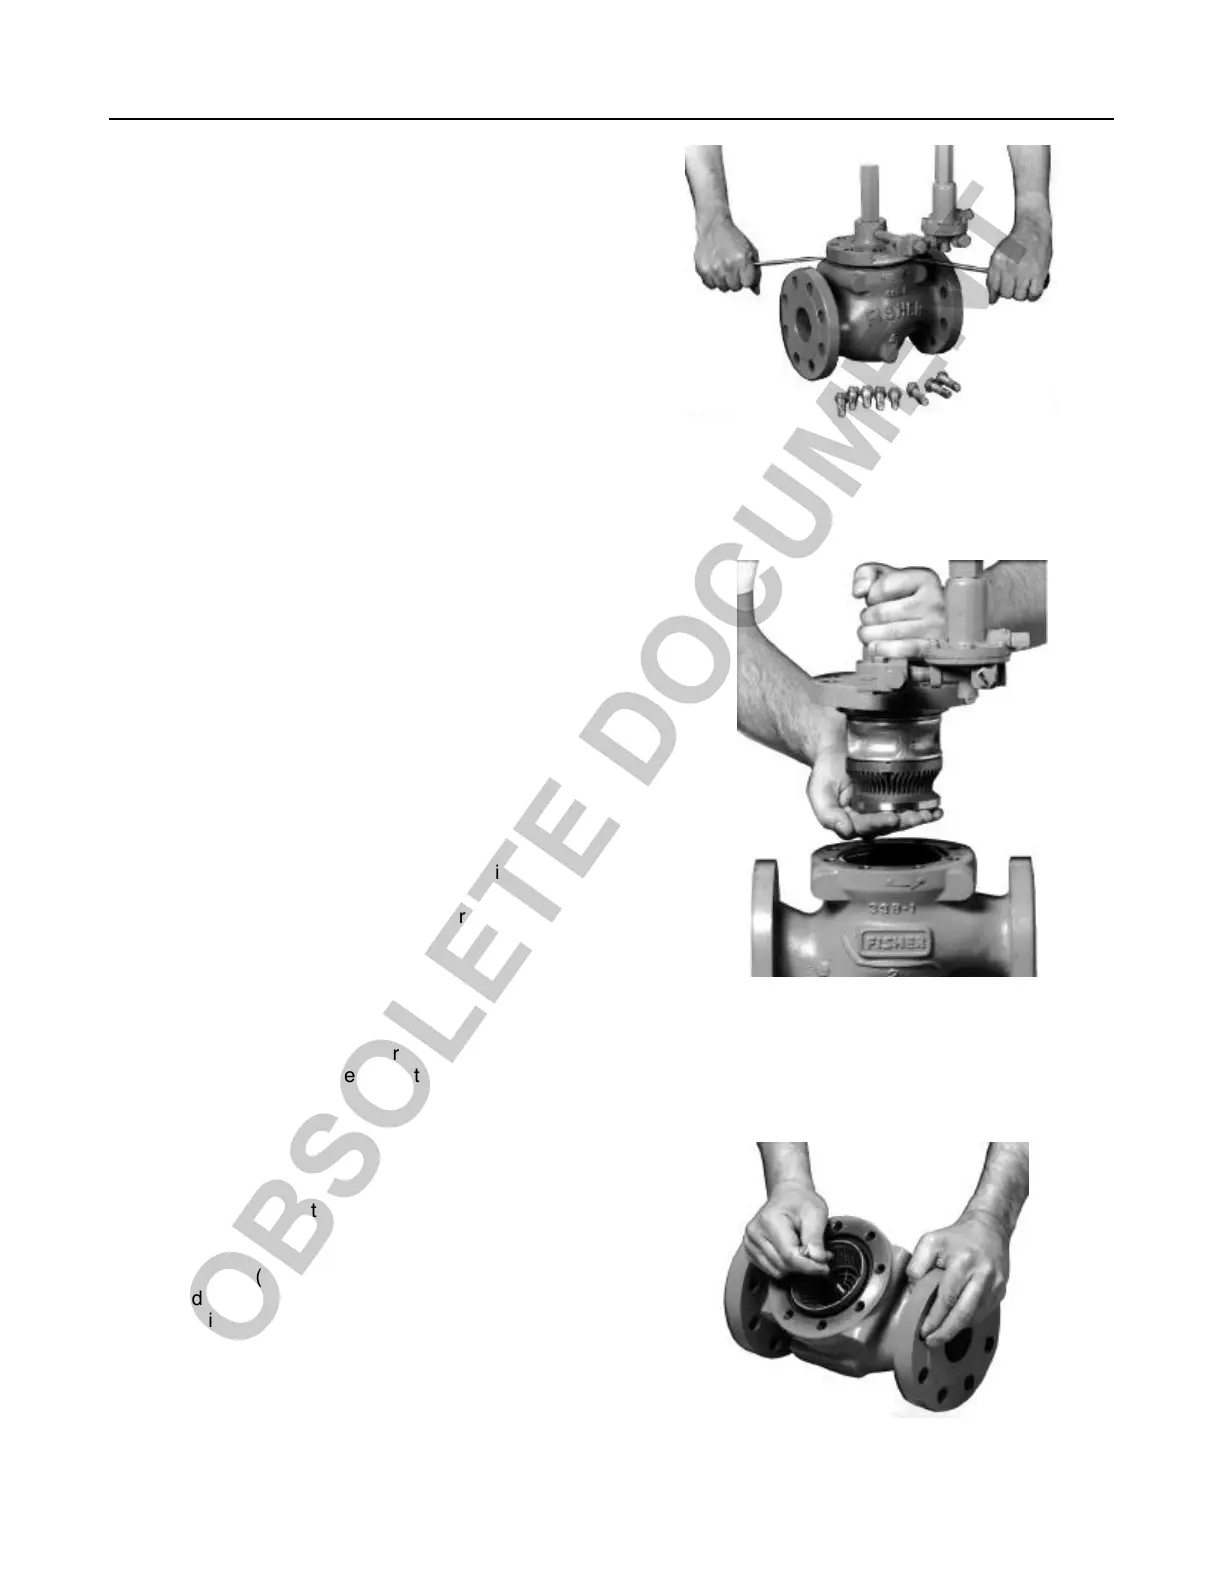
1. Remove the cap screws (key 3). Pry up the bonnet
(key 2) from the body (key 1), as shown in figure 6.
2. As shown in figure 7, lift off the bonnet. In a 2 x
1-inch body size also remove the bonnet adapter and
O-ring (keys 74 & 77). The cage retainer (key 10),
cage (key 7), and other trim parts will normally come
out with the bonnet (use care when removing the cage
assembly because it may separate and fall). If they
don’t, remove the cage retainer from the body and re-
move the cage by using a hex head cap screw (1/4 x
20 x 41/2 inches long, figure 8).
3. With a 1-1/4 x 1, 1-1/2 x 1, or 2 x 1-inch body
size, remove the orifice adaptor (key 76) and orifice
adaptor Oring (key 78) from the body. With a 4 x 2,
6 x 4, or 12 x 6-inch body size, also remove the
cage adaptor (key 65) from the body. With a 8 x
6-inch body size, also remove the cage adaptor (key
65) and cage adaptor Orings (keys 66 and 67) from
the body.
4. Pull the cage O-ring (key 8) and inlet strainer (key
23) or shim (key 23) out of the body. Inspect (replace
if needed) the cage Oring, inlet strainer or shim, flat
sheet bonnet gasket, and the body cavity.
5. Using a soft mallet as shown in figure 9, tap the
cage (key 7) to remove it from the diaphragm (key 9).
6. As shown in figure 10, push firmly on the diaphragm
(key 9) until a gap opens between the diaphragm bead
and the lip of the cage retainer (key 10). Begin at the
gap and peel the diaphragm from the cage retainer.
Check the diaphragm for damage, and replace if nec-
essary.
7. Remove the cage retainer (key 10) from the bonnet
(key 2) by twisting and pulling it out, see figure 11.
With a 2 x 1-inch body size, also remove the cage
retainer adapter ( Key 75). Check the cage retainer
O-ring and spiral wound bonnet gasket (keys 14 and
6), replace if necessary.
8. A functional check of the cage retainer (key 10) and
diaphragm support (key 11) can be done by manually
stroking the diaphragm support. If disassembly is
needed, separate the cage retainer bolt (key 13) and
the diaphragm support (key 11) as shown in figure 12.
Figure 6. Prying Bonnet from Body
Figure 7. Removing Bonnet and Attached Parts
Figure 8. Removing Cage with Cage Removal Tool
W45611/IL
W4562/IL
W6015/IL


 To Next Page