Type 399A-161-112
21
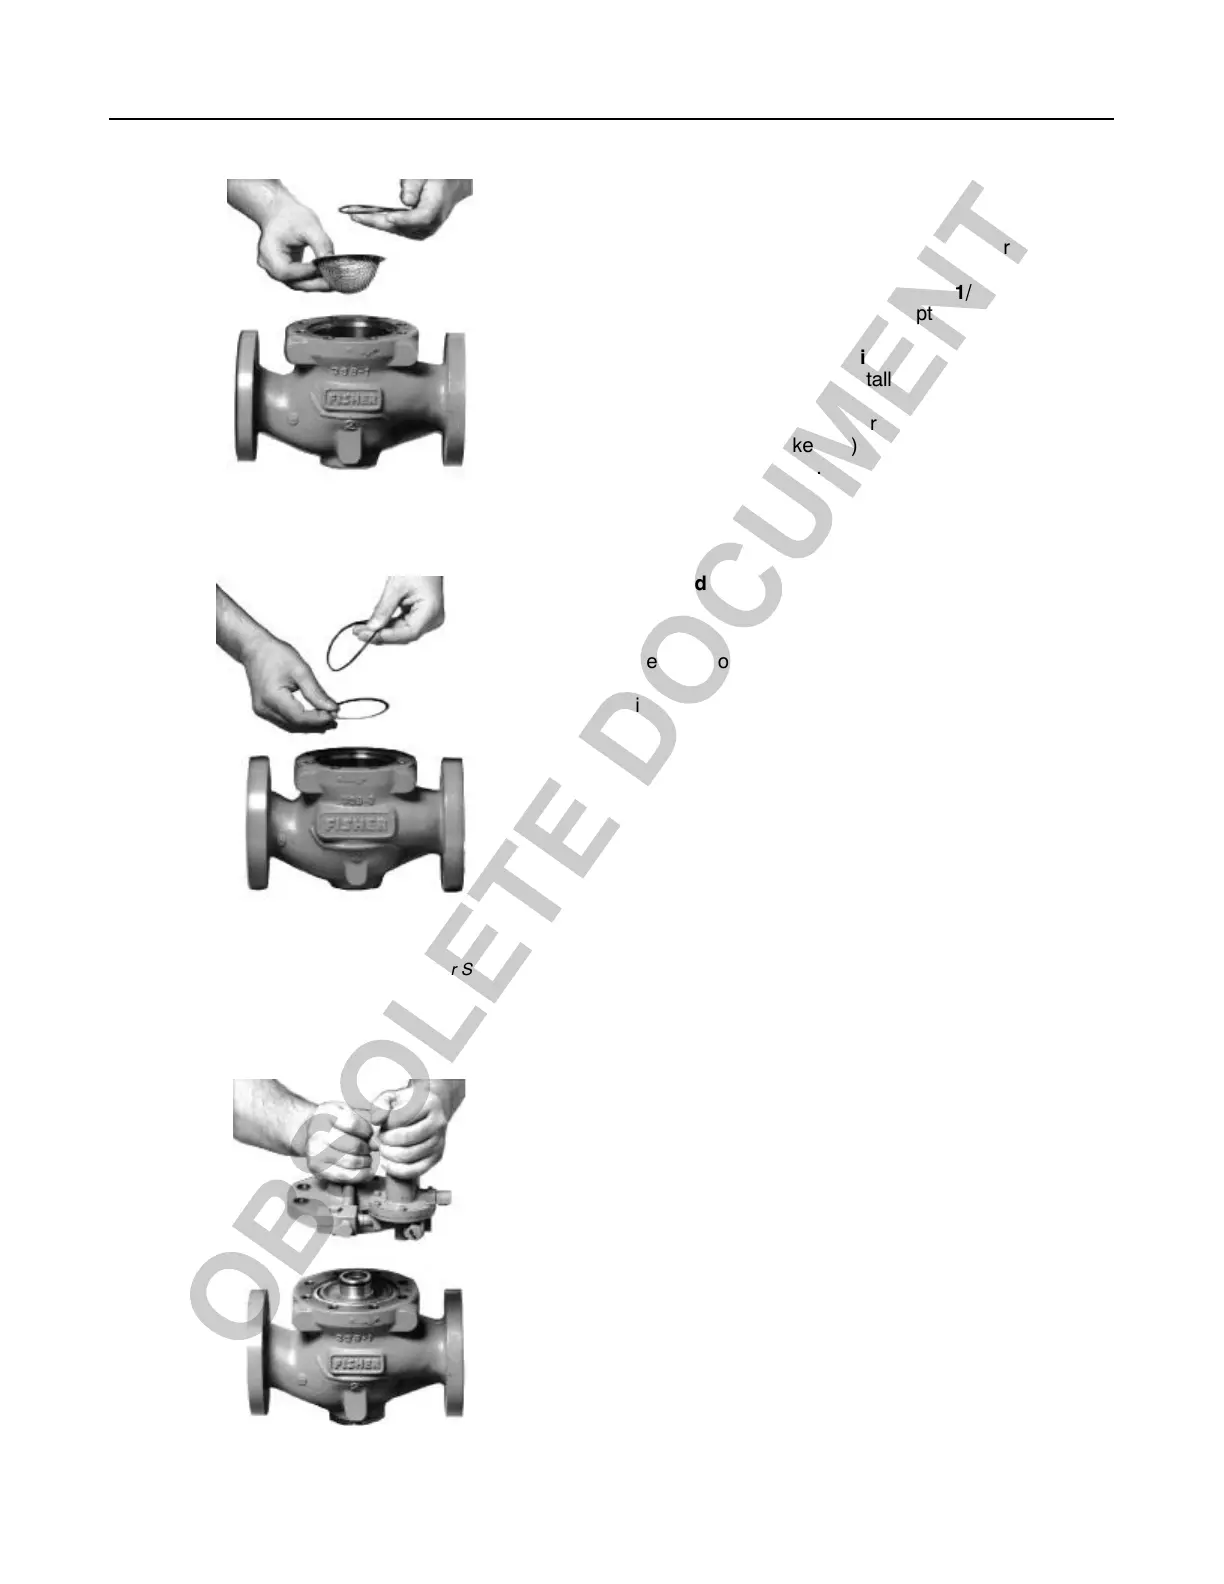
Figure 13. Installing Inlet Stainer or Shim
and Cage O-Ring
W6014/IL
INLET STRAINER
INLET STRAINER
REPLACEMENT SHIM
W4567/IL
Figure 14. Installing Bonnet
Plus Attaching Parts
W4569//IL
Assembly
1. Apply lubricant (key 27) to all O-rings and gaskets
before installing them.
2. As shown in figure 13, install the inlet strainer (key
23) or shim (key 23) then the cage O-ring (key 8) into
the body (key 1). With a 1-1/4 x1, 1-1/2 x 1-inch
body size, install the orifice adapter and orfice adapt-
er O-ring (keys 76 & 78) first, then install the strainer
or shim and the O-ring. With a 4 x 2, 6 x 4, or 12 x
6-inch body size, also install the cage adapter (key
65) into the body. With a 8 x 6-inch body size, also
install the cage adapter Orings (keys 66 and 67) onto
the cage adapter (key 65) and then install the cage
adapter into the body.
Note
The cage O-ring (key 8) must be instal-
led on top of the inlet strainer (key 23)
or the shim (key 23).
3. Install the cage (key 7) and flat sheet bonnet gasket
(key 5) into the body. A restrictedcapacity cage has
the percentage restriction stamped as shown in
figure 2.
4. Apply lubricant to the inside bead of the diaphragm
(key 9). With the identification side (figure 2) of the
diaphragm facing the cage retainer (key 10), snap the
diaphragm over the lip of the cage retainer. Apply
additional lubricant to the outside edge of the
diaphragm (key 9) to provide smooth installation into
the tight-fitting cage.
5. As shown in figure 14, install the diaphragm (key 9),
cage retainer (key 10), cage retainer O-ring (key 14)
and spiral wound bonnet gasket (key 6) into the body
(key 1).
6. Install the bonnet (key 2) by pushing it down over
the top of the cage retainer (key 10). Rotate the bon-
net for proper pilot mounting. With a 2 x 1-inch body
size, install the bonnet adapter and bonnet O-ring
(keys 74 & 77), then install the cage retainer adapter
(key 75) before installing the bonnet.
Note
The cage and diaphragm are pressed
into place when the bonnet bolting is
tightened.
7. Lubricate the cap screws (key 3) with lubricant and
secure the bonnet with them. Using an even criss-
cross pattern, tighten the cap screws to 100 foot
pounds (136 Nm)for a 1 or 1-1/4 x 1-inch body, 80
foot-pounds (110 Nm)for a 1-1/2 x 1, 2 x 1, 2 or 4 x
2-inch body, 130 foot-pounds (175 Nm)for a 3-inch
body, 190 foot-pounds (260 Nm)for a 4 or 6 x 4-inch
body, or 400 foot-pounds (542 Nm)for a 6, 8 x 6 or 12
x 6-inch body.
 Loading...