Type EZR
7
When installed indoors, no remote venting is required
except on the pilot spring case. This regulator can
also be installed in a pit that is subject to ooding
by venting the pilot spring case above the maximum
possible ood level so the pilot setting can be
referenced at atmospheric pressure.
1. Only personnel qualied through training and
experience should install, operate, and maintain
a regulator. Before installation, make sure that
there is no damage to or debris in the regulator.
Also, make sure that all tubing and piping are clean
and unobstructed.
2. A Type EZR regulator may be installed in any
orientation, as long as ow through the regulator
matches the direction of the arrow on the main
valve body. However, for easier maintenance,
install the regulator with the bonnet up.
cAUTIOn
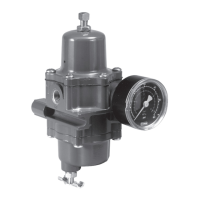
3. The standard pilot mounting position is as shown
in Figure 1. Other mounting positions are available.
4. Apply a good grade of pipe compound to the
external pipeline threads for a threaded body, or use
suitable line gaskets for a anged body. When
installing butt weld end connections, remove
trim before welding and make sure to use
approved welding practices. Use approved piping
procedures when installing the regulator.
cAUTIOn
5. A clogged pilot spring case vent may cause the
regulator to function improperly. To prevent
plugging (and to keep the spring case from
collecting moisture, corrosive chemicals, or
other foreign material) point the vent down,
orient it to the lowest possible point on the spring
case or otherwise protect it. Inspect the vent
regularly to make sure it has not been plugged.
To remotely vent a spring case, remove the vent
and install obstruction-free tubing or piping into the
1/4 NPT vent tapping. Provide protection on a remote
vent by installing a screened vent cap onto the
remote end of the vent pipe. The 161AY Series
pilot has a vent restriction (key 55, Figure 20) to
enhance low ow stability. Do not remove
this restriction.
!
WARnInG
6. As shown in Figure 3, run a supply pressure line
from the upstream pipeline to the restrictor inlet
(use 3/8 NPT outer diameter tubing or larger).
Install a Type 252 pilot supply lter upstream of the
restrictor, if needed, to keep the supply source
from clogging the restrictor or pilot. Inspect and
clean this lter regularly to make sure it has not
been plugged.
7. Install a downstream pressure control line
(as shown in the appropriate view of Figure 3)
to the pilot control line connection. Connect the
other end of the control line at a minimum of 8 to
10 pipe diameters downstream of the regulator

 Loading...