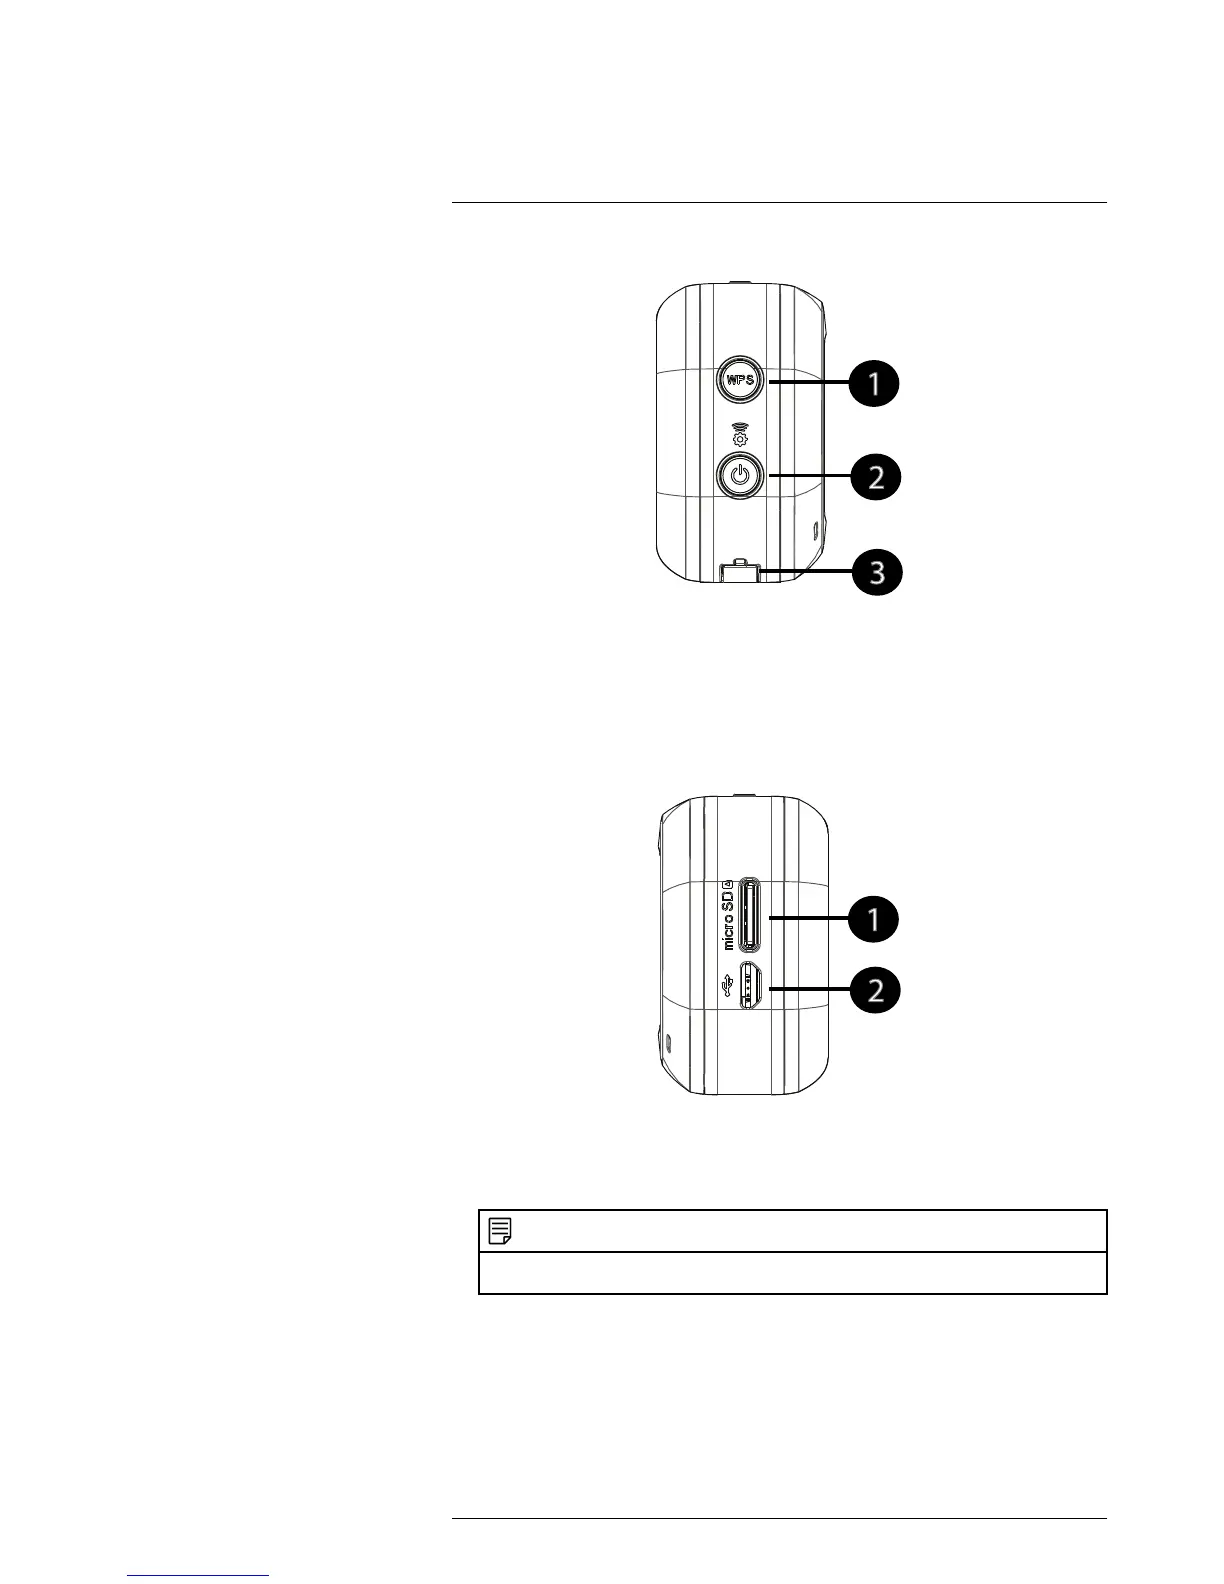
1. WPS button: Used to connect the camera to a WPS-compatible router (not included).
Press the WPS button on the router and then press the WPS button on the camera to
make the connection.
2. Power/Wi-Fi button: Press to turn the camera on. Press to switch the camera be-
tween Direct Mode and Cloud Mode. Press and hold to turn off the camera.
3. Accessory connector: Allows the camera to slide into compatible accessories.
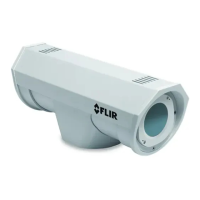
3.4 Right
1. microSD slot: Insert a microSDHC, or microSDXC card between 8GB and 64GB for
recording on the camera. It is recommended to use microSD class 10 or higher cards.
2. microUSB port: Connect a microUSB cable to the camera for charging or to save
video file from the camera to a PC or Mac.
NOTE
While the camera is connected to a computer, you will not be able to connect to it using a mobile
device. Do not connect a USB cable to both the camera and stand at the same time.