Installing M-Series Systems
8 432-0003-00-12 Rev 140 — M-Series Installation Guide
vessel impacts causing the camera to be unable to maintain pointing
direction.
• A final location consideration is the camera’s relation to other navigation
devices. If you are relying on a magnetic compass for navigation and
direction, you should establish a “compass safe distance” for any object
placed in its vicinity, especially any electronic equipment. The magnetic
compass safe distance for the camera is 20 cm (7.9 in).
Camera Mounting Options
Your M-Series camera—except for the M-618CS model—can be installed in an
upright or upside down position.
Warning: The M-618CS model, which is a mechanically stabilized system, must
be installed in the ball-up orientation.
Upright Installation
In most installations, the M-Series is mounted upright on top of a mounting
surface, with the pan/tilt base below the camera; this is known as the ball up
orientation. Optionally, the unit (unless it is the M-618CS model) can be hung
upside down or ball down. Unless otherwise noted, these mounting instructions
assume an upright installation; refer to “Mounting Upside Down” on page 12 for
information about ball down installations.
Once the mounting location has been selected, verify that both sides of the
mounting surface are accessible. With the supplied hardware, the camera can be
mounted to a platform that is up to 41 mm (1.6”) thick. Depending on the
thickness of the mounting platform, the installer can choose to provide other
mounting hardware, rather than using the supplied threaded studs and nylock/
acorn nuts. The camera mounting surface must be at least as large as the
footprint of the camera itself to ensure an adequate seal with the O-ring.
You do not need to remove the screws in the base of the camera or disassemble
the camera unit. The camera unit is sealed at the factory. Disassembling the
camera will compromise the seals and will void the warranty.
Top-Down Installation Kits
Generally the M-Series camera is secured directly to a surface using threaded
studs that extend from the base through the mounting platform and are secured
from below. If it is not possible to access the space below the mounting platform,
you can mount the camera from above the surface with one of the top-down
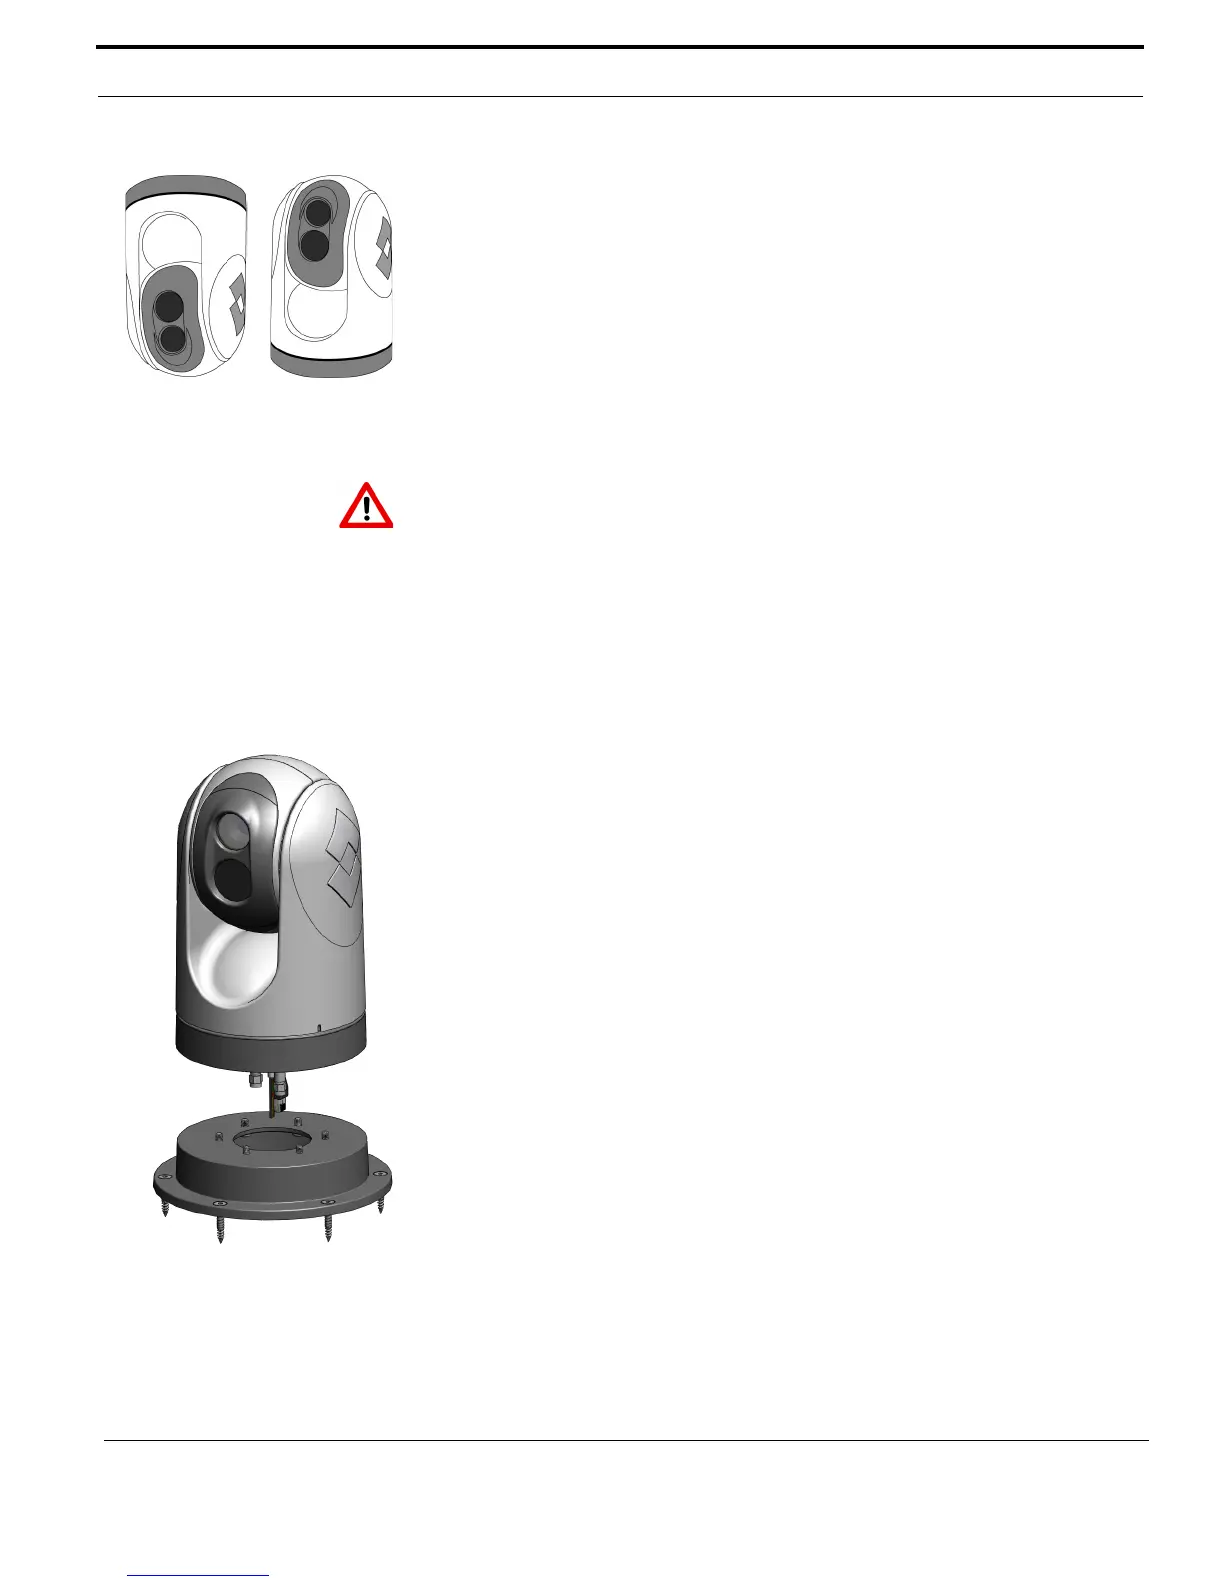
mounting accessory kits. This type of installation makes use of either a mounting
plate or mounting riser; these optional accessories are available from FLIR.
To install, the camera is first mounted to the accessory plate or riser, then the
plate or riser is secured to the surface with screws from above. The mounting
riser allows space between the camera base and the mounting surface for the
cable connections. With the mounting plate, the cables pass through the plate
and the connections are below the mounting surface.
Upright
(ball up)
Upside down
(ball down)
Top-down installation
using riser
 Loading...