This document is a subset of the complete documentation available for your
product. Visit the FLIR website to download the complete and latest
documentation available for your product, in your preferred language.
IMPORTANT
http://www.flir.com/marine/support
M100 / M200 Series cameras support DHCP and
UPnP to simplify the process of finding the camera
on your network, and connecting to it using a Web
browser.
To access the camera web page from a Windows
PC or laptop, double-click the camera in the
Windows Explorer “Network” folder. Alternatively,
type the camera’s IP address into your Web
browser’s address bar. Then, log in with User Name
“user”, and the default Password, “user”.
Note: See the documentation provided with your
camera for more information.
Connecting to the camera and controlling with a Web browser
Thermal imaging (also known as infrared)
cameras enable you to see clearly in
low-light and no-light conditions. For
example, a thermal camera can help you
navigate at night or identify obstacles in
areas of low visibility or even total
darkness.
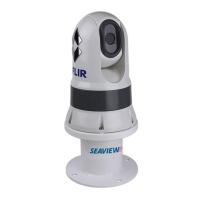
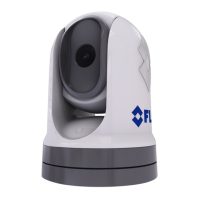
Your M100 / M200-Series thermal camera
is a network device that communicates
over an Ethernet network using Internet
Protocol (IP).
You can use various types of IP-networked
device to interact with the camera’s web
interface, such as a laptop, PC, tablet or
smartphone.
Using a Web browser, you can:
• Control the camera:
– Pan* and tilt the camera
– Zoom the video image (digital)
– Return the camera to its “home”
(default) position
– Set the camera “home” position
– Activate and adjust surveillance scan
– Manually control the de-ice/de-mist
window heater
• Adjust the camera image:
– Color palette
– Scene presets.
*M200-Series cameras only
On the Live Video page:
• Click and drag the virtual joystick up or down
to tilt the camera.
• Click and drag the virtual joystick left or right to
pan the camera (M200 Series only).
• Click and hold the zoom-in
button to reduce the field of view.
The current zoom level (between x1.0 and x4.0) is
shown at the bottom-right of the thermal image.
• Click and hold the zoom-out
button to increase the field of view.
On the Live Video page:
• Click the Toggle Palette button to
cycle through 4 different color palettes:
WhiteHot; RedHot; Fusion; FireIce.
• Click the Polarity button to toggle the
image polarity: BlackHot; RedHot-
Inverse; Fusion Inverse; FireIce Inverse.
• Click the Toggle Scene Preset button
to cycle through 4 presets: Day; Night;
Docking; High Contrast.
Depending on the time of day, weather, and other
conditions, one scene preset may produce a
clearer thermal image than the others.
3
Adjust the thermal image
2
Pan, tilt, and zoom the
thermal image
1
Connect to the camera web page
and log in
 Loading...