5.1Pre-installationtest
Warning:Transduceroperation
Onlytestandoperatethetransducerin
thewater.DoNOToperateoutofwater
asoverheatingmayoccur.
Testingthetransducer
Transduceroperationshouldbecheckedbefore
installation.
1.Connectthetransducertothesonarmodule’s/
display’stransducerconnection.
2.Fullysubmergethetransducerinwater.
3.Powerupthesonarmodule/display.
4.OpenaFishnderapplicationonyourdisplay.
5.Ifrequired,selecttherelevanttransducer/channel
fromtheChannelselectionpage(Menu>
Channel).
6.Checkthataccuratedepthandtemperature
readingsaredisplayed.
7.Ifyouexperiencedifcultiesobtainingreadings
thencontactRaymarineTechnicalSupport.
5.2Mountingthetransommount
bracket
Thetransducermustbemountedonthetransom
usingthemountingbracketprovided.Thesteps
belowdescribetheinitialmountingstepsrequired
inordertotestyourtransducersperformance.
Aftertestingthetransduceryoumustnishthe
mountingfollowingtheinstructionsintheFinishing
thetransducermountingsection.
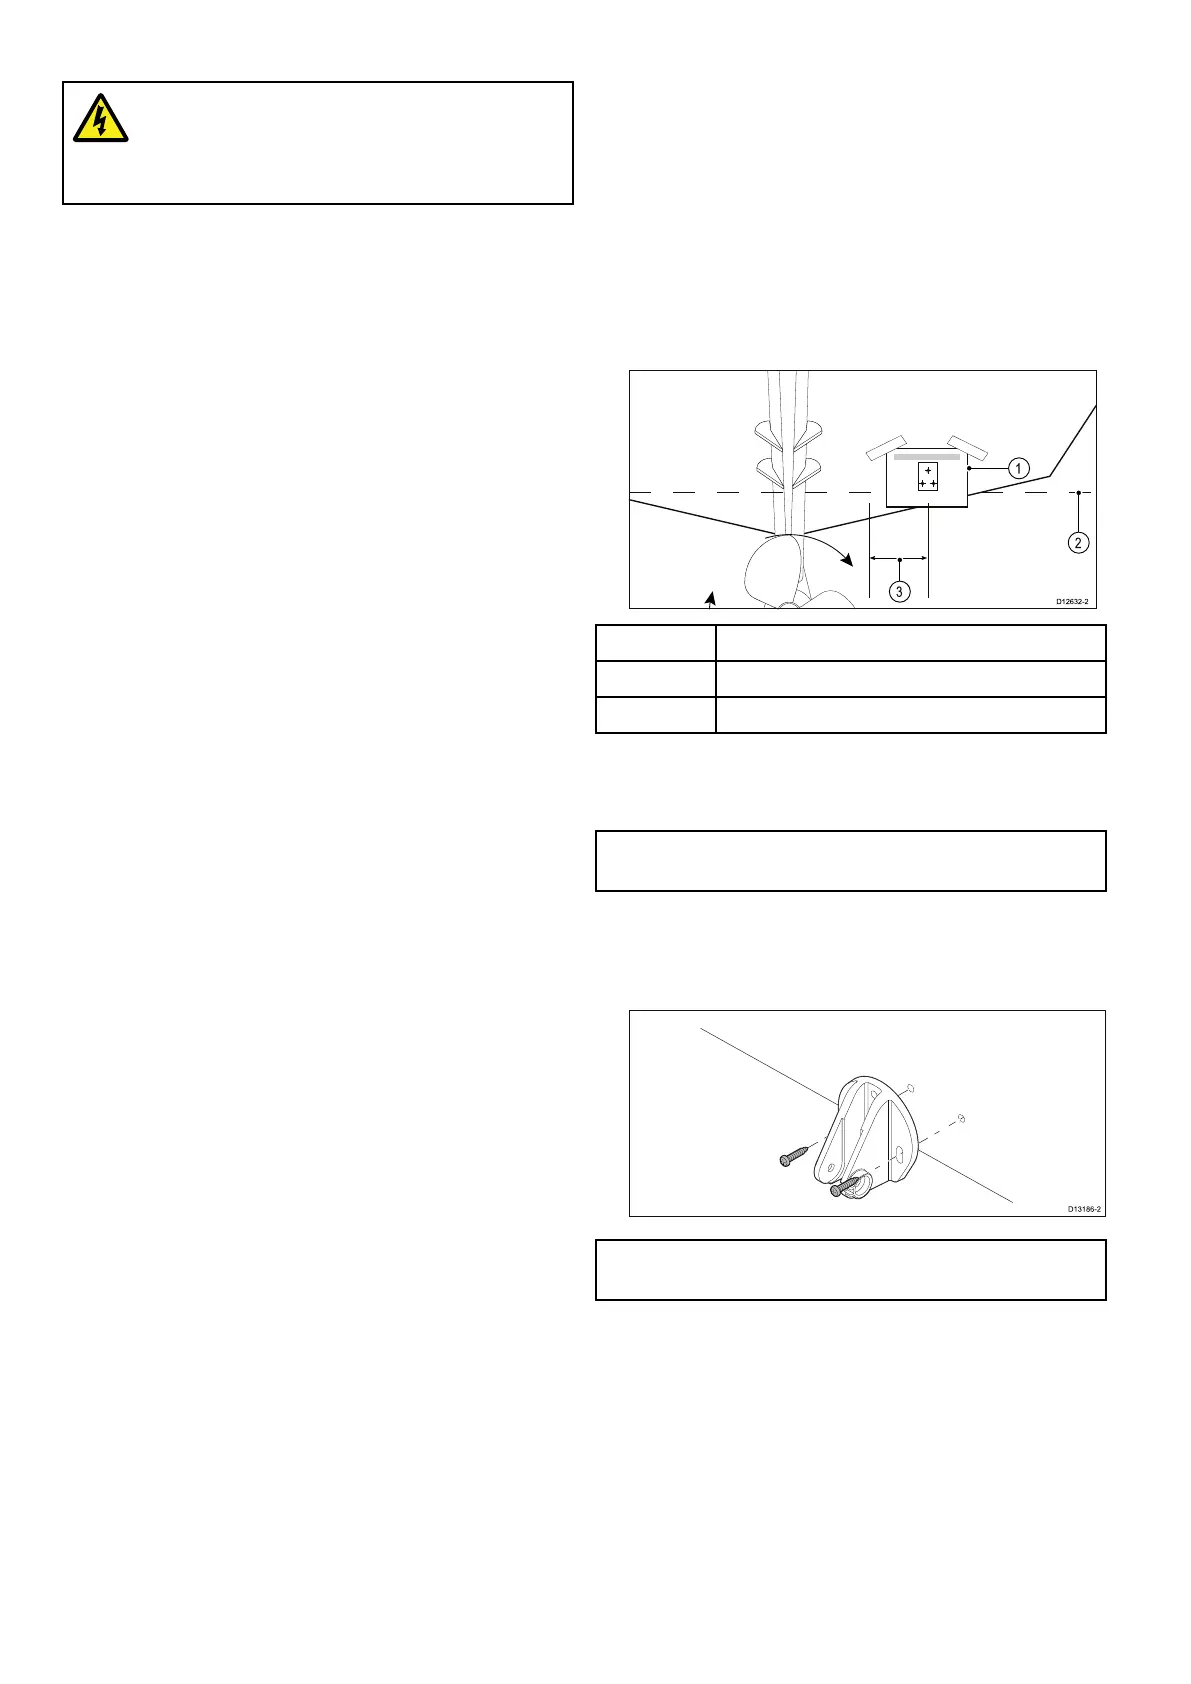
1.Fixthetransducermountingtemplatetothe
selectedlocation,usingmaskingorself-adhesive
tape.
1Transducermountingtemplate
2Waterline
3
Mountingawayfrompropeller
2.Ensurethetemplateisparalleltothewaterline.
3.Drill2xholesfortheadjustmentslotscrewsas
indicatedonthetemplate.
Note:DoNOTdrillthethirdmountingholeatthis
stage.
4.Fillthe2holeswithmarinegradesealant.
5.Usingapozi-drivescrewdriverandthescrews
provided,securethetransommountbracket
usingthe2adjustmentslots.
Note:Thethirdlockingscrewisnotuseduntilthe
transducerhasbeensuccessfullytested.
24
CPT-STransomCHIRPsonartransducer

 Loading...