5.5Finalizingthetransducermounting
Onceyouhaveachievedoptimumperformanceat
thedesiredvesselspeedsthetransducermustbe
lockedintopositiontocompletetheinstallation.
1.Drillthelockingholelocationtakingcarenotto
damagethemountingbracket.
2.Fillthelockingholewithmarinegradesealant.
3.Securethetransducerandbracketbyfully
tighteningall3mountingscrews.
4.Securetheratchetarmbolt,bytighteninguntil
thecompressionwasheriscompressedandthen
addanother1/4turn.Ifthetransducerkicksupat
speedthentightenfurther.
Important:Takecaretoensurethatthepivotbolt
isnotovertightenedasthiswillpreventkick-up
andmaycausedamage.
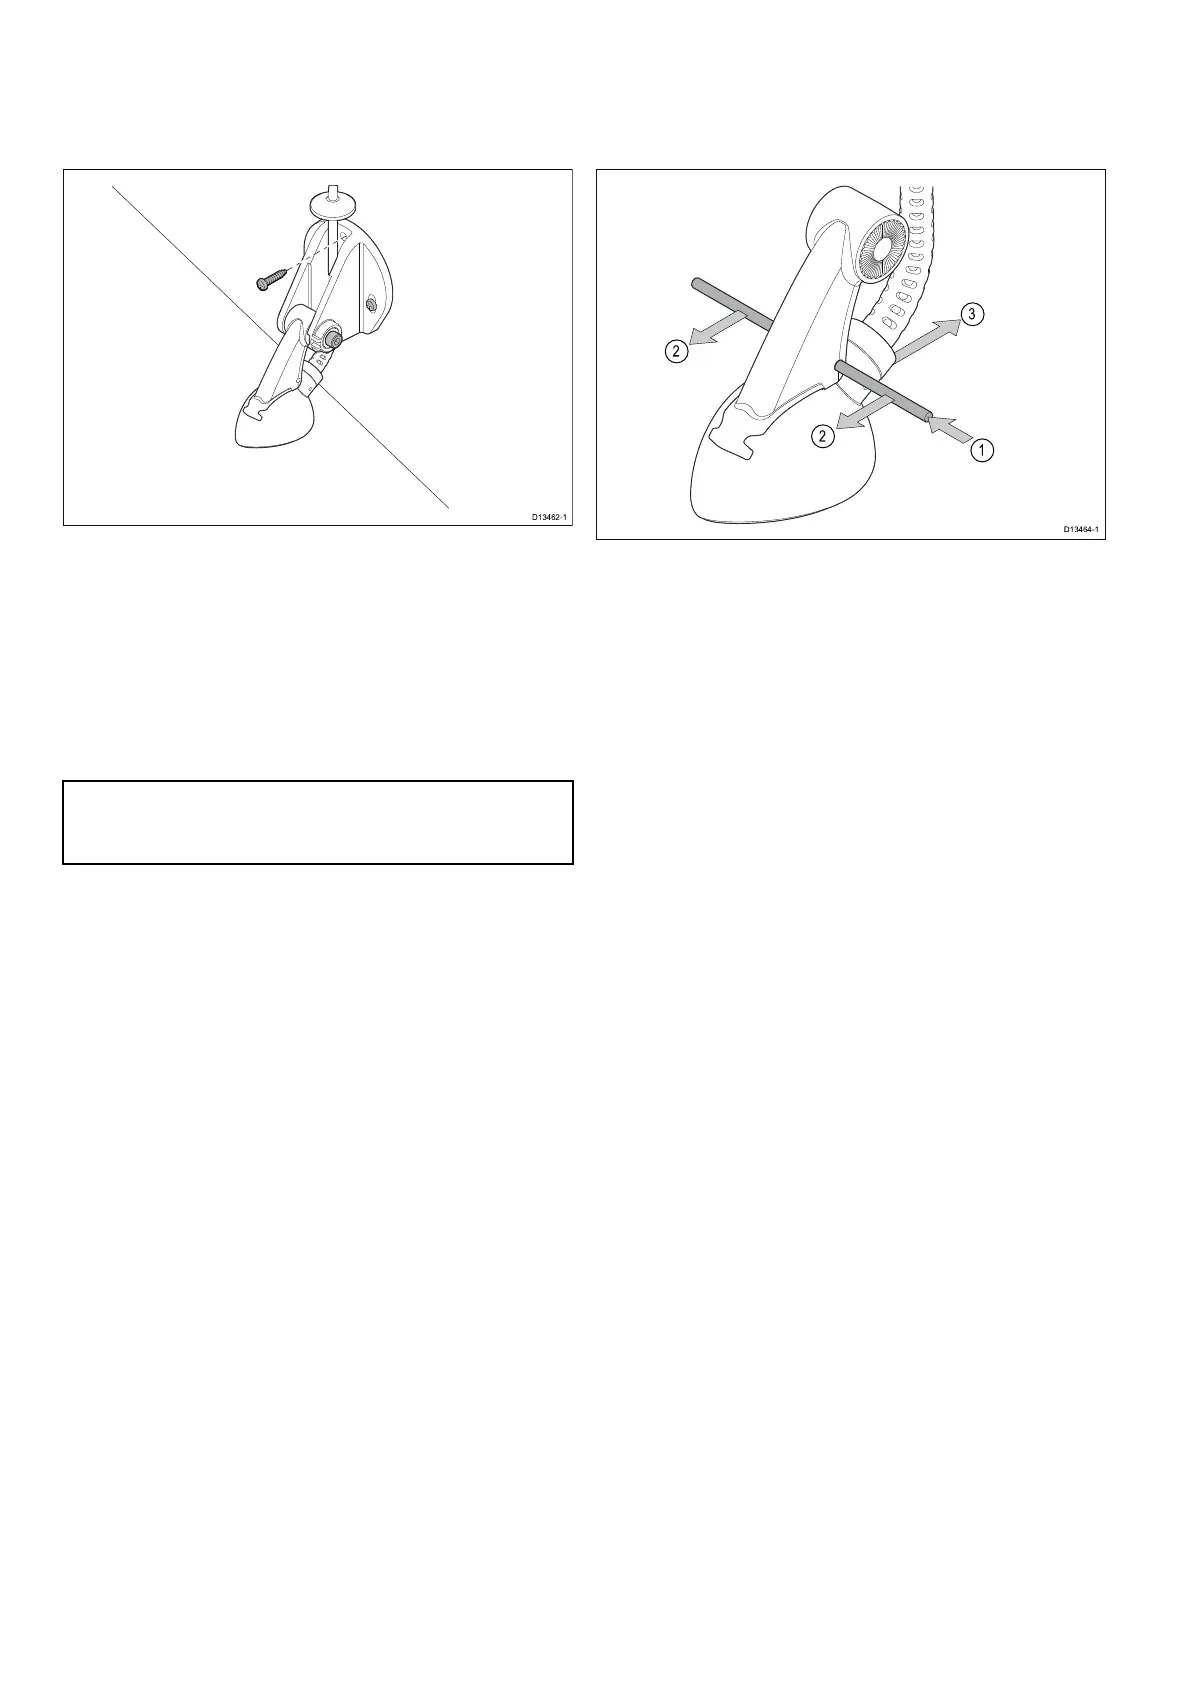
5.6Removingthetransducer
Thetransducercanbereleasedfromthebracket
usinga2mm(0.08in)diametermetalrodsuchasa
smalldrillbitorhexkey.
1.Insertthemetalrodintothetransducerrelease
hole.
2.Pullthemetalrodaftofthetransomfromboth
sidesandholdinposition.
3.Slidethetransducerforwardsoffthebracket.
26CPT-STransomCHIRPsonartransducer

 Loading...