5.5Surfacemountingusingthe
Riser
TheDeckmountingkit(A80437)canbeusedto
raisetheproductfromthemountingsurface.
TheWallbracketisnotrequiredwhenusingthe
Riser.
Ensurethatthechosenlocationmeetstheproduct’s
locationrequirements,see3.6Selectingalocation
fordetails.
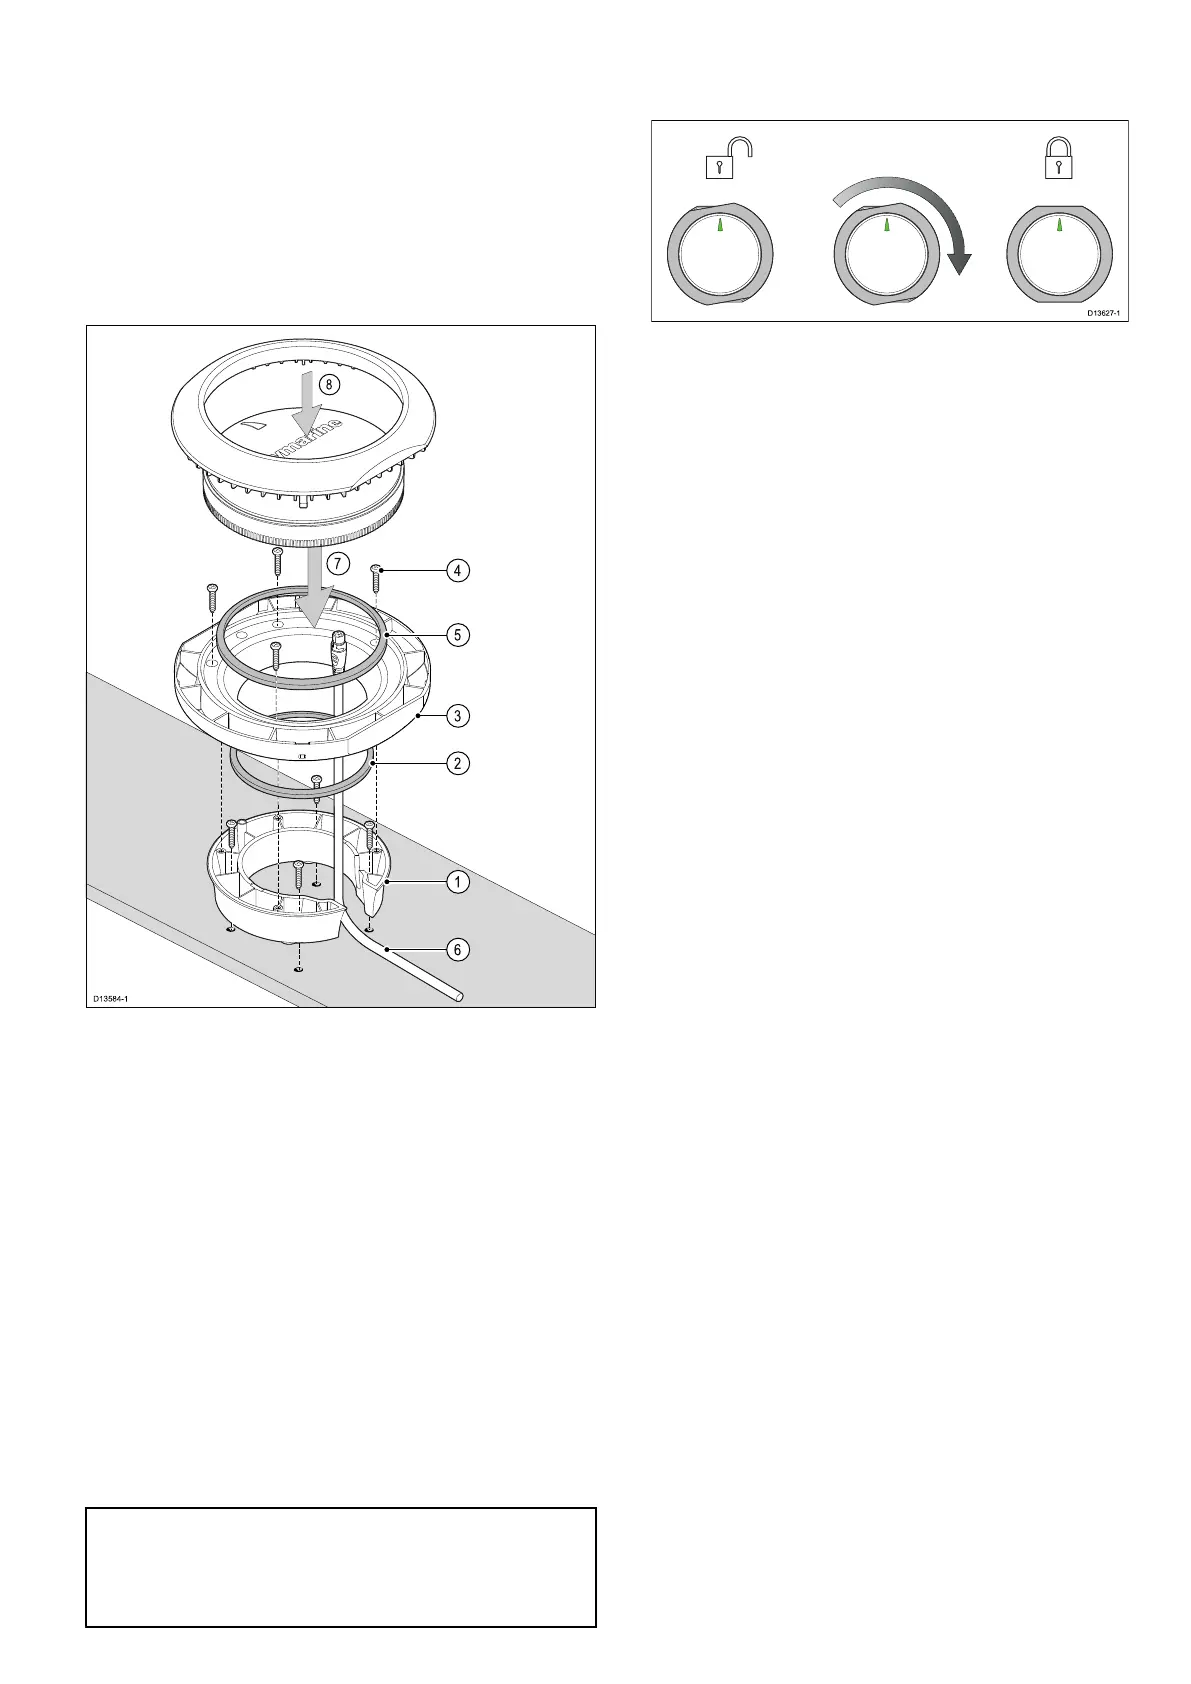
1.UsethesuppliedDeckmountrisertemplate
(87280)todrill4holesinthemountingsurface.
SecuretheRisertothemountingsurfaceusing
4xsuppliedxings.
2.Placethesmallsealingringinthegroovelocated
onthebottomofthemountingtray.
3.PositiontheMountingtrayontopoftheRiser.
4.SecuretheMountingtraytotheRiserusing3x
suppliedxings.
5.Placethelargesealingringintothegrooveon
theuppersideoftheMountingtray.
6.PulltheSeaTalkng®cablethroughtheRiserand
Mountingtray.Pluginthecableconnectoronthe
undersideoftheunitandsecurebyrotatingthe
lockingcollarclockwise2clicks.
7.Inserttheunitintothemountingtray,ensuring
thetabsintheMountingtrayareslottedintothe
groovesaroundtheedgeoftheunit.
Important:
UnitorientationisnotimportantwiththeRS150,
butaestheticallytheunitmaylookbetterwiththe
LED‘arrow’pointingtowardsthevessel’sbow.
8.PlacetheMountingtrimovertheunitslightly
offset,andthentwisttheMountingtrimclockwise
untilitlocksintoposition.
Installation
 Loading...