18
2.5 Grouting
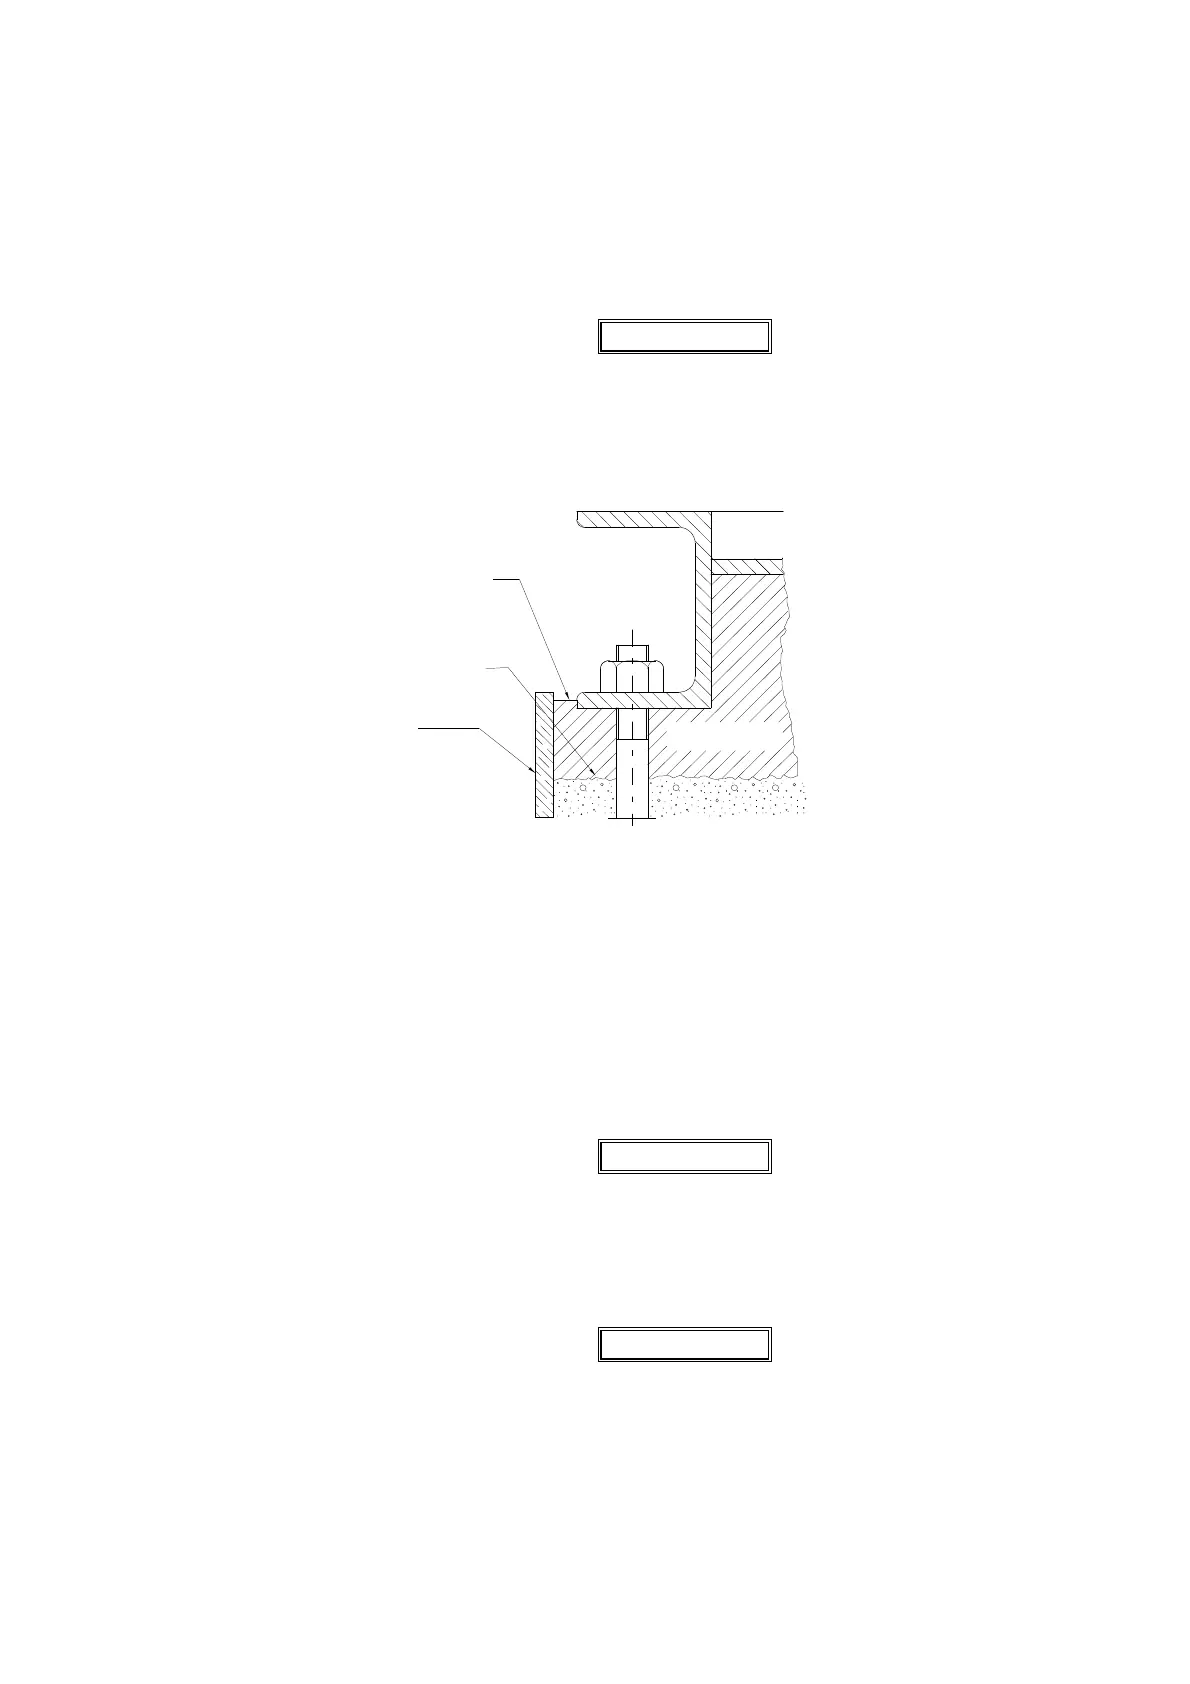
Build a dam around the foundation as shown in Figure 4 after levelling the baseplate. It is a matter
of personal preference whether the levelling wedges under the baseplate should be removed after
grouting. If you do not want to remove the wedges, carefully mark their locations before pouring
grout.
CAUTION
Before grouting, level machined pads of baseplate in both directions and perform a rough
shaft/coupling alignment. Alignment after grout has set will not be possible if above is not
satisfactorily completed.
GROUTING 1 TO 2
INCHES DEEP
LEAVE TOP OF
FOUNDATION ROUGH
DO NOT FINISH
WITH TROWEL
FINISHED GROUT
DAM
Figure 4
Use a good, high strength, non shrink grout mix and install as per manufacturer's instructions.
Holes are provided in the baseplate to permit pouring the grout and stirring while acting as air
vents. Fill under the baseplate completely, stirring to assure correct distribution of the grout. Check
to see that the grout flows under the edges of the baseplate evenly.
NOTE
Do not vibrate baseplate when grouting, making sure baseplate is vented correctly and all areas
are thoroughly puddled to prevent any reasonant problems.
When the grout is thoroughly hardened, remove the dam and wedges, if desired, filling in the
holes they leave with grout.
NOTE
Pour grout until level reaches top of dam. Allow to dry sufficiently to prevent grout from overflowing
while completing the remaining grouting.