7
Getting Started
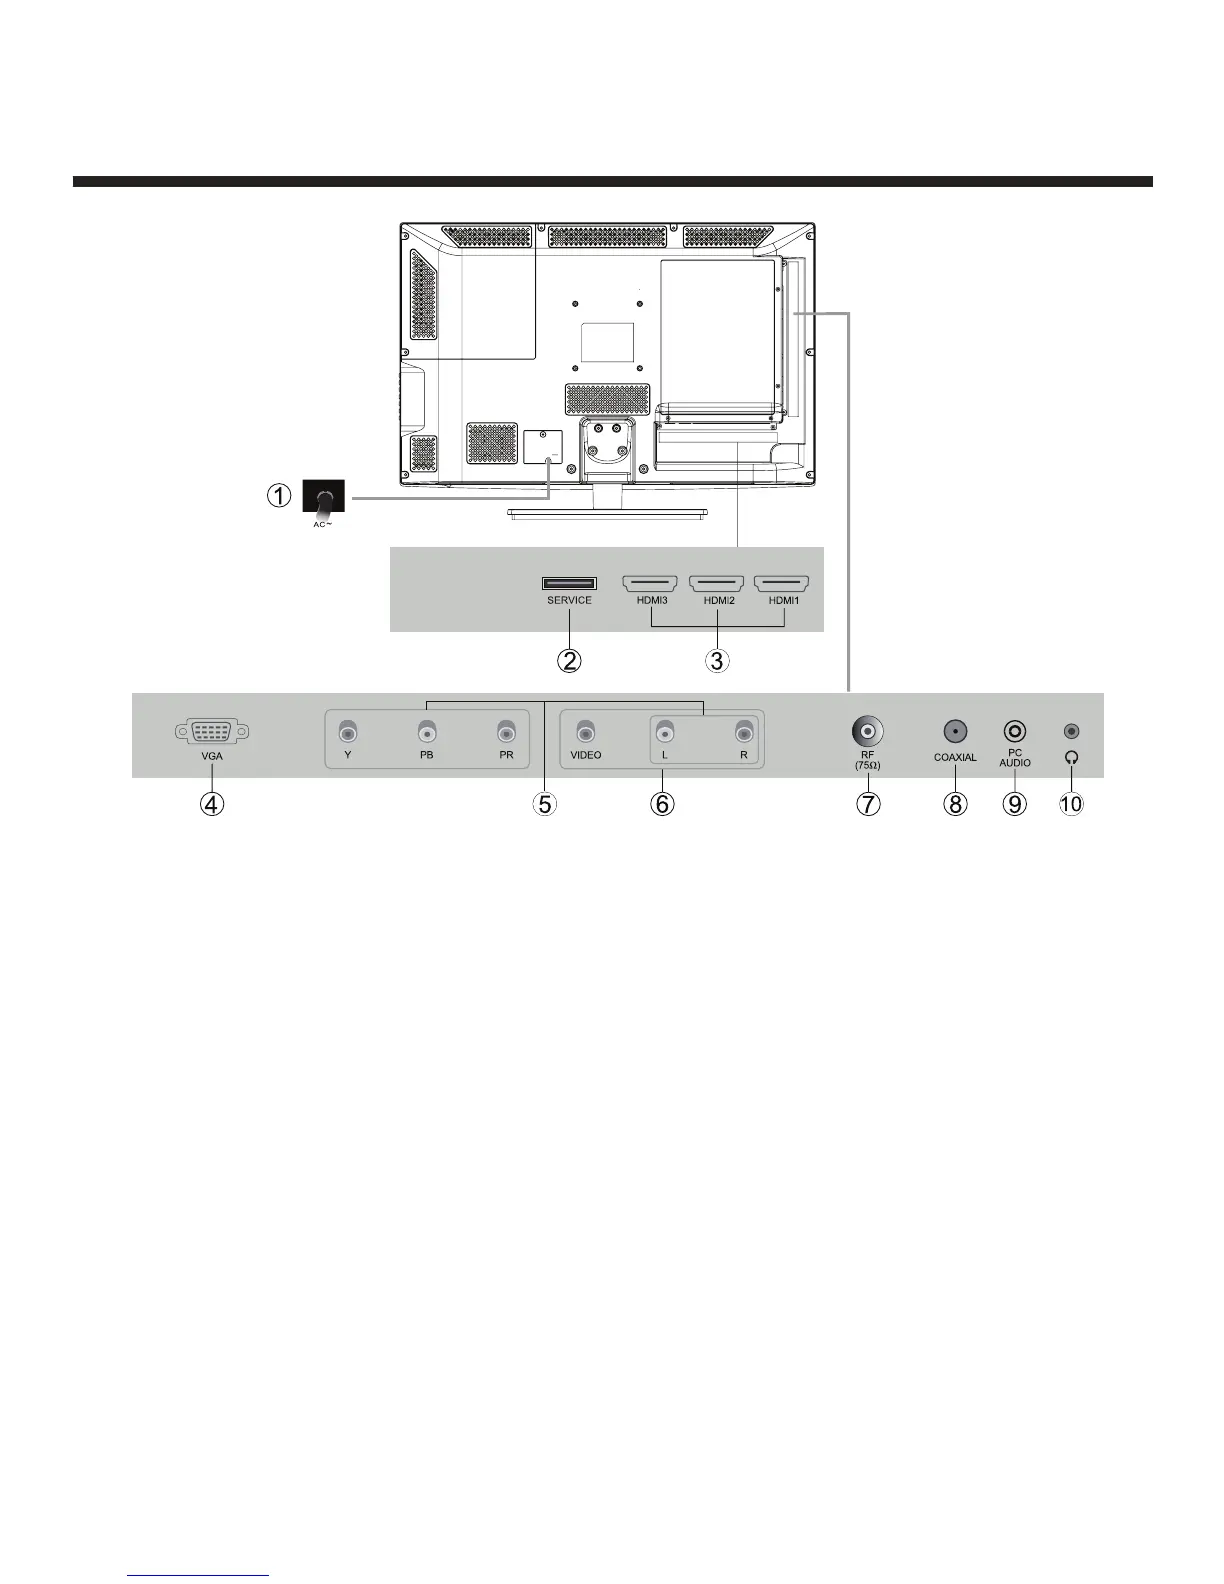
Rear View
1. AC power input terminal
2. SERVICE port
3. HDMI1 / HDMI2 / HDMI3 input
4. VGA input
5. Component and audio input terminal
6. AV input
7. Antenna input (75 Ohm VHF/UHF)
8. Coaxial audio signal output plug
9. PC audio input
10. Headphone output
Wall Mounting
The TV is provided with mounting holes for a VESA approved wall mounting bracket (NOT
SUPPLIED). The VESA mounting pattern is 100 x 100. Remove the screws holding the base to
the base bracket and lift the base away (do not remove the base mounting brackets). Mount
the VESA bracket using 4 x M4x10 isometric threaded screws (not supplied). Do not use screws
longer than 10 mm; damage will occur to the internal components.
Caution: Your new TV is heavy; please consult with a professional wall mount installer to perform
this installation.