Digital Multimeters
Adjustment Procedures
9
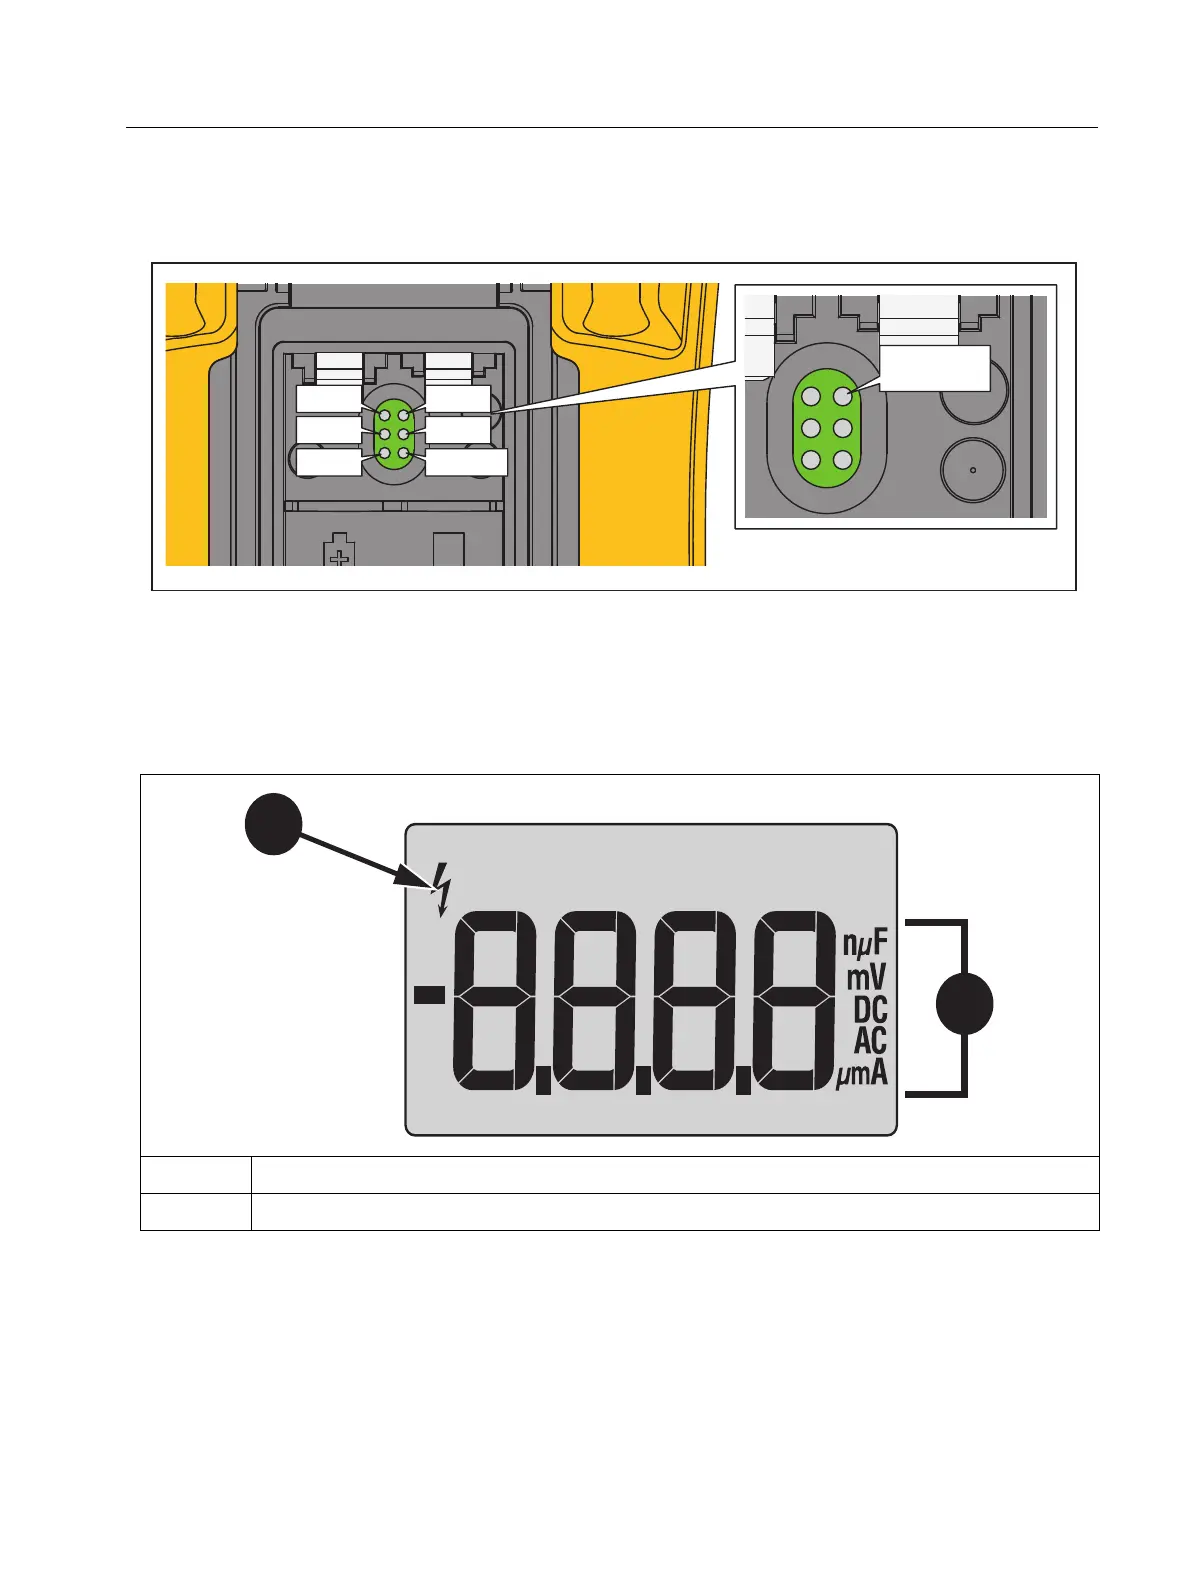
4. To put the DUT in adjustment mode, use a small probe to push the calibration button
(CAL1). See Figure 6.
Figure 6. Adjustment
5. Enter the adjustment values on the calibrator.
6. For each function, wait 4 seconds for the measurement to stabilize. Then push
H to
confirm and go to the next step. The display shows the function and the high voltage
indicator, see Ta b l e 4 .
7. For 17B MAX temperature adjustment:
a. Use an adjustable potentiometer to make a manual adjustment. See Figure 7.
b. Adjust to 0.1
ÁC to 0.3 ÁC at 0 ÁC input.
Tabl e 4. D ispl ay I ndic ato rs
A
High voltage alert
B
Function
CAL1
WP6
HOLD1
WP7
WP8
WP9
CAL1
 Loading...