233
Calibration Information
10
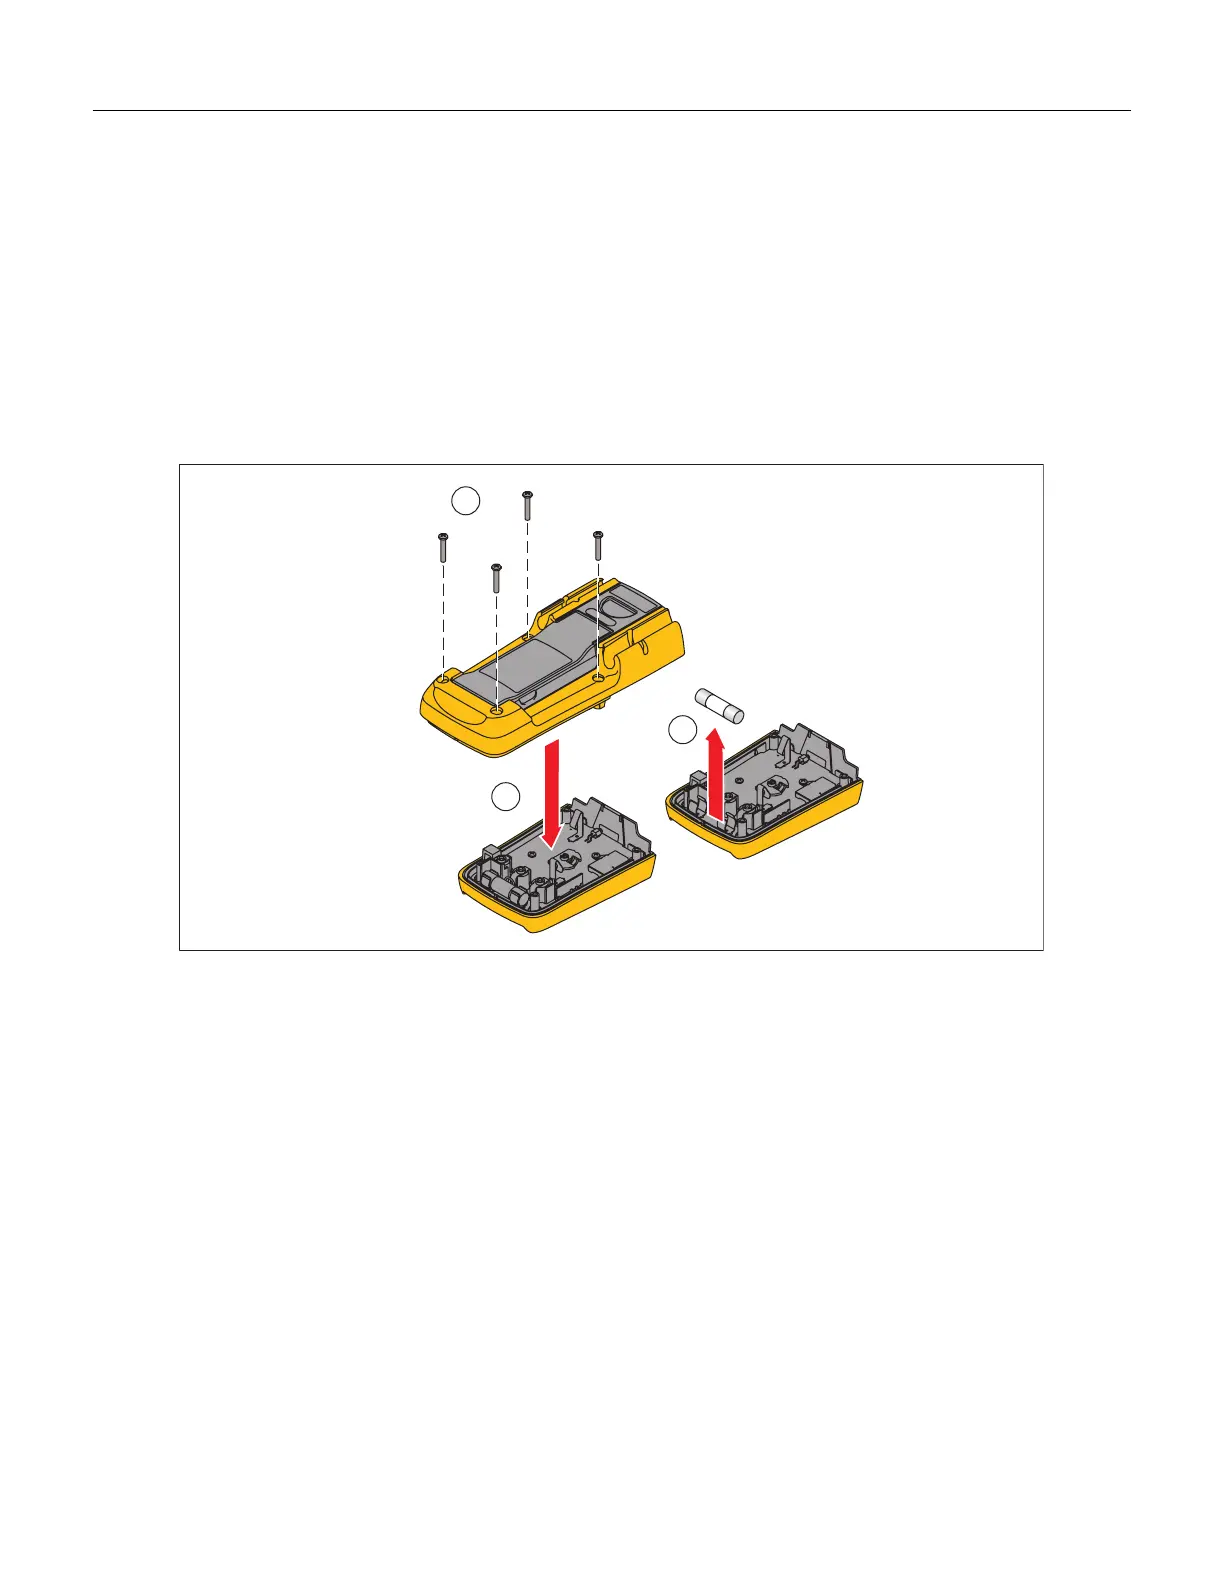
Fuse Replacement
To replace the fuse:
1. Remove the test leads from the Meter.
2. Remove the display module from the Meter base. See the “Remove the Display Module” section.
3. As shown in Figure 5, remove four screws from the case bottom.
4. Pull the case bottom from the case top.
5. Remove the fuse from its holder and replace it with an 11 A, 1000 V, FAST fuse with a minimum interrupt
rating of 17,000 A. Use only Fluke PN 803293.
To re-assemble the Meter, do the steps above in the opposite sequence.
3
5
4
gcc113.eps
Figure 5. Fuse Replacement
Cleaning the Meter
Wipe the case with a damp cloth and mild detergent. Do not use abrasives or solvents. Dirt or moisture in the
terminals can affect readings.