87V EX
Calibration Manual
12
After replacing the fuse, use the following procedure to verify the integrity of the new
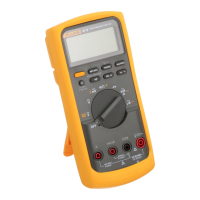
fuse and the current circuitry. Refer to Figure 2.
1. Turn the rotary knob to N.
2. To test F2, insert a test lead into the I input terminal and touch the probe to
the A input terminal.
Note
The input receptacles contain split contacts. Be sure to touch the probe to
the half of the receptacle nearest the LCD.
3. The display should indicate between 00.0 Ω and 00.5 Ω. If the display reads OL,
replace the fuse and test again. If the display reads another value, further servicing is
required.
4. To test F1, move the probe from the A input terminal to the mA/UA input terminal.
5. The display should read between 0.995 kΩ and 1.005 kΩ. If the display reads OL,
replace the fuse and test again. If the display reads another value, further servicing is
required.
XWWarning
To avoid electrical shock or personal injury:
• Remove the test leads and any input signals before
replacing the battery or fuses.
• Install ONLY specified replacement fuses with the
amperage, voltage, and speed ratings shown in Table 9.
PEAK MIN MAX
Hi Res
1 Second
OFF
mA
A
mV
V
V
A
A
mA
COM
V
A
400mA
FUSED
10A MAX
FUSED
Ex-Area:
Ui = 65 V
Ii = 5 A
Ta = -20 C ... +50 C
ZELM 05 ATEX 0274
Geräterückseite beachten!
Observe reverse side of unit!
1000
V
CAT
CAT 600V
MIN MAX
RANGE
REL
Hz %
AutoHOLD
˚
C/
˚
F
PEAK MIN MAX
Hi Res
1 Second
OFF
mA
A
mV
V
V
A
A
mA
COM
V
A
400mA
FUSED
10A MAX
FUSED
Ex-Area:
Ui = 65 V
Ii = 5 A
Ta = -20 C ... +50 C
ZELM 05 ATEX 0274
Geräterückseite beachten!
Observe reverse side of unit!
1000
V
CAT
CAT 600V
MIN MAX
RANGE
REL
Hz %
AutoHOLD
˚
C/
˚
F
Good F2 fuse: 00.0 Ω to
00.5 Ω
Good F1 fuse: 0.995 kΩ to
1.005 kΩ
Replace fuse: OL
Replace fuse: OL
Touch top half
of input contacts
ecg5f.eps
Figure 2. Testing the Current Input Fuses
 Loading...