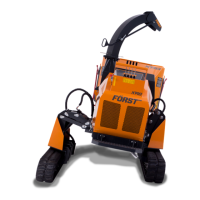
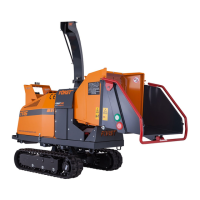
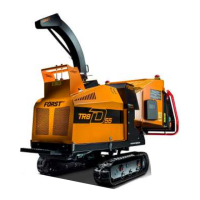
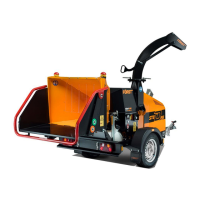
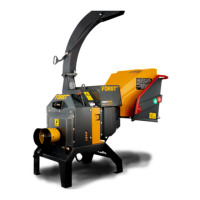
The device is a FÖRST XR8P Woodchipper, designed to reduce wood material into woodchips. It is capable of processing wood up to 203mm in diameter and 254mm wide, with a processing capacity of up to 5.5 tonnes of wood per hour.
Technical Specifications:
- Engine: Kubota 4-cylinder Petrol engine
- Maximum Power: 45.5 Kw (61.2hp)
- Cooling Method: Water-cooled
- Overall Weight: 2075 Kg
- Starting Method: Electric
- Roller Feed: Twin series hydraulic motors
- Maximum Material Diameter: 203mm
- Fuel Capacity: 35 litres
- Hydraulic Oil Capacity: 55 litres
- Material Processing Capacity: 5.5 tonnes/Hr
- Fuel Type: Petrol
- Noise Emission: A-weighted emission sound pressure (beside operator's ear) LpA = 106.2dB(A); Peak C-weighted instantaneous sound pressure (beside operator's ear) LCpeak = 128.8dB(C). Guaranteed sound power: 117dB(A). Noise levels above 85dB(A) are experienced at the working position and within a 4-meter radius.
Usage Features:
The XR8P features an engine PLC (Programmable Logic Controller) system that manages the engine, feed, and all safety features. The control panel, located on the right side panel, allows for feed and engine speed control with a "No Stress" function to optimize cutting conditions, maximize throughput, and minimize jams.
Operation Modes:
The machine supports two main operating programs:
-
Standard Programme (Touch Sensor Hopper):
- Fold down the hopper tray.
- Start the engine by turning the ignition key to pre-heat, waiting for "Start Engine" display, then turning to crank.
- Allow the engine to run for 30 seconds, then open the throttle to full.
- For forward feed, touch the green button twice.
- To stop feed, touch the red button or push the trip bar.
- To reverse feed, touch the green button once.
- To stop the machine, close the throttle to minimum, switch off ignition, and remove the key.
- Before transport, sweep out debris and close the hopper tray, engaging the latch.
-
Orange Button Programme (Touch Sensor Hopper):
- Similar start-up procedure as the Standard Programme.
- For forward feed, touch the green button once.
- To stop feed, push the e-stop button or push the trip bar.
- To reverse feed, touch the orange button once for a short reverse or twice for continuous reverse.
- To stop the machine, close the throttle to minimum, switch off ignition, and remove the key.
- Before transport, sweep out debris and close the hopper tray, engaging the latch.
Feed Speed Adjustment:
The feed speed can be adjusted using a control valve dial (0 = minimum, 10 = maximum) to suit the material being chipped. The "No Stress" function will momentarily stop the feed if engine speed drops, then restart automatically. For leafy material or Leylandii, a feed roller speed of 4.5 is recommended.
Emergency Stopping:
- Pushing the RED SAFETY BAR stops the feed rollers instantly, though the chipper flywheel will continue turning.
- The E-Stop button (if fitted) will shut down the entire machine.
- After an emergency stop, turn the throttle to idle and switch off the engine with the ignition key.
Track Control and Driving:
Driving controls are on the engine cover, operated from a fold-down footplate.
- Outer levers control track rotation direction and speed. Equal use provides forward/reverse; differing proportions or individual use allows steering.
- Inner levers control chipper width and height, adjustable separately for optimal positioning.
- Avoid driving on soft ground or inclines exceeding 25°. Traversing gradients up to 35° is possible depending on ground conditions, but extreme caution is advised on slippery or loose surfaces.
- Engine and hydraulic oil should be warm before operating on inclined ground. If stopping on an incline, position the machine facing up or down the slope and chock the tracks.
Transportation:
- Load/unload on solid, level ground using a ramp with an angle less than 15°.
- Ensure ramps and vehicle bed are clean and free of slippery substances.
- Warm the engine and hydraulic oil in cold weather before loading.
- Do not steer on ramps; reposition on level ground if adjustments are needed.
- Drive slowly during loading/unloading, especially over the ramp-to-bed join.
- Securely fasten the machine to the transport vehicle using lashing eyes, cables, chains, or ratchet straps, ensuring no hydraulic hoses are trapped.
- Clear all woodchip debris and secure the chute in the inboard position.
- Close and latch the hopper tray before transport.
Maintenance Features:
Routine Maintenance (Daily/During Use):
- Check engine oil level (refer to Figure 12).
- Check water level in the radiator reservoir bottle (refer to Figure 12).
- Clear debris screen on the front of the radiator.
- Check hydraulic oil level, topping up as needed after cleaning around the filler cap (refer to Figure 13).
- Grease the machine every 8 hours (one pump to each of the six nipples at the central grease point manifold near the control panel, refer to Figure 1).
- Check all fasteners for correct torque.
- Check proximity sensors on the engine cover, removable hopper, and trip bar.
- Check and adjust drive belt tension (refer to Figures 13, 14, 17).
- Check pulleys and taper lock on the flywheel shaft (refer to Figure 14).
- Inspect flywheel blades for damage and sharpness; replace/sharpen as required. Ensure blade seat is clean and shims are used to maintain a 3mm gap between the inner blade tip and anvil (refer to Figures 15, 16).
- Check anvil and side anvil condition.
- Inspect hydraulic hoses and fittings after 5 hours of initial work, and regularly thereafter. DO NOT CHECK FOR LEAKS WHILE THE ENGINE IS RUNNING.
- Check top and bottom feed motor bracket bolts weekly.
- For track-related servicing, consult a Forst dealer.
Scheduled Maintenance:
- Every 20 Hours: Change hydraulic oil filter; check blades and machine.
- Every 50 Hours: First full service recommended.
- Every 200 Hours: Full service recommended.
- Weekly (Every 100 Hrs): Clean air filter element, check battery electrolyte level, check fan belt tension.
- Every 2 Weeks (Every 200 Hrs): Check fuel hoses and clamp bands, check feed roller tension springs.
- Monthly (Every 250 Hrs): Check radiator hoses and clamp bands, replace oil filter, check air intake hose, check and recharge battery.
- Every 400 Hrs: Replace fuel filter cartridge.
- Every 500 Hrs: Clean fuel tank, clean radiator, replace engine fan belt, check & recharge battery, change hydraulic filter cartridge, change feed roller bearings on motor side.
- Every 800 Hrs: Check valve clearances.
- Every 1000 Hrs: Change hydraulic oil.
- Every 1500 Hrs: Check fuel injector pressure.
- Every 2000 Hrs: Check fuel injection pump.
- Every 3000 Hrs: Check fuel injection timer.
- Every 12 Months: Change air filter element, check wiring for damage/loose connections, change radiator coolant.
- Every 2 Years: Replace battery, replace radiator hoses and clamp bands, replace fuel hoses and clamp bands.
- Every 5 Years: Change air intake hose, change hydraulic hoses, get machine overhauled by a service specialist.
Blade Changing:
- Requires rigger gloves.
- Turn off chipper, remove ignition keys, disconnect battery.
- Remove bolts holding the chipping chamber lid, open it to hinge stops.
- Turn flywheel to blade change position, insert locking timber.
- Clean debris from around blade bolts/nuts.
- Undo blade bolt nuts (24mm socket), steadying the blade.
- Carefully remove the blade.
- Clean blade seat thoroughly.
- Re-fit blades with new bolts, washers, and nuts, ensuring no debris underneath.
- Use shims to maintain a 3mm gap between the inner blade tip and anvil.
- Tighten blade bolts to 310NM with a calibrated torque wrench.
- Remove locking timber, rotate flywheel, and repeat for other blades.
- Close chipping chamber lid, re-fit bolts (tighten to 86NM), re-fit battery leads.
- WARNING: Failure to keep blades sharp overloads the engine and bearings. Blades must not be used beyond the wear mark (Pic 4).
Blade Sharpening:
- Blades need to be kept sharp for optimum performance.
- Minimum safe blade size is 60mm (from 80mm new, refer to Figure 15).
- After sharpening, the blade gap must be re-set using shims (0.5, 1, 1.5, 2, 2.5mm available).
- Set a 3mm gap from the inner blade tip to the anvil. The outer blade tip will automatically be set to 5mm due to the anvil's angle.
- Replace the complete blade fastener set every time blades are changed.
- DO NOT lubricate bolts when fitting.
Hydraulic Oil Filter:
- Accessed via the right side panel.
- Thoroughly clean around the housing before removal.
- Unscrew the housing body, remove the element, and allow to drain for 15 minutes.
- Screw on and tighten the filter body with a new filter into the housing.
- Use protective plastic gloves and dispose of oil and filter responsibly.
Battery:
- Safety: Battery acid is corrosive; wear eye protection. Keep children away. Battery emits explosive hydrogen gas; avoid fires, sparks, and smoking. Neutralize acid splashes with water/baking soda.
- Storage/Transport: Store upright in a cool, dry, frost-free place. Do not remove the positive terminal cap.
- Removal/Maintenance: Switch off engine, remove left side panel. Avoid short-circuiting terminals. Clean debris. Remove negative lead first, then positive. Slacken M8 clamp screw. Clean battery and tray. Apply petroleum jelly to terminals. Replace vent pipes.
- Charging: Remove battery, disconnect negative terminal first. Ensure ventilation. Use suitable DC mains chargers. Connect positive to positive, negative accordingly. Charging current recommendation is 10% of battery Ah rating (14.4V constant voltage). Stop charging if acid temperature exceeds 38°C.
- Jump Starting: Use standardized jumper cables (DIN 72553). Use batteries of the same voltage. Switch off ignition on both vehicles. Connect in sequence: machine battery positive, support vehicle battery positive, support vehicle battery negative, machine metal part away from battery. Start support vehicle engine for 15 seconds, then machine engine for 15 seconds. Disconnect in reverse order.
Decals:
The machine features various decals indicating:
- Throttle movement relation to engine speed.
- CE mark (Conformity to EU directives).
- Ignition switch stop.
- Hearing and eye protection required.
- Finger and toe amputation hazard.
- Refer to user manual.
- Allow machine to stop before touching.
- Danger from flying objects.
- Do not open or remove covers while engine is running.
- Keep away from rotating machine parts.
- Push to stop, trip bar operation.
Warranty:
Redwood Global Ltd guarantees all Forst equipment for 12 months against manufacturing defects. The warranty is limited to repair at Redwood Global Ltd or an approved dealer. It does not cover normal wear and tear, failures due to non-genuine parts, improper servicing, modifications without approval, or use contrary to the manual. Engine units are covered by their manufacturer's warranties. The owner is responsible for operating the machine according to the manual. Warranty claims require notification to Redwood Global Ltd within 7 working days.