Step 1: Login to the router, and go to your router’s port forwarding or port triggering menu. Sometimes this is
also under the name of Virtual Server or NAT.
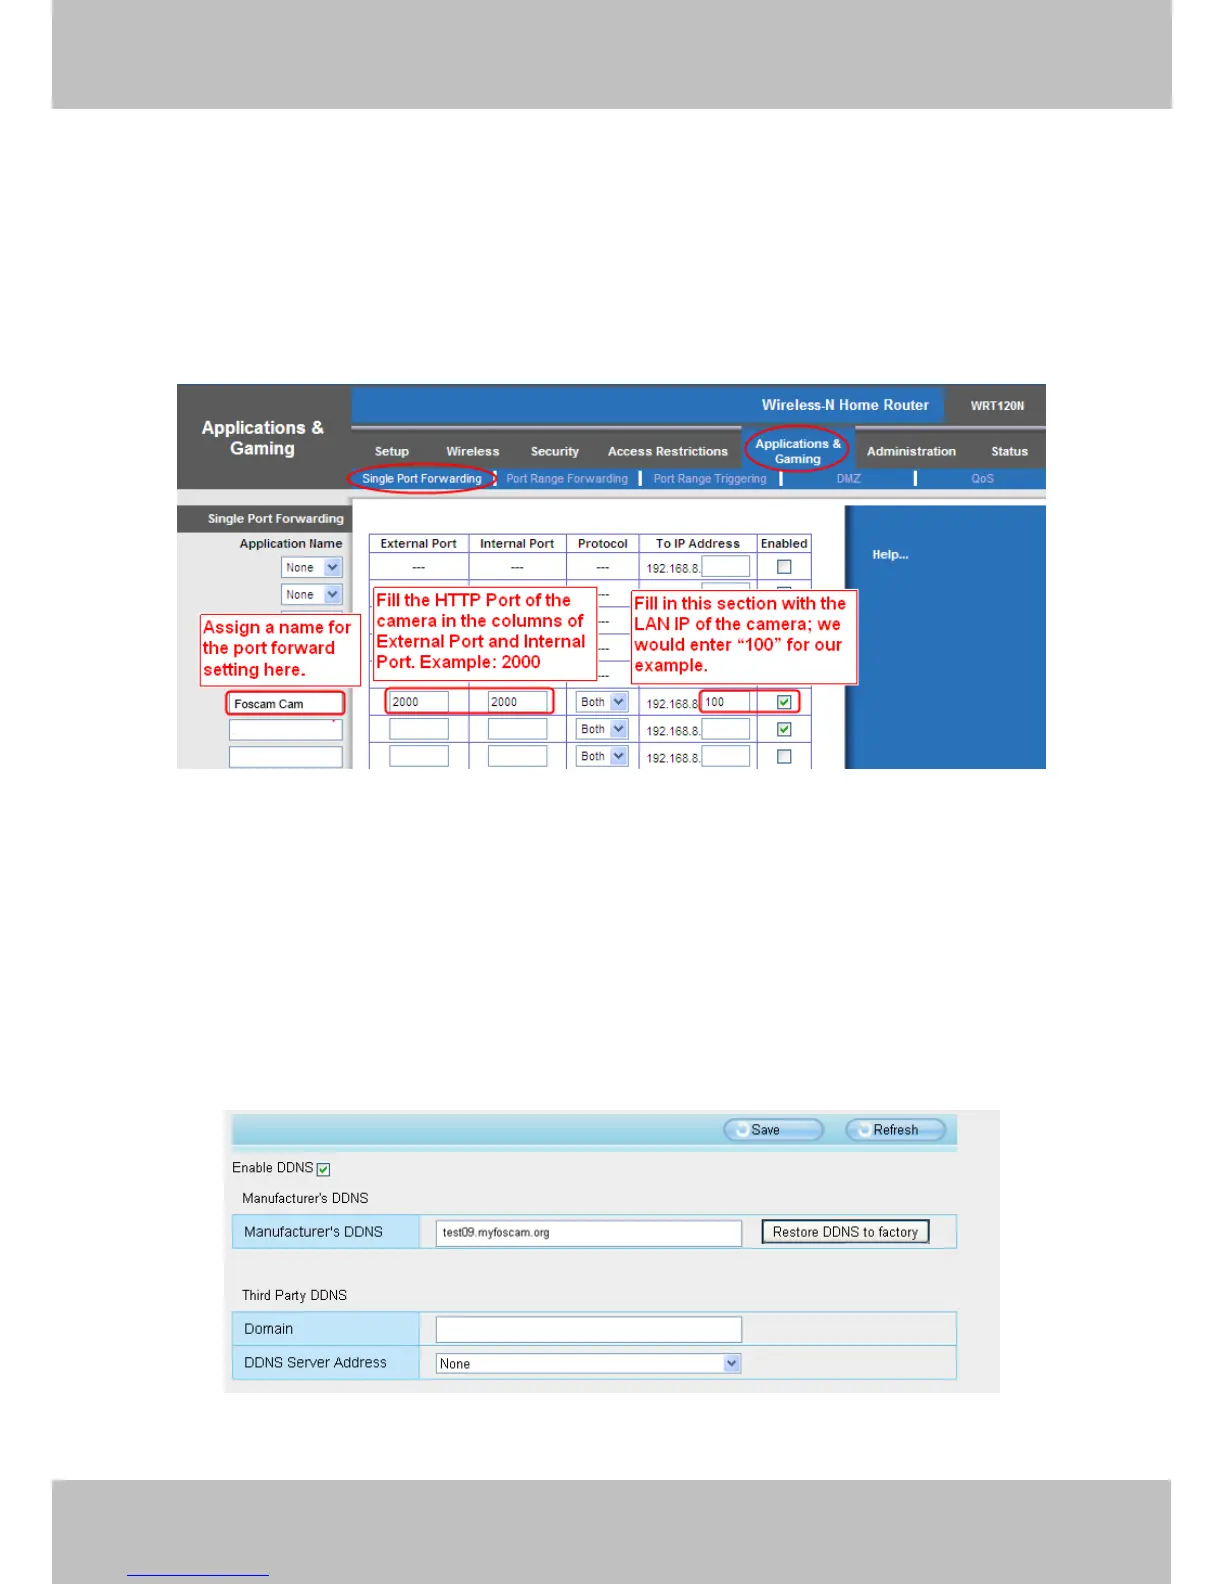
Using the Linksys brand router as an example, we would log into the router, and go to the Applications &
Gaming menu. We would then click on the “Single Port Forwarding” sub-menu.
Step 2: Create a new column using the LAN IP address & HTTP Port of the camera within the router as shown
below, then push OK or Submit to save your settings:
Figure 2.12
First method :
Use the embedded DDNS to access the camera via the Internet
Each Foscam camera has an embedded unique DDNS domain name, the format of this domain name is
xxxxxx.myfoscam.org. On the bottom of the camera, you can see the domain name sticker with this
information on it.
For example, we can use test09.myfoscam.org. In the camera, click Settings at the top, click “Network” on the
left, then click “DDNS” to get to the DDNS settings page. Here you can see the unique domain name of your
camera.
Figure 2.13