Do you have a question about the Fostex R8 and is the answer not in the manual?
Covers placement, ventilation, heat, water, power sources, grounding, cords, cleaning, non-use, and object entry.
Details electrical precautions, user servicing limitations, and damage requiring professional service.
Congratulates the user and highlights advanced features and improvements of the Fostex R8.
Outlines the sections of the manual and their content for new and experienced users.
Guidance on unit positioning, choosing audio cables, and mixer connections.
Matching signal levels/impedance and setting up sync for MIDI devices.
AC connection, foot switch use, tape loading, and powering on the unit.
Details detaching the control panel and connecting the optional extension cable.
Explains fundamental operations like Rewind, Fast Forward, Play, and Stop modes.
Introduces features like Preroll, Locate, Auto Play, Auto Return, and Zone Limit.
Outlines recording process, tape labeling, reference tones, and sync track recording.
Steps for recording primary tracks that serve as a reference for overdubs.
Using SAFE/RDY, playback, and practicing overdubs with auto return.
Step-by-step guide to recording new sounds onto separate tracks while listening to existing ones.
Correcting mistakes via punch-in/out and practicing timing with rehearsal mode.
Detailed steps for punch-in/out and the ping-pong technique for track mixing.
Features for tape searching, creating stereo masters, and synchronizing with external devices.
Utilizing the pitch control for retiming, retuning, and tempo adjustments.
Lists necessary tools like splicing blocks, razor blades, and splicing tape for tape editing.
Instructions on marking splice points and using splicing tape to join tape segments.
Setting a delay before playback/recording and locating specific memory points.
Step-by-step guide to set, check, and understand the preroll time.
Setting, checking, clearing, and using memory points for tape access.
How to use the LOCATE function to automatically move the tape to a memory point.
Enabling automatic playback and tape rewinding to a start point.
Procedures for defining start and end points for the auto return function.
Restricting tape movement within a specified zone and setting its limits.
Preventing tape run-off and organizing memory points.
Steps to calculate the tape reel zone based on tape and reel size.
Methods for altering data and understanding error messages.
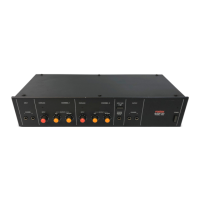
Covers reel holders, power, transport buttons (play, stop, FF, RW), and REC button.
Includes REC LEDs, INPUT MON, SAFE/RDY LEDs, NR OFF LED, MEMORY/TAPE TIME displays.
PITCH control, AUTO PLAY, AUTO RTN, LOCATE, ZONE LIMIT, RESET, and PEAK METER switch.
Instructions for cleaning the tape path and demagnetizing magnetic components.
Details tape specs, performance metrics, power requirements, and physical dimensions.
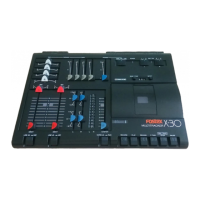
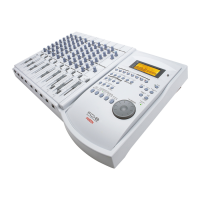
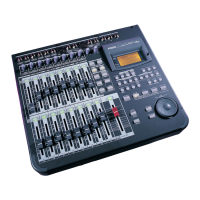
The Fostex R8 is an 8-track recorder/reproducer designed for high-quality multi-track recording, offering a range of advanced features in a compact and lightweight design. Its microprocessor-controlled system provides sophisticated functionalities that make the recording and playback process more efficient and creative.
The R8 operates at a standard tape speed of 38 cm/s (15 inches per second), ensuring low wow and flutter and a high signal-to-noise ratio. A variable pitch control knob allows for adjusting the tape speed by ±10%, which can be useful for retiming or retuning recordings.
The device supports various tape transport functions, including rewind, fast forward, and play, with corresponding green LEDs indicating the active mode. The STOP button offers two modes: a momentary press enters standby mode, positioning the pinch roller for immediate playback, while holding it for over half a second releases the transport mechanism, useful for tape editing.
A key feature of the R8 is its computer-controlled transport functions. The preroll function allows the tape to start automatically several seconds before a zero position or memory point, aiding in precise timing for overdubs. The locate function enables the user to set and automatically return to up to 10 different memory points on the tape, in addition to a dedicated "Locate 0" function for the zero position. The auto play function, when combined with locate or auto return, automatically initiates playback once a memory point or the zero position is reached. When used with auto return, it facilitates continuous "shuttle playback" of a designated tape section.
The auto return function allows the R8 to automatically rewind to a specified "start point" after reaching a defined "end point," making repeated rehearsals or specific section work seamless. The zone limit function further refines tape control by allowing the user to specify a desired section of tape, limiting all transport functions (play, record, fast forward, rewind, locate) to within that zone. This prevents accidental tape run-off and is particularly useful when focusing on a specific part of a recording. The tape reel zone function automatically calculates and sets a zone based on reel size and tape type, stopping the tape at the zone borders to prevent accidental run-off.
The R8 is an 8-track recorder, allowing for the recording of up to eight separate parts. It supports common multi-track recording techniques such as overdubbing, where new sounds are recorded onto separate tracks while listening to previously recorded tracks. The punch in/out feature allows for selective correction of mistakes within a track without re-recording the entire take. This can be performed manually or with an optional foot switch, and a rehearsal mode is available to practice punch in/out timing. Ping-pong recording (bouncing tracks) is also supported, enabling the mixing of multiple existing tracks onto a single open track, thus freeing up original tracks for further overdubs.
The cuing function allows for high-speed searching of recordings while monitoring the audio, by temporarily defeating the head lifter mechanism. This helps in quickly locating specific cue points. For final production, the R8 facilitates mixdown, where all tracks are remixed onto a stereo master tape.
The device also supports synchronization with external equipment like sequencers or drum machines via a sync track, typically recorded on an edge track (1 or 8) to minimize leakage. An optional synchronizer (e.g., Fostex Model 4030) can be connected for SMPTE time code control with other audio or video tape recorders.
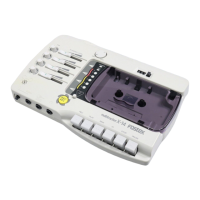
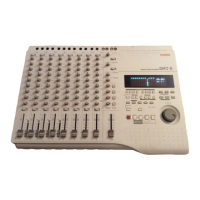
The detachable control panel is a practical feature, allowing the R8 to be operated remotely using the supplied or an optional extension cable. The control panel includes a numeric keypad for easy programming of computer-controlled functions, two 6-digit LED displays for showing memory points and tape time, and peak level meters for monitoring input and playback signals. The peak meter mode switch allows selection between permanent peak hold (PERM), normal/reset (NORM/RST), and temporary peak hold (TEMP) displays.
To begin recording, users first identify their tape with labels and voice identifications, then record reference tones for future alignment. The sync track is typically recorded first to synchronize MIDI-controlled equipment. Basic tracks (drums, bass, rhythm guitar) are then recorded as a reference for overdubs.
Overdubbing involves selecting tracks for recording, adjusting input levels, and simultaneously pressing REC and PLAY. For punch in/out, tracks are selected, the tape is rewound to a point before the punch-in, and REC and PLAY are pressed simultaneously at the punch-in point, then STOP is tapped at the punch-out point.
Memory points can be set either by directly inputting time values using the numeric keypad or by capturing the current tape position with the HOLD button. These points can be recalled using the LOCATE button. The preroll time can be adjusted between 0 and 9 seconds. Auto return points are set by specifying start and end memory points. Zone limits are set by defining start and end points within the tape.
The R8 includes built-in Dolby C noise reduction, which can be turned on or off. The METER NORM/FINE switch allows for magnified display of the peak level meters, useful for precise calibration.
Routine maintenance is crucial for optimal performance. This includes regularly cleaning and demagnetizing the tape path. Cleaning involves using a cotton swab moistened with head cleaning fluid or pure alcohol to clean the heads, tension arm guides, tape guides, capstan shaft, and pinch roller. All parts should be allowed to dry completely before loading tape.
Demagnetization of the head area, capstan, and guides should be performed after approximately every 8 hours of use with a demagnetizer (e.g., Fostex Model HD-10). It is critical to ensure the R8 is turned OFF and no tapes are within 2 feet (0.6 meters) during demagnetization. The demagnetizer should be turned on at least three feet (1 meter) away from the recorder, slowly approached to the head area, and then slowly removed before turning it off at a distance of at least three feet.
The manual also provides guidance on tape identification and reference tones, including labeling tapes, creating track sheets, recording voice identifications, and recording standard level reference tones (1 kHz, 10/15 kHz, 100/50 Hz) for precise alignment.
The R8 is designed for exclusive use with 7-inch or 5-inch reels and 1 mil (35µm) tape. Using recommended tape formulas (e.g., Ampex 457 or Scotch 227) is advised for specified results, otherwise, realignment of the electronics may be necessary.
For tape editing, materials such as a splicing block, a sharp non-magnetic single-edged razor blade, a white or yellow grease pencil, and 1/2-inch splicing tape are recommended. Conventional cellophane or packaging tapes should be avoided for splicing as they can contaminate the recording tape.
| Tape width | 1/4 inch |
|---|---|
| Tape speed | 15 ips, ±05% ’Of 15 ips.referenced to 3% T.H.D. |
| Fast wind time | 120 seconds for 1800 ft. |
| Frequency response | 40 Hz to 18 kHz for 15 ips ±3 dB |
|---|---|
| Signal to noise ratio | 78 dB weighted, 60 dB unweighted |
| T.H.D. | Less than 1% at 1 kHz, 0 dB |
| Power voltage (USA/Canada) | 120 V AC, 60 Hz, 55 W |
|---|---|
| Power voltage (European models) | 220 V AC, 50 Hz, 55 W |
| Power voltage (UK/Australian models) | 240 V AC, 50 Hz, 55 W |
| Weight | 22 lbs (10 kg) |
|---|---|
| Width | 12-1/2 inches |
| Height | 13-1/8 inches |