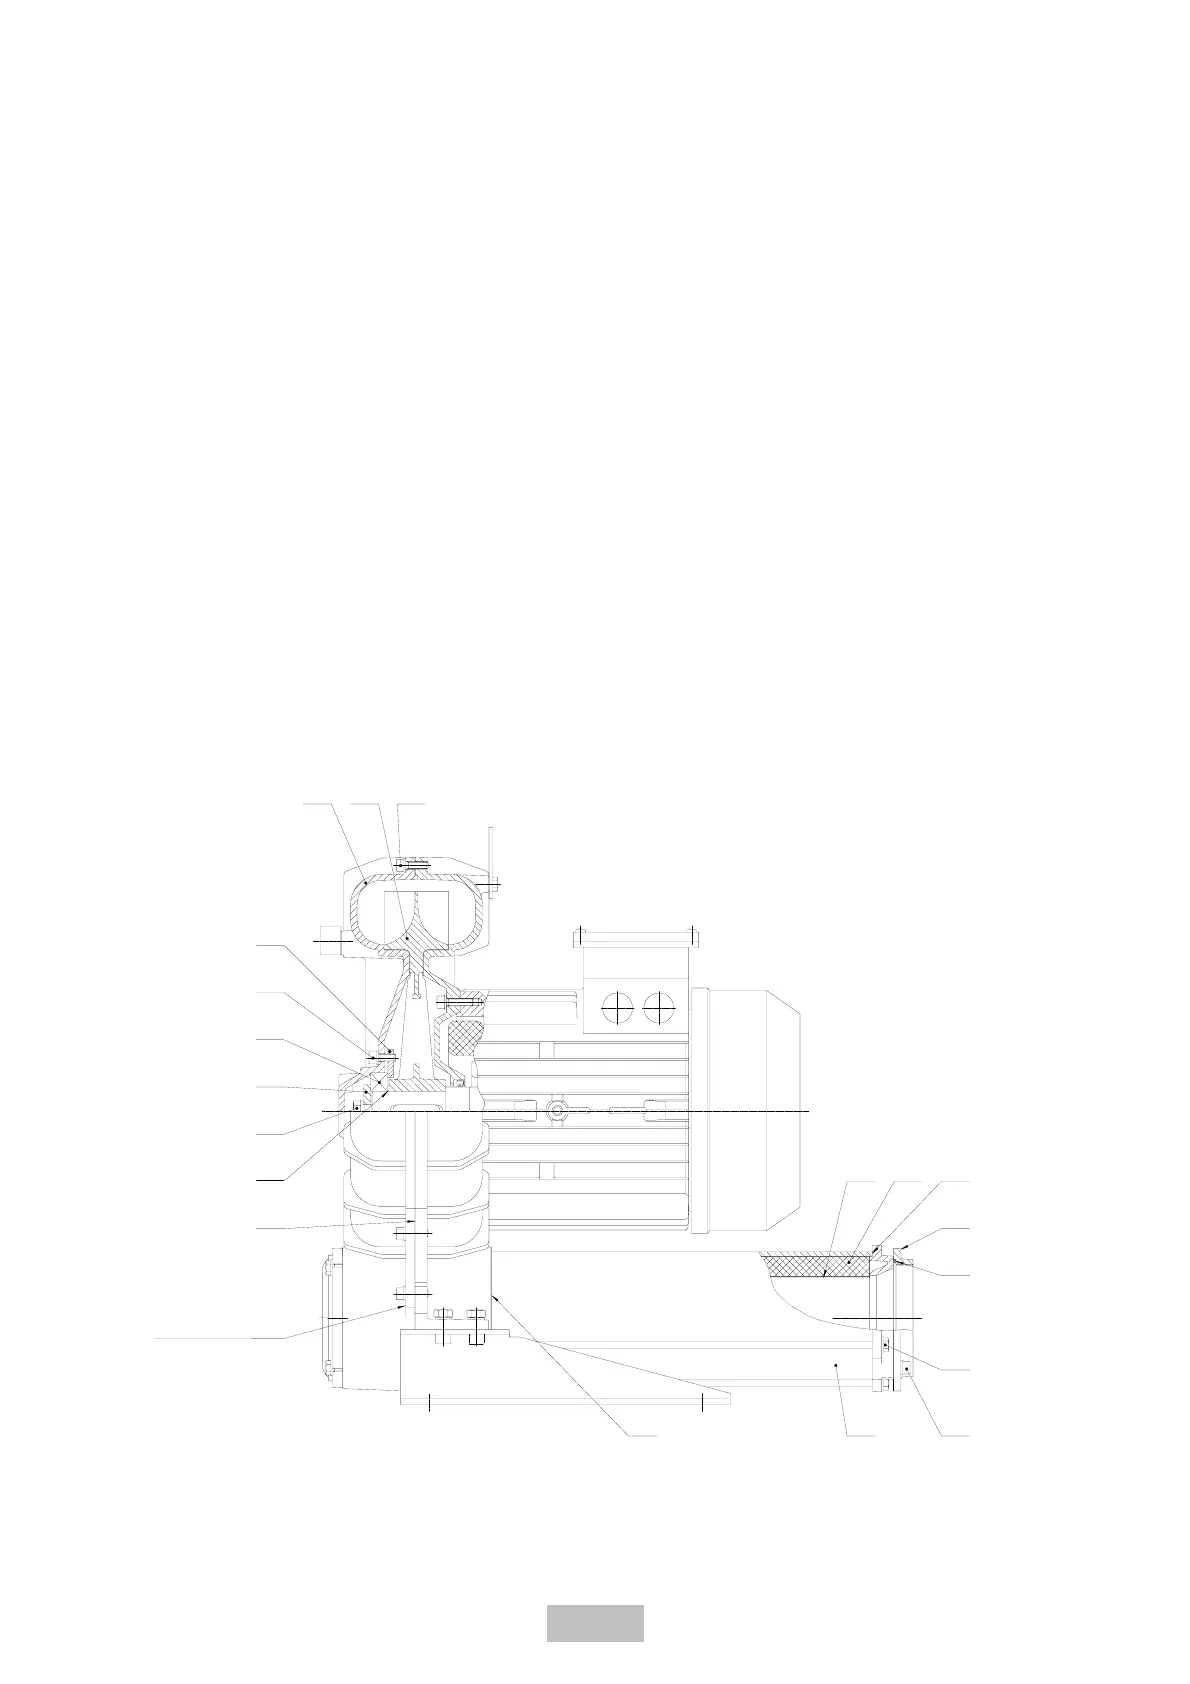
3. INTERNAL CLEANING INSTRUCTIONS
CAUTION!
Internal deposit build up can cause:
• performance variations;
• alteration in clearances resulting in seizing;
• out of balance rotor.
3.1 CLEANING INSTRUCTIONS
In case it is necessary to clean the inside of the blower, proceed
as follows:
1. Remove in order #915 and #902 screws placed on #162
cover.
2. Remove #162 cover by using the two threaded holes placed
on cover itself.
3. Remove the #900 screw and #365 washer.
4. Remove the #360 bearing cover and extract the #321
bearing using a bearing puller.
N.B.: The #935 shims washers are included when necessary to
accomodate the axial clearance. Be careful not to misplace.
5. Remove the #230 impeller, using a puller if necessary.
6. Clean and reassemble in reverse order.
If needed, reconstruct #423 seal using Loctite 598 or similar,
after cleaning the sealing surfaces of any existing sealant.
3.2 REPLACEMENT SOUND-ABSORBING PANELS
If needed, replace the foam sound-absorbing panels, proceed as
follows:
1. Remove #723 flange and related #426 O-Ring by removing
#908 screws.
2. Remove #906 screws.
3. Take away the #700 silencers from the unit, being careful
not to lose the #424 gaskets.
4. Extract the #720 panels from the silencer housings.
5. Clean up the #710 retaining screen.
6. Replace and reassemble proceeding in reverse order,
remembering to include the #424 and #426 gaskets.
If needed, reconstruct #425 seal using Loctite 598 or similar,
after cleaning the sealing surfaces of any existing sealant.
GB - 16/39
162 230 902
360
915
321
365
900
423
424
700 908
906
426
723
425 720 710
935
Cover extraction’s
threaded holes