FP4000 Rev0204
30
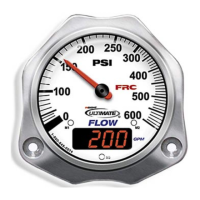
Pressure Calibration (Code 323)
To calibrate the pressure gauge use a calibrated test gauge or a master pressure
gauge as a reference.
During the calibration procedure the pressure indicating needle will not move.
This procedure sets the pressure values in the program. During normal operation the
microprocessor controls the needle movement.
There are five pressure calibration points available in the program. Select at least
two pressure levels to calibrate (100 and 200 are recommended).
1. Enter code 323.
Result: The digital display will show Pt1 (the pressure gauge program is ready
to set the first calibration point).
2. Cap the discharge.
3. Open the discharge valve fully and bring the pressure up.
4. Set the pressure on the reference gauge to the level selected for the first
calibration point. Ensure a constant pressure is maintained.
5. Adjust the digital display to match the reference pressure.
Use the M1 sensor to select the digit to change. The digit will flash.
Use the M2 sensor to change the value of the flashing digit.
6. Touch the magnet on the glass at the M3 sensor and remove it.
Result: The display will show Pt2 (or the next calibration point).
7. Set the pressure on the reference gauge to the level selected for the next
calibration point. Ensure a constant pressure is maintained.
8. Repeat steps 5, 6, and 7 for each pressure calibration point.
9. To exit the calibration program:
Touch the magnet on the glass at the M3 sensor and hold it there until four
dashes are shown in the display. Remove the magnet and after 3 seconds the
program will return to normal operation.
10.Vary the pressure and ensure that the needle indicator matches the pressure
shown on the reference gauge
 Loading...