8
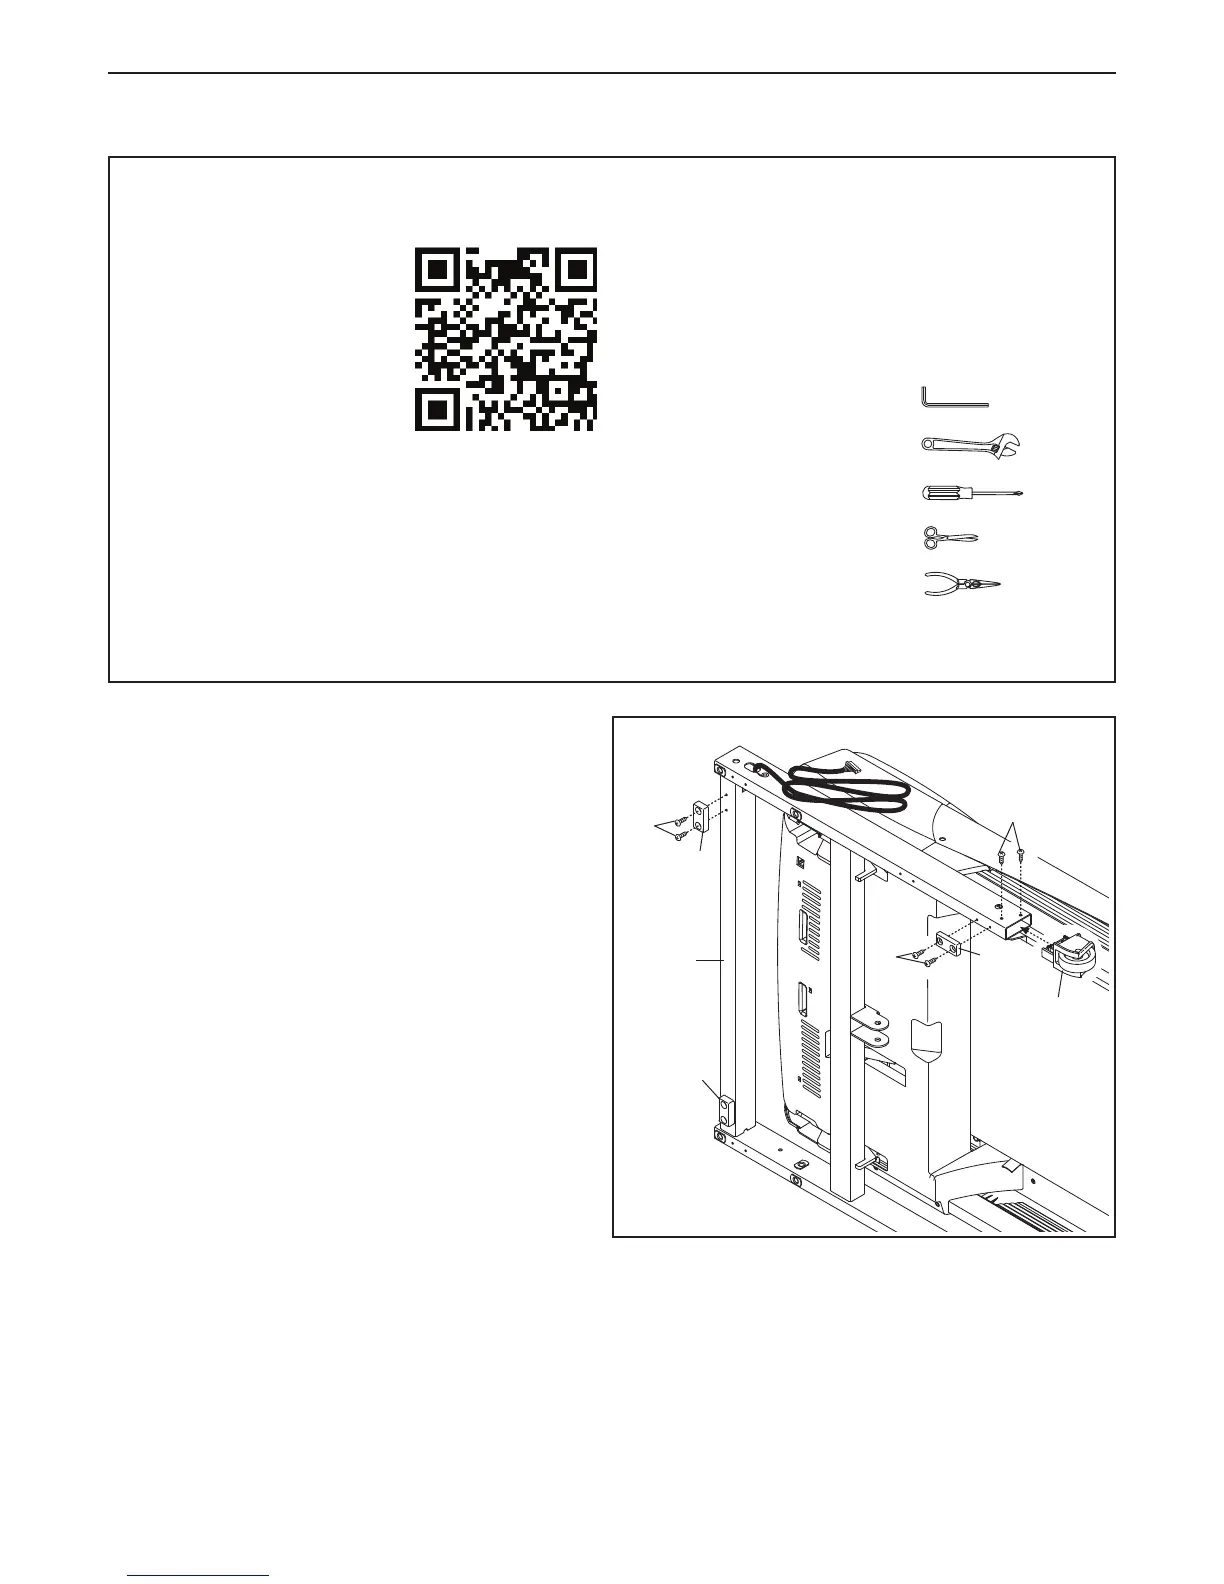
• To watch an assembly video, go to
www.freemotiontness.com/assemblyoruse
your mobile phone or
smartphone to read the
QR code at the right. A
reader application, such
as ShopSavvy, which can
be downloaded at www.
shopsavvy.mobi, must be
installed on your mobile
phone or smartphone.
• Assembly requires two persons.
• Place all parts in a cleared area and remove the
packing materials. Do not dispose of the packing
materialsuntilyounishallassemblysteps.
• The underside of the walking belt is coated with
high-performance lubricant. After shipping, there
may be some lubricant on top of the walking belt
or on the shipping carton. This is normal. If there
is lubricant on top of the walking belt, wipe it off
with a soft cloth and a mild, non-abrasive cleaner.
• To identify small parts, see page 7.
• Assembly requires the following tools:
theincludedhexkeys
one adjustable wrench
one Phillips screwdriver
scissors
needlenose pliers
To avoid damaging parts, do not use power tools.
ASSEMBLY
1. Make sure that the power cord is unplugged.
With the help of a second person, tip the tread-
mill onto its right side. Angle the Base (29) to
stabilize the treadmill.
Attach the Left Wheel Cap (87) to the Base (29)
withtwo#8x3/4"Screws(14).
Attach a Thick Base Pad (37) and a Thin Base
Pad (92) to the Base (29). Make sure to attach
the Thin Base Pad (92) near the wheel as
shown.
With the help of a second person, tip the tread-
mill onto its left side. Attach the Right Wheel
Cap (not shown) and the other Thick Base
Pad (37) and Thin Base Pad (not shown) as
described above.
14
87
29
37
13
92
13
1
37