Do not position the jack under the dropped
frame rails in the center section of the vehicle.
6.
Place the jack on a solid surface. Insert the jack
handle and pump the handle slightly. Do not
raise the wheel off of the ground yet. Loosen the
wheel lug nuts, but do not remove them.
IMPORTANT: The dual rear wheels are attached
using two-element lug nuts. The larger nut re-
tains the outer dual. The inner square stud re-
tains the inner dual. Remove and install these
nuts separately. The rear dual outer lug nut
must be loosened to check and retighten the
inner nut.
7.
Raise the vehicle until the wheel is off of the
ground. Remove the lug nuts and the wheel.
8.
Install the spare wheel and lug nuts. Make sure
that the beveled sides of the nuts face inward,
or, on hub-piloted wheels, make sure that the
hub-pilot pad is centered at the top.
IMPORTANT: When a tire is changed, the ve-
hicle should be taken to a mechanic as soon as
possible, to have the lug nuts tightened properly
with an impact air gun.
9.
In a star pattern, tighten the nuts evenly until
snug. See Group 40 of the S2 Workshop
Manual for wheel tightening patterns and torque
specifications. Lower the vehicle until the wheel
touches the ground. Tighten the nuts.
10.
Finish lowering the vehicle to the ground, then
remove the jack.
11.
Remove the block, then stow the jack, jack
handle, and lug wrench.
12.
After operating the vehicle for 50 to 100 miles
(80 to 161 km), retighten the wheel nuts to the
specified torque values.
Fire Extinguisher
An optional fire extinguisher is located in the front of
the cab, between the driver and passenger seats.
First Aid Kit
An optional first aid kit is mounted to the back of the
cab, between the driver and passenger seats.
Flare Kit
An optional flare kit is located in the center of the
cab, between the driver and passenger seats.
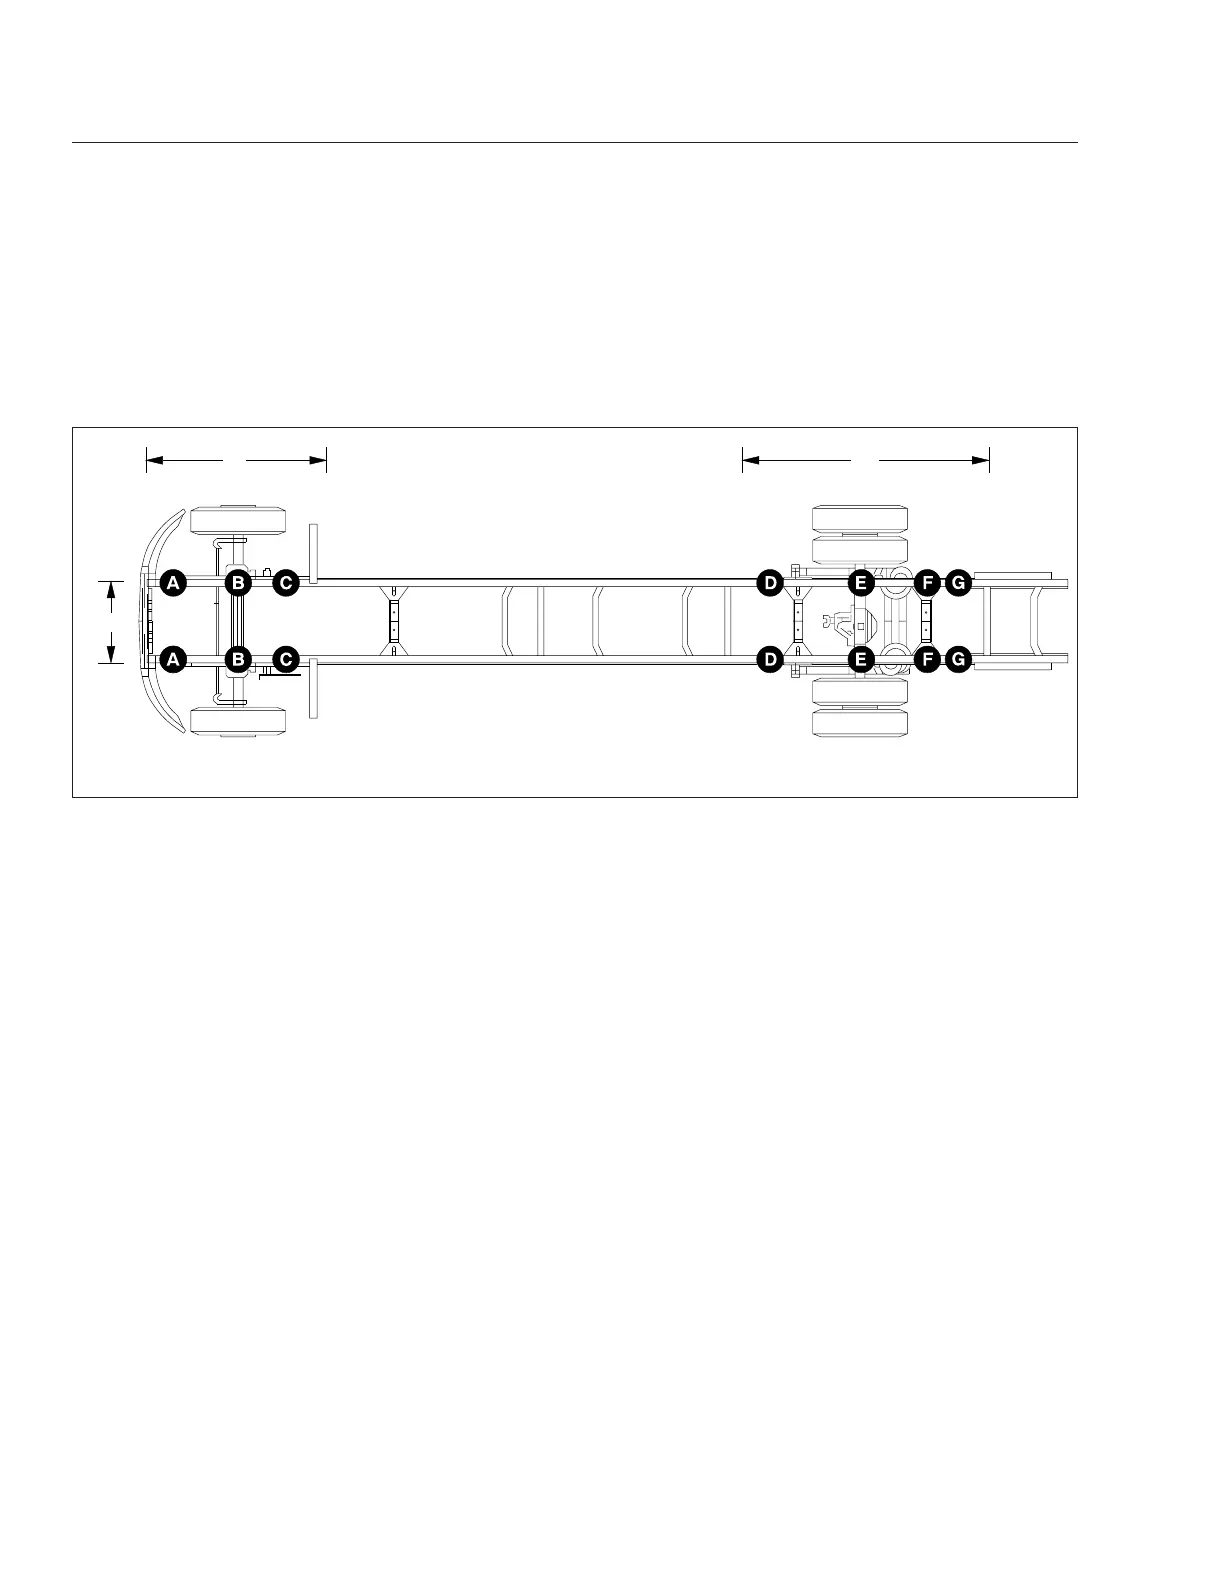
12/13/2010 f311093
1
2
3
1. Jack Locations—Front Axle 2. Jack Locations—Rear Axle 3. Jack Locations—Front Bumper
Fig. 17.4, Jack Placement
In an Emergency
17.5