2
Establish the connection to the inverter in the network settings (the inverter
is displayed with the name "FRONIUS_PILOT" and the serial number of the
device).
3
Password: enter 12345678 and confirm.
IMPORTANT!
To enter the password on a Windows 10 operating system, the link "Connect
using a security key instead" must first be activated to establish a connection
with the password: 12345678.
4
In the browser address bar, enter and confirm the IP address
192.168.250.181.
5
Select the "Technician" user in the "User menu" and enter and confirm the
password for the "Technician" user.
6
Call up the "Safety and grid regulations" → "Country setup" menu area.
7
Enter the requested access code (see chapter Access code on page 4) in the
input field "Access code country setup" and click the button "Activate".
8
Adjust the parameters in the individual menu areas taking into account the
nationally applicable standards and/or the specifications of the grid operator.
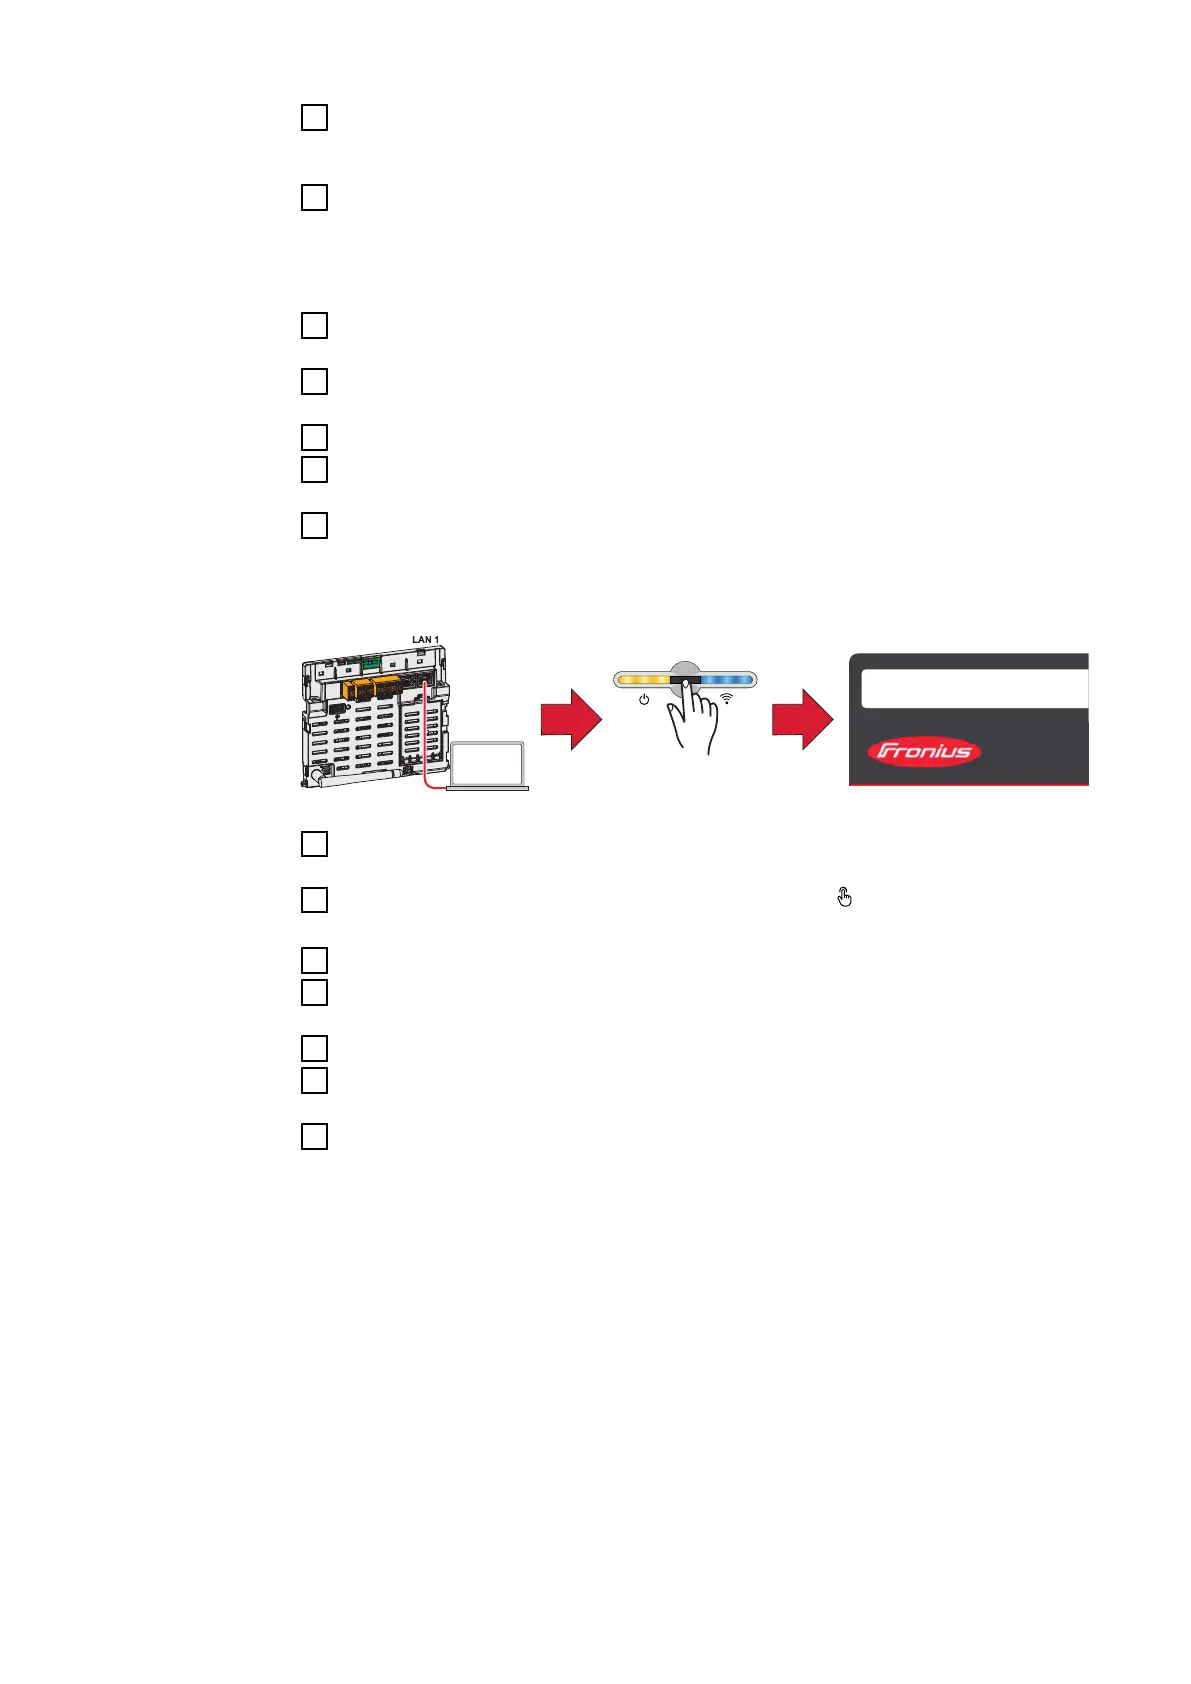
Ethernet:
1
Establish a connection to the inverter (LAN1) with a network cable (CAT5
STP or higher).
2
Open the access point by touching the sensor once → Communication LED:
flashes blue.
3
In the browser address bar, enter and confirm IP address 169.254.0.180.
4
Select the "Technician" user in the "User menu" and enter and confirm the
password for the "Technician" user.
5
Call up the "Safety and grid regulations" → "Country setup" menu area.
6
Enter the requested access code (see chapter Access code on page 4) in the
input field "Access code country setup" and click the button "Activate".
7
Adjust the parameters in the individual menu areas taking into account the
nationally applicable standards and/or the specifications of the grid operator.
6