Mounting The Standard Mounting Bracket (And Optional Mounting Wedge)
To complete installation for the Standard Mounting Bracket without the use of
the Optional Mounting Wedge (recommended for most homes), please follow the
instructions below. For those using the Optional Mounting Wedge, please skip to the
following section (page 12).
No-Wedge Setup:
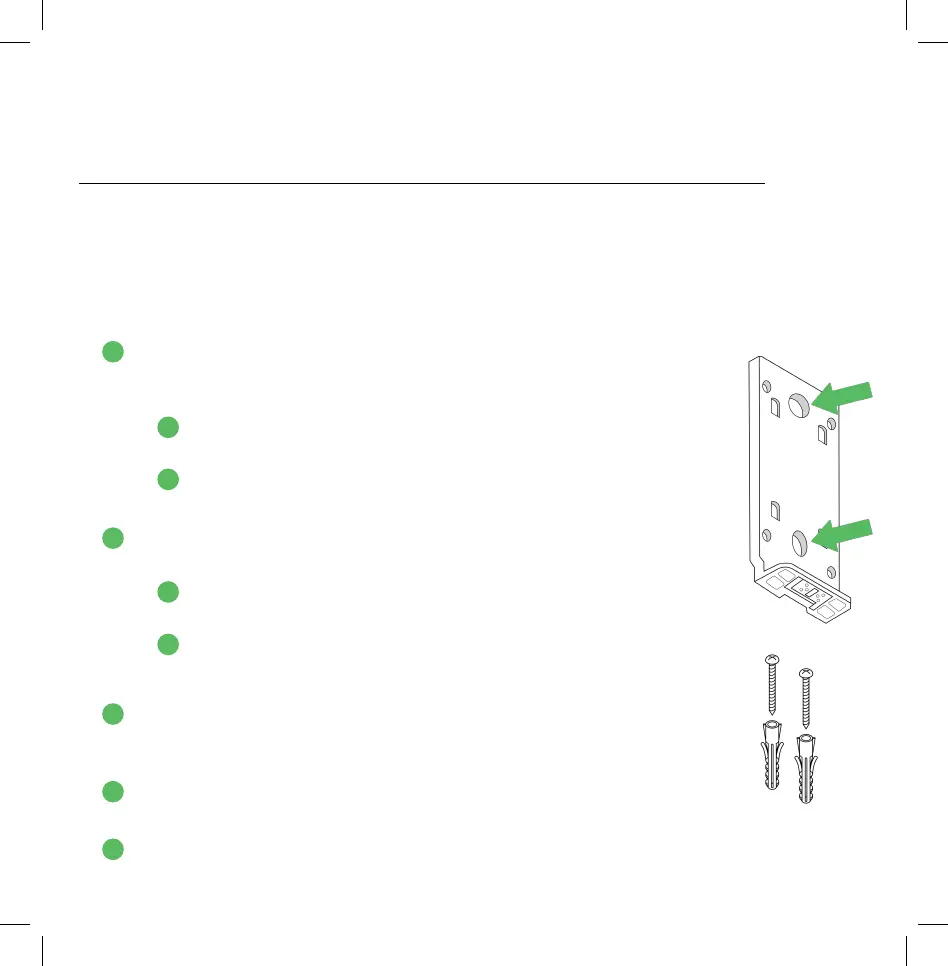
1. Hold the Standard Mounting Bracket at the predetermined
location. If possible, use a level to confirm the mount is
parallel with the ground.
a. Use a pencil to mark where the two screws will go,
indicated in the image to the right.
b. Once marked, you can set aside the Standard Mounting
Bracket until Step 4.
2. Prepare your power drill and drill into each of the 2 marked
locations on the wall, depending on your mounting surface:
a. If screwing into drywall or brick, it’s recommended to
use a 1/4” drill bit.
b. If screwing into wood, use a 1/8” drill bit.
Not sure which to use? Use the 1/4” drill bit.
3. Insert the included anchors into the screw holes if you used a
1/4” drill bit. If you used the smaller drill bit, the anchors will
not be necessary.
4. Position the Standard Mounting Bracket so its 2 holes align
with the 2 screw holes.
5. Use your power drill to screw in the included screws, fastening
the Standard Mounting Bracket to the wall.
1
A
B
11
2
A
B
3
4
5