4. Touch DHCP, DHCP/AutoIP, BOOTP, or RARP, then touch Save.
Configuring IPv6 Dynamic Address Settings
To configure IPv6 dynamic address settings at the Control Panel:
1. At the printer Control Panel, press the Machine Status button, then touch the Tools
tab.
2. Touch System Settings > Connectivity & Network Setup > Protocol Settings.
3. Touch TCP/IP-Network Settings and touch Change Settings.
4. Touch IPv6 Address Manual Configuration, and touch Change Settings.
5. Touch Disabled, then touch Save.
6. Touch Automatically Configured IPv6 Address, then touch Change Settings to
see the acquired IPv6 address information.
Configuring DNS/DDNS Settings
Domain Name System (DNS) and Dynamic Domain Name System (DDNS) is a system
that maps host names to IP addresses.
To configure DNS settings at the Control Panel:
1. At the printer Control Panel, press the Machine Status button, then touch the Tools
tab.
2. Touch System Settings Connectivity & Network Setup Protocol Settings.
3. Touch IPv4 DNS Server Setup, or IPv6 DNS Server Setup, then touch Change
Settings.
4. Do one of the following:
a. To allow your DHCP server to provide the DNS server address, on the Get IP
Address from DHCP screen, touch Enabled, then touch Save.
b. To manually provide the DNS server address, touch Preferred DNS Server IP
Address then touch Change Settings. Type the DNS server address, then touch
Save.
Configuring Settings for IPv4
To configure settings for IPv4:
IPv4 can be used in addition to or in place of IPv6.
Caution
If both IPv4 and IPv6 are disabled, you cannot access CentreWare Internet Services.
You must re-enable TCP/IP at the printer Control Panel before you can access CentreWare
Internet Services. Disabling TCP/IP or changing the IP address also disables any
dependent protocols.
5-3 Xerox
®
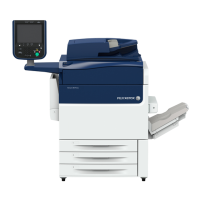
Color C60/C70 Printer
System Administrator Guide
Network Configuration
 Loading...


