3 Rack Configuration and Installation 125
E
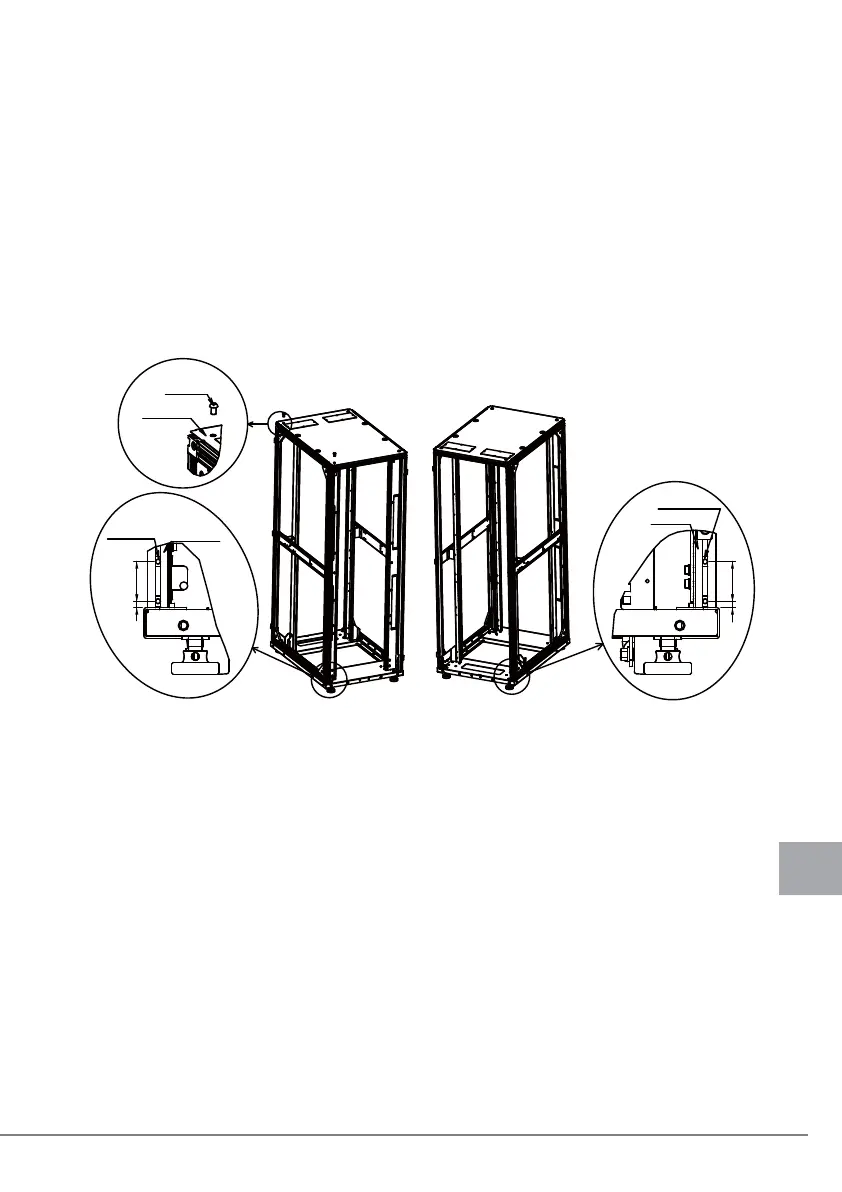
5 Remove the retaining screws of the top cover of the expansion rack, and
then install M6 core spring nuts on the front and rear of the rack.
Remove the two M12 screws securing the top cover at the front and rear corners on the left,
since the other rack will be connected to the left of this rack.
Note: Be careful when working at height on the top cover. Never put your foot on the rack
because it is very dangerous.
Install M6 core spring nuts at the bottom of the front H frame of the rack, on the side to be
connected to the other rack (left side when viewed from the front).
Install M6 core spring nuts at the bottom of the rear H frame of the rack, on the side to be
connected to the other rack (right side when viewed from the rear).
For information on the procedure for installing the core spring nuts, see "4.2 Installing and
Removing Core Spring Nuts".
6 Align the height of the expansion rack with that of the existing rack.
Line up the side of the expansion rack with the side of the existing rack, and then adjust the
expansion rack feet to align the expansion rack height with that of the existing rack.
50
508
8
H frame
M6 core
spring nut
H frame
M6 core
spring nut
M12 screw
Top cover
 Loading...