4 Handling the Rack after Installation 155
E
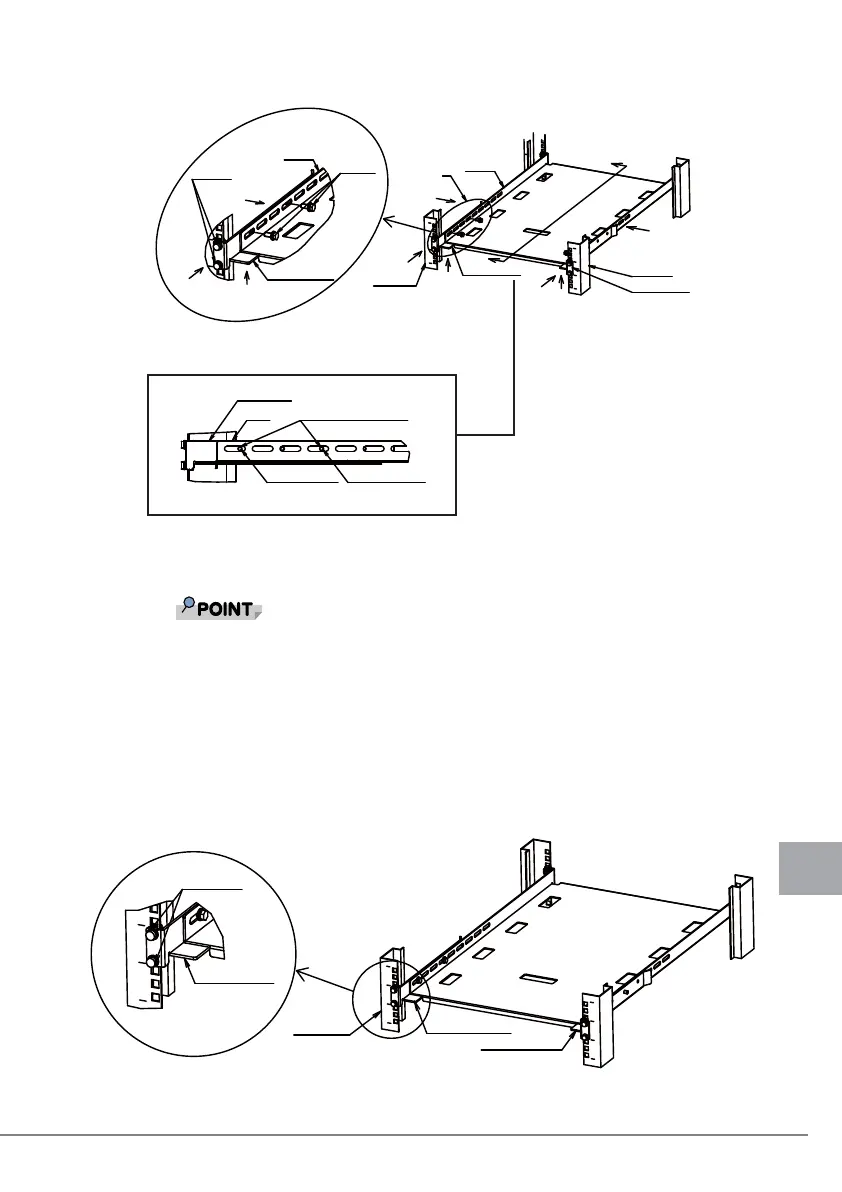
2 Secure the table in position by applying M6 bolts to the first and third screw
holes from the rear of rear brackets L and R.
Secure the table in position while fully pressing rear brackets L and R against the
rack posts (in the direction of arrow A).
Secure the table in position while fully pressing rear brackets L and R against the
table so that no gaps appear (in the directions of arrows B and C).
If you are unable to press against rear brackets L and R adequately, do so after
slightly loosening the M6 screws marked with an asterisk (*).
3 Fully tighten the M6 screws to secure rear brackets L and R, which were
temporarily fixed in position in step 1 according to "4.4.2 Attaching rear
brackets and temporarily mounting the table," to the rack posts.
* Same locations as in rear bracket L
Cross section G-G
Screw holes in rear bracket R
used for fixing it in positionTable
First screw hole from
rear
Third screw hole from
rear
#
$
%
#
%
)
Table
Rack post
$
Rear bracket L
)
M6 bolts
Rear bracket R
Table
M6 screws
#
$
%
Rear bracket R
Rack post
Rear bracket R
Rack post
Rear bracket R
Rear bracket L
M6 screws
Rear bracket R
 Loading...