Getting started
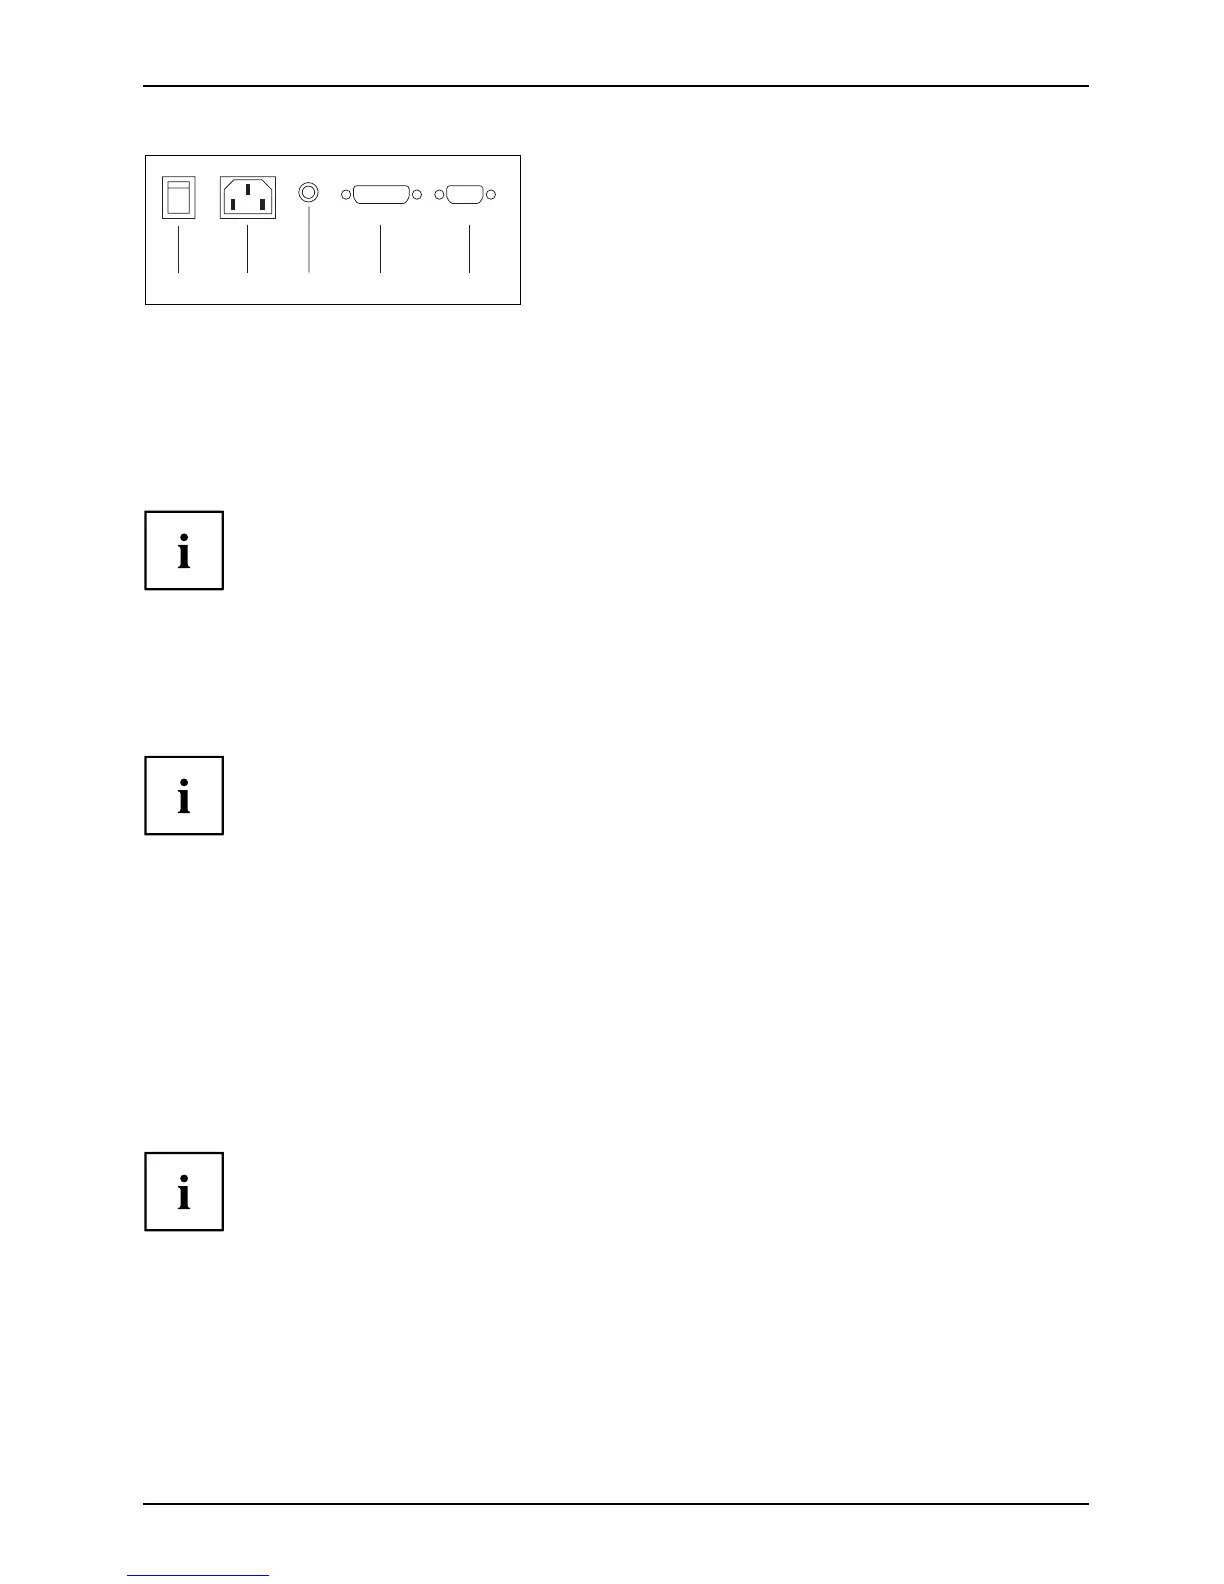
3 4 6 75
3 = Main switch
4=Powersocket
5 = AUDIO-IN socket
6 = DVI-D socket (DVI)
7 = D-SUB socket (VGA)
► Connect one of th e c onnectors of t he data cable t o the D-SUB connector (9) or the DVI-D
connector (8) on the monitor and secure the plug-in connection by tigh tening the safety screws.
The monitor automatically detects the input when only one signal source is connected.
► Insert one connector of the audio cable in the AUDIO IN (6) socket on the
monitor an d make sure it is properly engaged.
► Plug the power ca ble supplied into the power socket ( 5) of the monitor.
► Mount the cover (2) over the connections.
A Kensington lock can be mount ed in the security slot (1) to prevent the monitor
from being stolen. A K ensington lock is not supplied with the monitor.
Connecting cables to the computer
Information on the computer connections an d interfaces is conta ined in the
operating manual for your computer.
► Connect the data cable to the (active) monitor port on the computer and secure
the plug-in connection by tightening the safety screws.
► Insert the other plug of the audio cable in the audio output of the compu ter.
► Plug the power connector of the monitor into a properly grounded mains outlet.
► Plug the power connector of the computer into a prope rly grounded mains outlet.
If your computer ha s two monitor ports ("onboard" screen controller and separa te
display adapter), the mon itor port for the separate display adapter is active as standard.
A26361-K1240-Z120-7619, edition 1 17
 Loading...