12
|
13
6.3 Installation
DAMAGE TO ESSENTIAL VEHICLE COMPONENTS! Essential vehicle components or wiring can be damaged when drilling mounting
holes or screwing in self-threading screws. Please make sure there is always sufficient space behind the screw holes and drilled
holes!
6.3.1 Mounting the electronics box
Installation consoles for a number of car models
are available from your dealer. These are designed
to contain all the system components, including
the electronics box. When it is not possible to use
an installation console, please proceed as follows:
Define the mounting points
Making sure that there is at least 2.8 in space for
the plug and socket connectors. Mark the positions
for the fixing screws.
Mounting the electronics box
For mounting the electronics box, use four self-threading screws and appropriate washers. We recommend size “ST 2,9x25 DIN
7981” self-threading screws. These are ideal for the fixing of the electronics box. Pre-drill the holes with a 0.08 in drill.
6.3.2 Mounting the microphone
Define the mounting location
The microphone holder has a self-adhesive strip on the back. The mounting location should have the same form and area as the
self-adhesive strip on the microphone holder. The location selected must allow the microphone cable to reach the electronics box!
Position the microphone with the head facing towards the direction of speech.
Cleaning and degreasing the mounting location
The mounting location must be clean and free from grease and dirt/dust. Prior to installation, clean the area with a cleansing product
containing ethyl alcohol. Only use products that do not damage plastics or varnished wood finishes and are themselves free of oils or
grease. Unsuitable cleansers are, for example, lighter fluid, acetone, turpentine, trichloroethylene and similar products.
Attaching the microphone holder
Peel off the protective backing from the self-adhesive strip. Hold the microphone holder at a distance of several millimetres (about a
quarter of an inch) above the desired mounting location. Re-check the positioning. Re-positioning after mounting is no longer possi-
ble. Place the microphone holder on the mounting location and fix by applying short and light pressure.
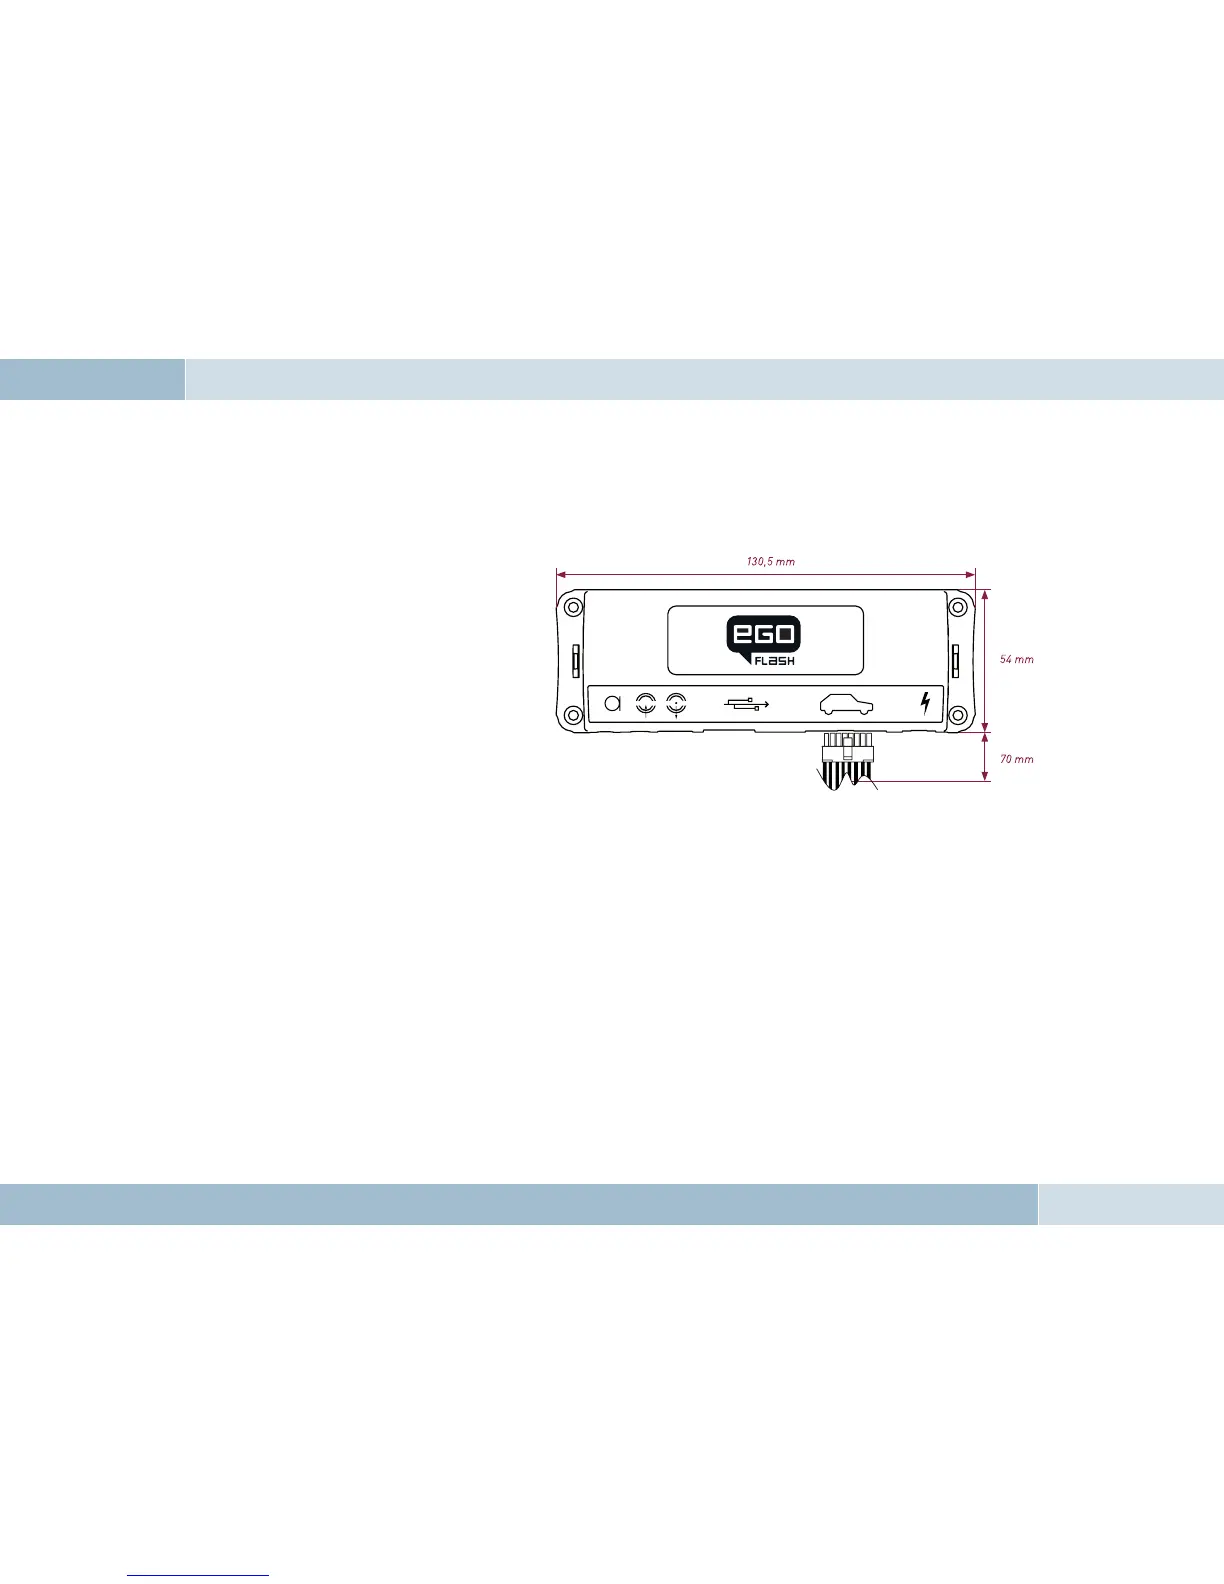
Fig. 05:
Electronics box
dimensions
 Loading...