2
3. Attach the cosmetic cap (supplied as accessories) to the display unit at the locations
shown in the drawing on page 1.
Note: If necessary, fill gap between the mounting panel and the display unit chassis with
sealing material.
Desktop mounting
The display unit can be mounted on a desktop, using the optional bracket kit (Type:
FP03-09820, Code No.: 008-535-560).
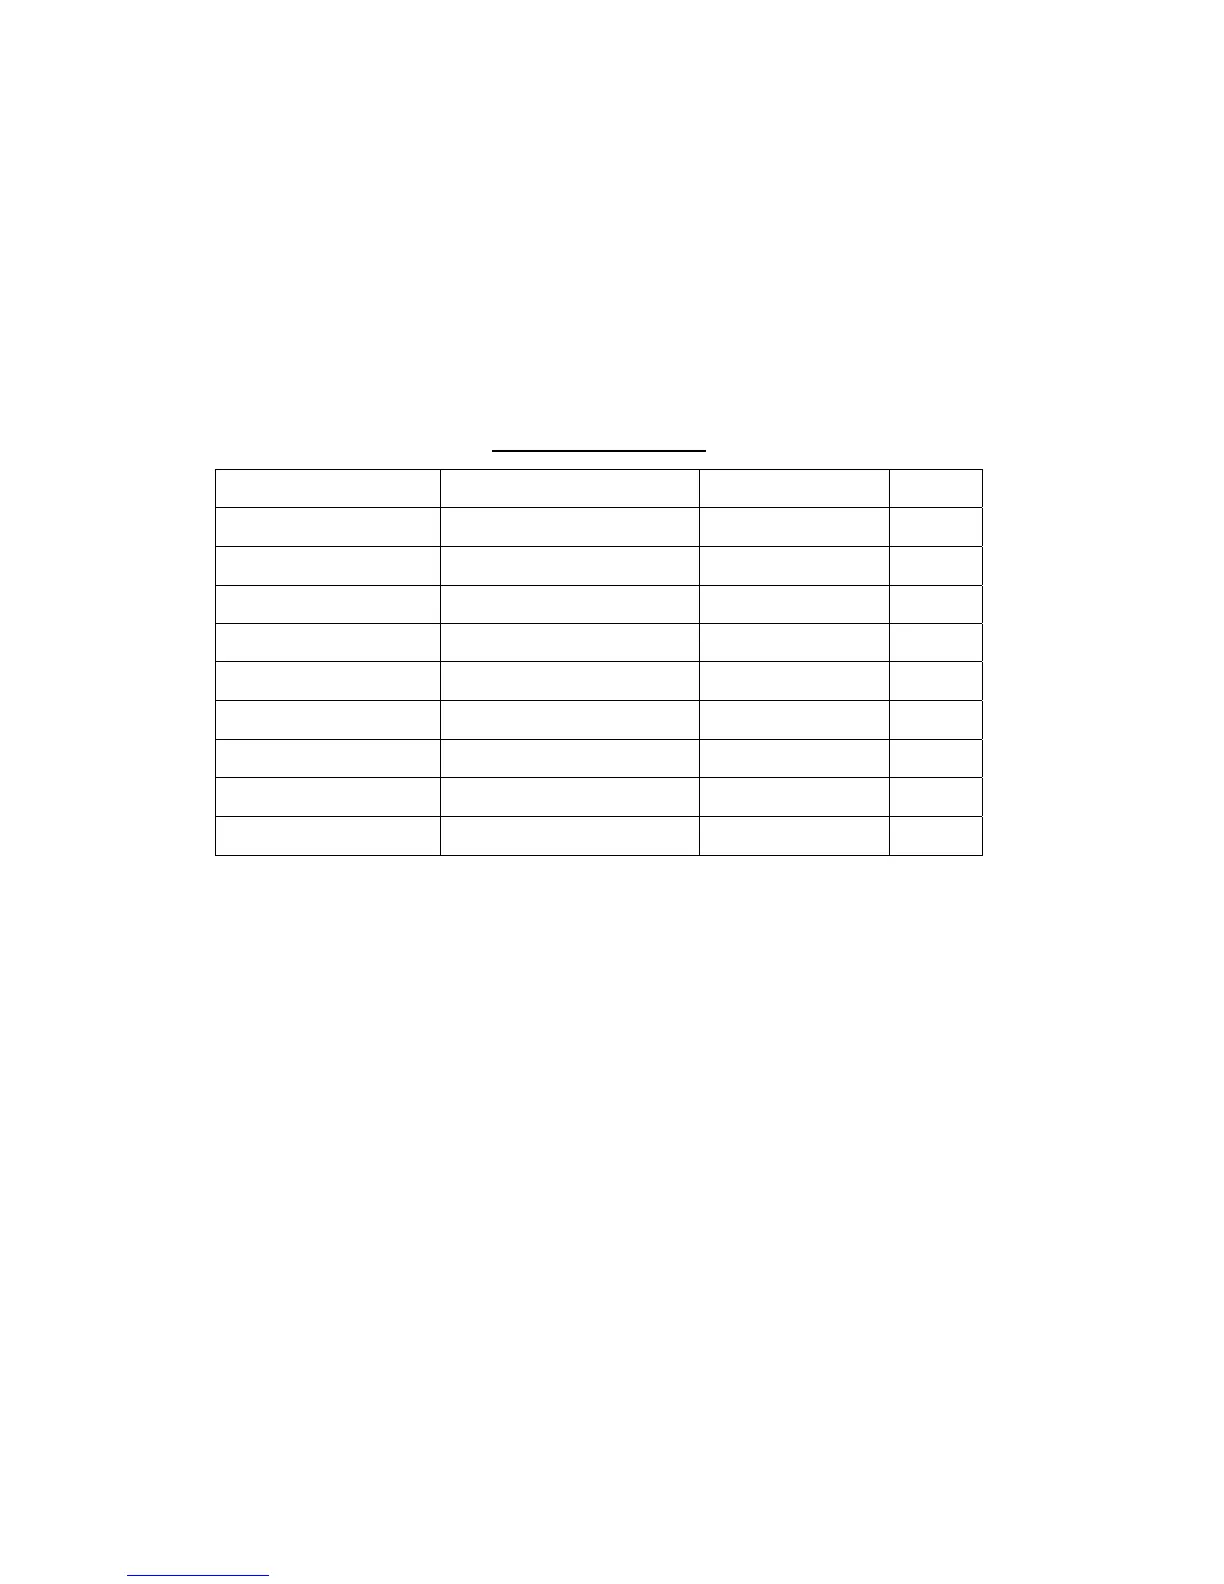
Contents of bracket kit
Name Type Code No. Qty
Hanger L (20) 03-163-1111 100-305-141 1
Hanger R (20) 03-163-1112 100-305-181 1
Hanger stay (20) 03-163-1113 100-305-191 1
Hole plug CP-30-HP-13 000-147-143 2
Plastic rivet For KB-13, black button 000-570-276 4
Hex bolt M6x25 000-802-771 4
Hex bolt M10x30 000-802-182 2
Spring washer M10 000-864-261 2
Flat washer M10 000-864-131 2
1. Assemble two hangers and hanger stay with two hex bolts (M10x30), spring washers
and flat washers and cover each hex bolt with hole plug.
2. Fix the above assembly to the mounting location with four hex bolts (M10, dockyard
supply).
3. Fasten the display unit to the bracket with four hex bolts (M6x25, supplied).
4. Cover each hex bolt with cosmetic cap.
5. Cover each hole for handle on the hanger with plastic rivet.
 Loading...