44
About Transfer Function Of Gyro Setting Data
With this function, by connecting the transmitter and the GPB-1 with the transmitter
connection cable, it is possible to wirelessly change the setting of the CGY mounted
on the model via the transmitter. For the list of functions that can be changed, refer
to page 105. Before connecting the GPB-1 to the transmitter, please connect to the
CGY rst and save the original data to the GPB-1 accordingly.
Setting on transmitter side
1. Follow the transmitter’s instruction manual, to set these items to the correct con-
figuration. Use the TX's Function menu to set two consecutive free AUX channels
to match the channel assignments set in the gyro SBUS menu. However, do not
set the "Control" and "Trim" functions.
2. Set the two free channels to the following settings.
Sub Trim: 0 / Fail safe: hold / Battery fail safe: OFF / Set the end point: 100
The limit point:155 (maximum) / Servo speed: 0 / Servo Reverse: Normal
3. Set the trainer function as follows according to the transmitter’s instruction manual.
Always ON
Teacher / Student: ------------------------------------------------------------------- Teacher
Channel mode: ------------------------------------------------------------------------- 16
CH
Mode for individual channels being used for gyro programming: -------- Normal
Rate: ------------------------------------------------------------------------------------------ 100
Point : In 12
ch FASSTest mode only the first 12
channels can be used for wireless trainer. In 18
ch
FASSTest it is possible to use 18
chs.
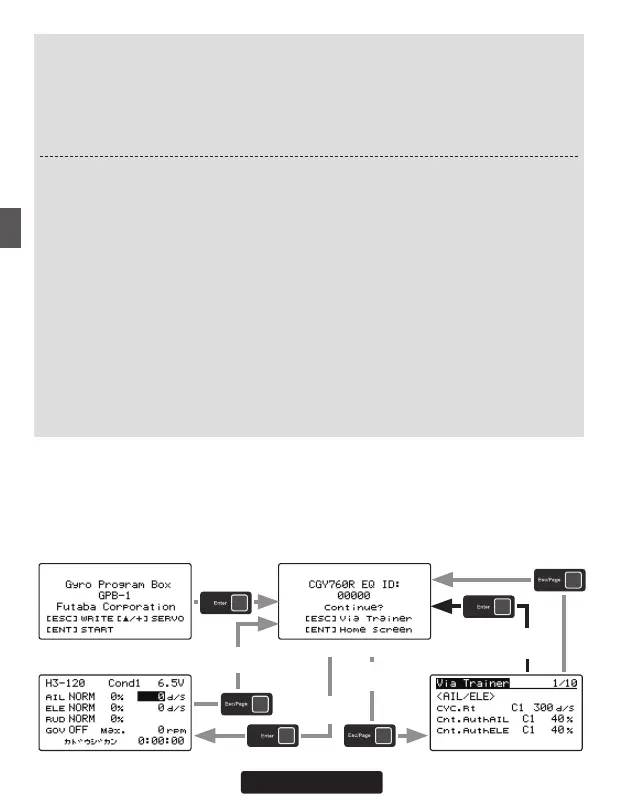
After connecting the GPB-1 to the transmitter via trainer port, power on the transmit-
ter. Upon turning the transmitter
"
On
"
the GPB-1 will show the opening screen and the
ID screen will be displayed. The ID number should be the same as the ID sticker on the
CGY. If the ID numbers match, press and hold the [Esc/Page] key to display the trainer
via function setting screen. Note: if the ID is different on the ID conrmation screen, con-
nect CGY and GPB-1 to update the current set data of the CGY to GPB-1.
Opening screen ID screen
Via Trainer screenHome screen
Press and hold
the [Esc/Page] key
Press and hold
the [Esc/Page] key
Press and hold
the [Esc/Page] key
Press and hold
the [Eter] key
Press and hold
the [Eter] key
Press the [Enter] key
with the cursor on the
"Via Trainer"
 Loading...
