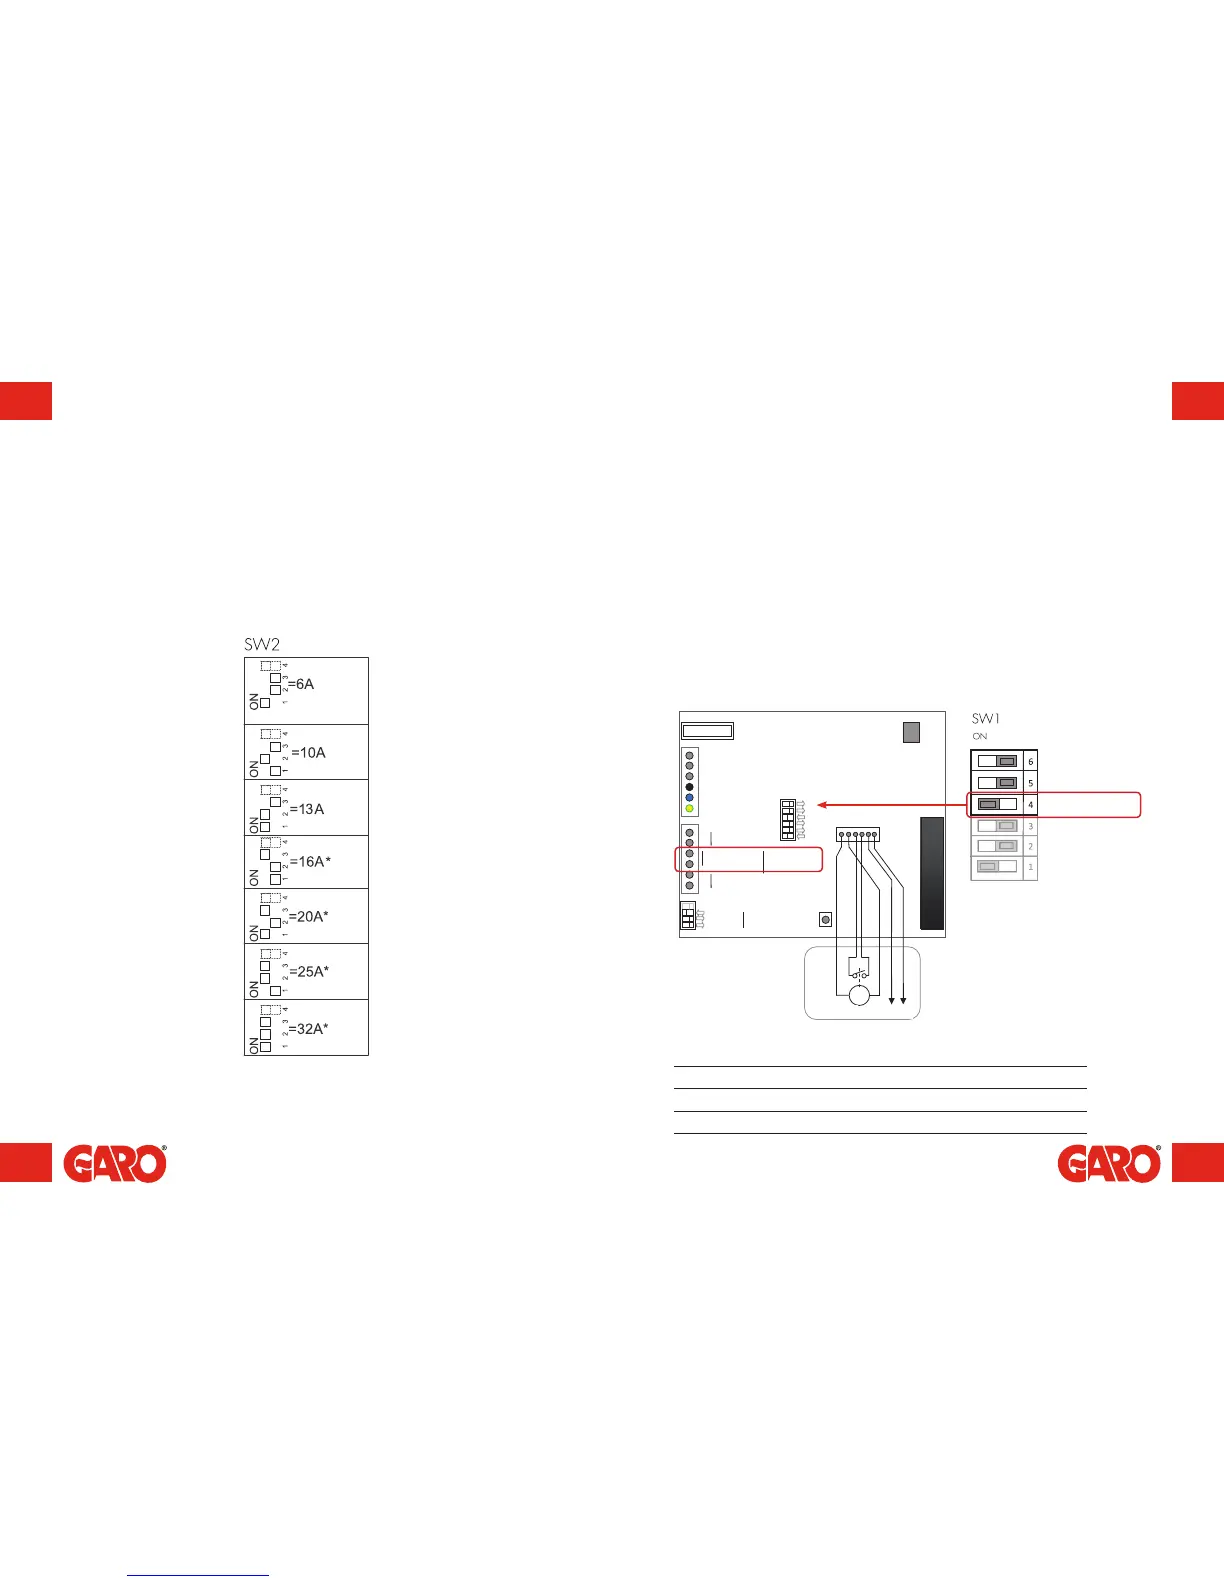
Reducing the charging current – Switch 2
(figure 11)
Depending on the size of the fuse, overload may occur, primarily at the property's meter
fuse. The wallbox's charging current can be reduced using the switches on the circuit
board. The supply voltage must be broken before the charging current is reduced.
The wallbox is equipped with a port, where charging can be activated and deactivated.
The charger's remote control capability allows charging to be controlled externally
through, for example, a relay outlet such as a timer or other superordinate control unit.
Charging can be verified in two ways:
• Activate charging by opening the circuit between the Remote Control connection
blocks. This option is the factory setting.
• Activate charging by closing the circuit between the Remote Control connection
blocks.
Remote control of charger via enable port
DIP Switch settings
Charging is activated at DIP Switch SW1.4
Open circuit ON (Factory setting)
Closed circuit OFF
Remote control –
see table below
(figure 12)