- 10 of 40 -
4400-0024-EN Rev A
Controller Model 121
40°C
2:20 P
L
O
C
K
U
N
L
O
C
K
POWER
Controller Model 121
40°C
2:20 P
Controller Model 121
40°C
2:20 P
Controller Model 121
40°C
2:20 P
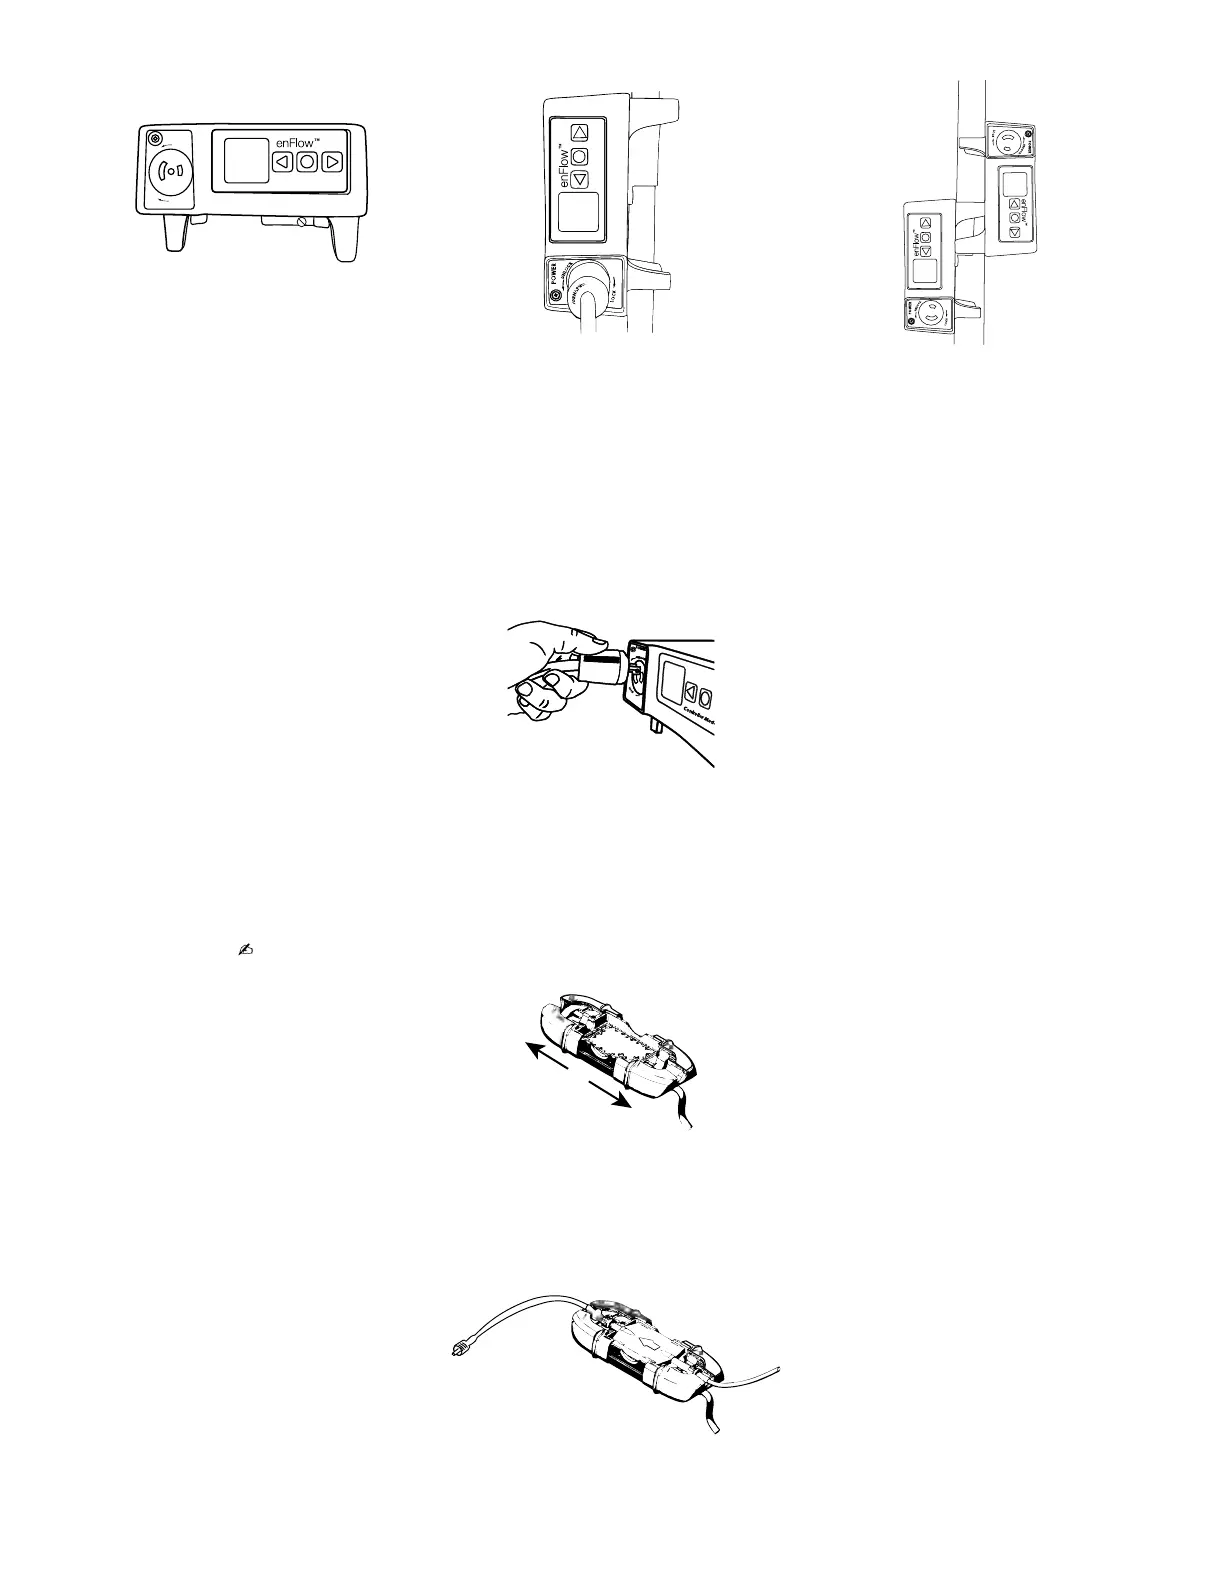
b. Plug the Controller into a hospital grade outlet.
c. Setting the clock to the local time is optional, but usually done on initial use. No changes in performance are aected by the clock’s setting.
(Please refer to the “enFlow Controller (Model 121 series) indicators and operations” section for directions to set the clock).
d. Connect the Warmer cable to the Controller. This action is accomplished in three steps:
1. Insert the male plug end of the Warmer into the female receptacle on the front face of the Controller. Push it in so that the plug cover is tight against
the receptacle.
enFl
2. The plug and receptacle are keyed in both orientation and conguration. This feature ensures that the Warmer can only be plugged in properly.
Additionally, it prevents other plug devices from tting into this receptacle.
3. Turn right to lock. (See arrows on label.)
e. The rear mounted I/0 (ON/OFF) switch on the Controller turns the power on and o. Switch the Controller to ON. Upon startup, the Controller conducts a
self-test. The power indicator illuminates green, the Controller display ashes “enFlow,” a short audible beep occurs, and the LED’s light up for about
one (1) second. Note : The Controller automatically switches for operation at either 100, 115, or 240 VAC (100-240 VAC).
POWER
TEMP
OFF
ON
f. Open the covers on the Warmer by sliding them apart.
g. Connect the infusion set and/or extension set to the Disposable Cartridge; then prime with uid using standard medically approved protocols. Next,
connect the infusion set to the patient and place the Disposable Cartridge into the Warmer.
POWER
OFF
TEMP
OFF
ON
 Loading...