- 39 of 40 -
4400-0024-EN Rev A
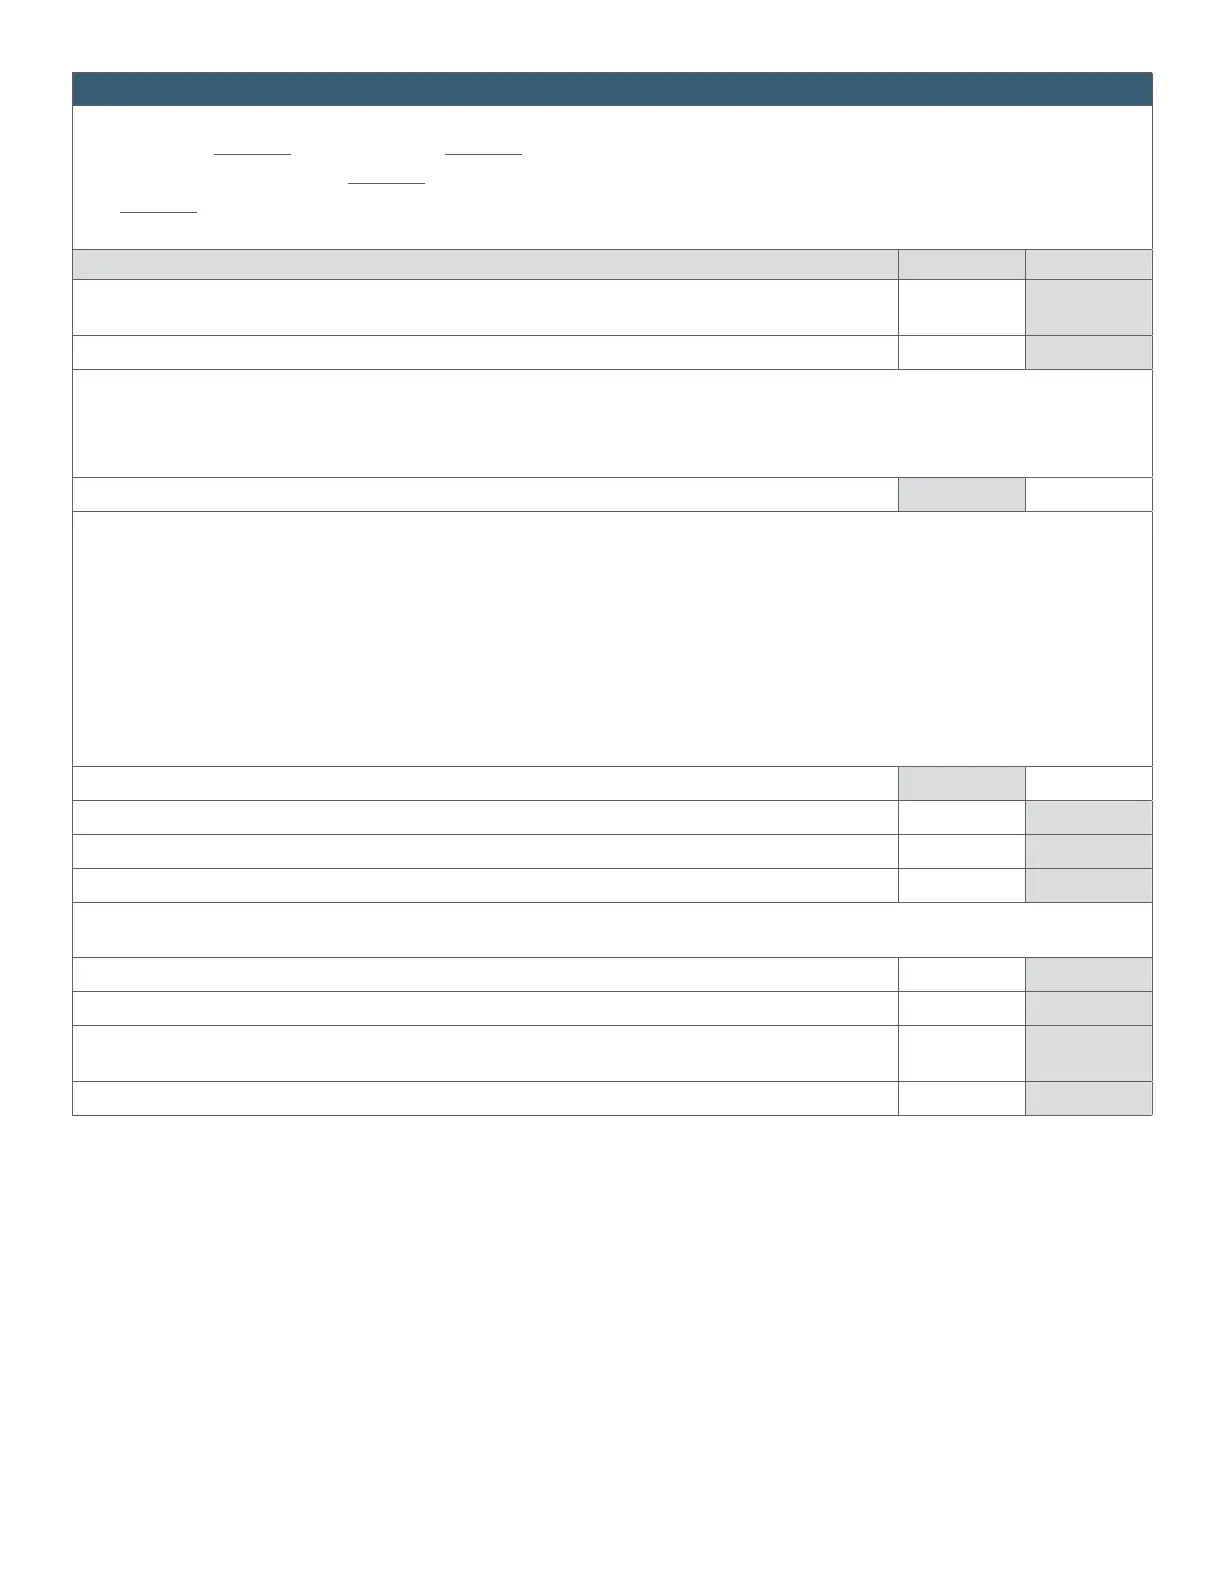
Appendix G: enFlow IV uid/blood warming system operational checklist—enCheck Model 400 method
Warmer Serial No Controller Serial No
Warming system location/identier
Date
Procedure Instructions
Pass/Fail Temperature
Inspection
Ensure all cords and connectors are in good condition and void of any cuts, cracks, or frays.
Ensure units are clean and void of any cracks or other signs of damage.
Performance Test Setup
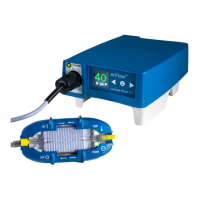
Plug the Controller into a hospital grade outlet. Connect the enCheck to the Controller by inserting the male plug end of the enCheck Hubbell connector into the female
receptacle on the front face of the Controller. Push it in so that the plug cover is tight against the receptacle. Insert the enCheck unit into the Warmer. The end of the unit is
keyed similar to the Cartridge so it will only t in the correct orientation. Close the covers. The temperature on the thermometer should be 40 °C ± 2 °C.
Record the temperature.
Over-Temperature Alarm Check
Plug the enFlow Controller into an AC outlet. Conrm that the switch on the enCheck is set to the normal mode. Connect the enCheck to the enFlow Controller, by inserting the
male plug end of the enCheck Hubbell connector into the female receptacle on the front face of the enFlow Controller. Push in and twist the enCheck Hubbell connector so that
the plug cover is locked snugly against the receptacle. Connect the enFlow Warmer to the enCheck by inserting the male plug end of the Warmer into the female receptacle of
the enCheck. Push the plugs together and twist to lock them snugly against each other. Insert the enCheck temperature probe connector into the Calibrated Thermometer and
set the Thermometer to “K” type setting. Insert the enCheck unit into the Warmer so the bottom end of the unit is keyed similarly as the Warmer Cartridge, so that it only ts
in the correct orientation (curved section on the left side), and close the Warmer covers. Switch the Main power switch on the back of enFlow Controller to the ON or
l position.
Verify that the Orange “power” LED indicator is illuminated on the enCheck. After waiting, for approximately 30 to 60 seconds, conrm the temperature on the Calibrated
Thermometer is reading in the range of 40 °C ± 2 °C, and that the Green “Normal” LED on the enCheck is illuminated. Disconnect the enCheck temperature probe connector
that is connected to the Calibrated Thermometer. Place the Switch on the enCheck to the “Overheat” position and verify that the Red “Overheat” LED is illuminated on the
enCheck. At this time, observe the enFlow Controller display until the temperature rises to greater than 45 °C; the controller display should be Red and the audible alarm should
sound, the Green “TEMP” LED on the enFlow Warmer should also have changed from a solid Green to a ashing Red.
Record the temperature.
The High Priority Over Temp Alarm occurs within less than 20 seconds of reaching input temperature. (See Appendix C.)
High Priority Alarm indicated by Audible beep and Over-Temp message in Red appearing on the Controller
Red Temperature LED ashes on the Warmer, also indicating a High Priority Alarm
Electrical Safety
Follow safety analyzer manufacturer’s instructions
Test leakage current at the AC power cord using a safety analyzer.
Test leakage current of the Warmer to the saline in the IV line using a safety analyzer.
Inspected By
Enter initials and conrm date.
Comments, Observations or Corrective Actions
Note: Please reference the Preventative Maintenance Procedure (Appendix E) for the specic procedures in order to perform the tests listed above.
 Loading...