– 37 –
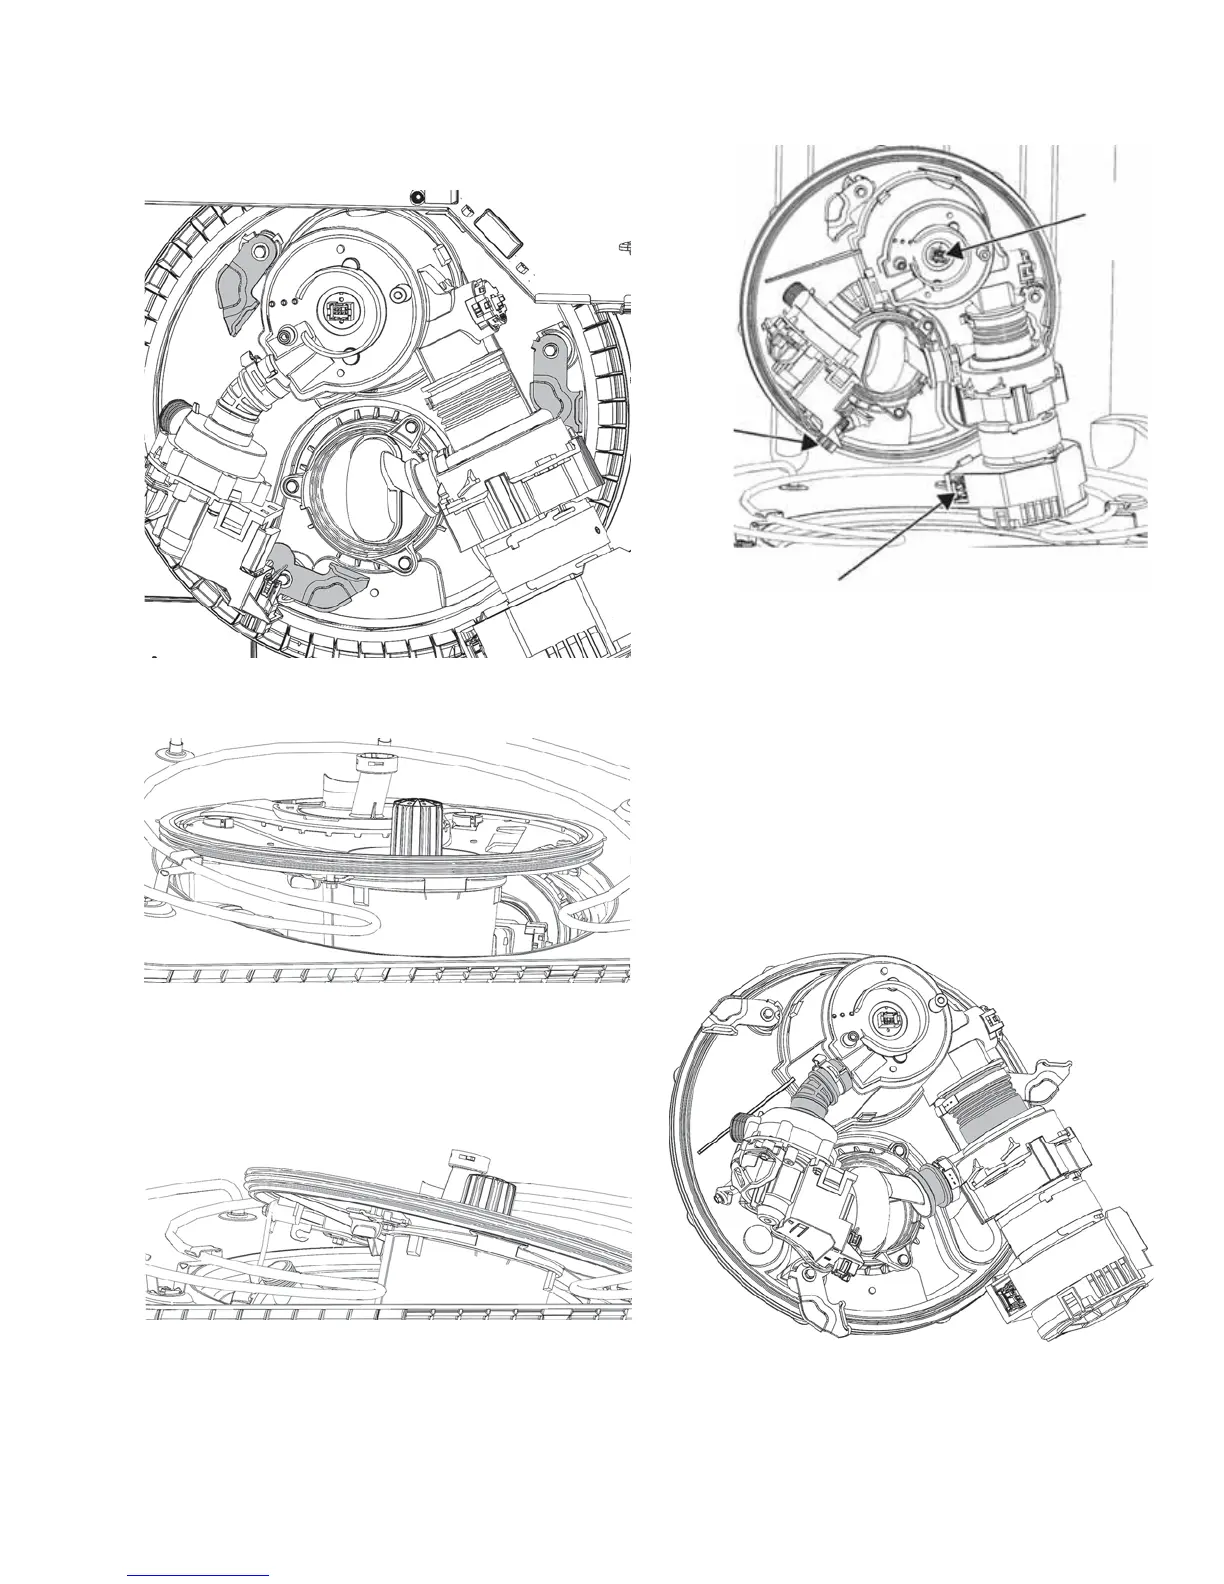
11. The sump latches below are shown in the
release position. Each latch has a stop point
built in. Turn the latches to a stop point when
unlatching and latching.
12. Push the sump from the bottom into the tub.
13. Grasp the sump from inside, using care NOT to
XVHWKHÀRRGVZLWFKDVDKDQGOH7LOWDQGOLIW
to bring the sump into the tub. Bring the drain
SXPSXSDQGLQ¿UVW7KLVDOORZVDFFHVVWR
disconnect the wiring in the next step.
NOTE: It is important to route the wire harnesses
in the same locations to prevent future damage
to the harness.
14. Disconnect the circulation pump wiring, drain
SXPSZLULQJDQGÀRRGVZLWFKZLULQJ
15. The sump is now free to remove.
NOTE: A Clamp Kit (Part #: WD35X10382) can be
used to replace any or all clamps on the sump
assembly. The three hoses located on the sump are
not available as individual parts. The circulation in
ÀRZKRVHLVPROGHGWRWKHFLUFXODWLRQSXPS7KH
hose between the circulation pump and diverter
is molded to the diverter. The hose connecting the
sump to the drain pump has the hose molded to the
drain pump.
Flood
Switch
Drain
Pump
Circulation Pump
 Loading...