Adaptive Vibration Control
This GE washer is equipped with Adaptive Vibration Control Technology. Using information about the fl oor,
this system can reduce vibration and improve spin performance in some installations by adapting the spin
cycle. The DEFAULT confi guration is specially designed to provide optimal performance across the widest
range of fl oor types. Follow the procedure below to enable more specifi c adaptive settings. The washer can
be returned quickly and easily to the DEFAULT confi guration at any time using the same procedure.
Floor Type Selection
1. Place control in the idle state. (Make sure no cycles or options are selected but that the washers Power
is on.)
2. Press and hold the Power and Spin keys at the same time for 3 seconds.
3. Only the Power, Start and display lights will be lit in this mode.
4. Pressing the Power key in this mode will return the control to the idle state and the defaults will be
restored.
5. Rotate the selector knob to select the Floor Type, per the table below.
Display Floor Type
F0 Default
F1 Concrete Floor
F2 Second Floor, all surface types
F3 First Floor, Tile surface
F4 First Floor, Linoleum surface
F5 `First Floor, wood surface
6. Press the Start key to make selection.
a. For riser models, the programming of the washers Adaptive Vibration Control is now complete.
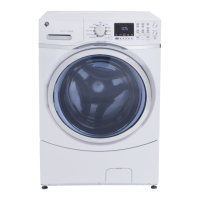
b. For all other models (GFWS2500, GFWS2505, GFWS2600, GFWS2605, GHWS3600, GHWS3605,
GFWS3700 and GFWS3705) – proceed to the pedestal selection (steps 7&8).
7. Rotate the selector knob to select the Pedestal Type per table below.
Display Pedestal Type
P0 No Pedestal (Default Setting)
P1 Pedestal
8. Press the Start key to make selection, the programming of the washers Adaptive Vibration Control is
now complete.
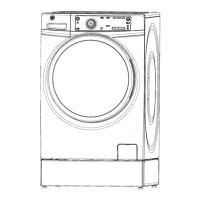
Pedestal Installation
Remove the packaging. Flatten the product carton to use as a pad to lay the washer or dryer down on its
side. Continue using the carton to protect the fi nished fl oor in front of the installation location.
Washer Prep
1. Carefully lay down the washer on its back to access the leveling legs on its bottom.
2. The washer shipping bolts must remain in place until the washer is returned to an upright position.
Installation