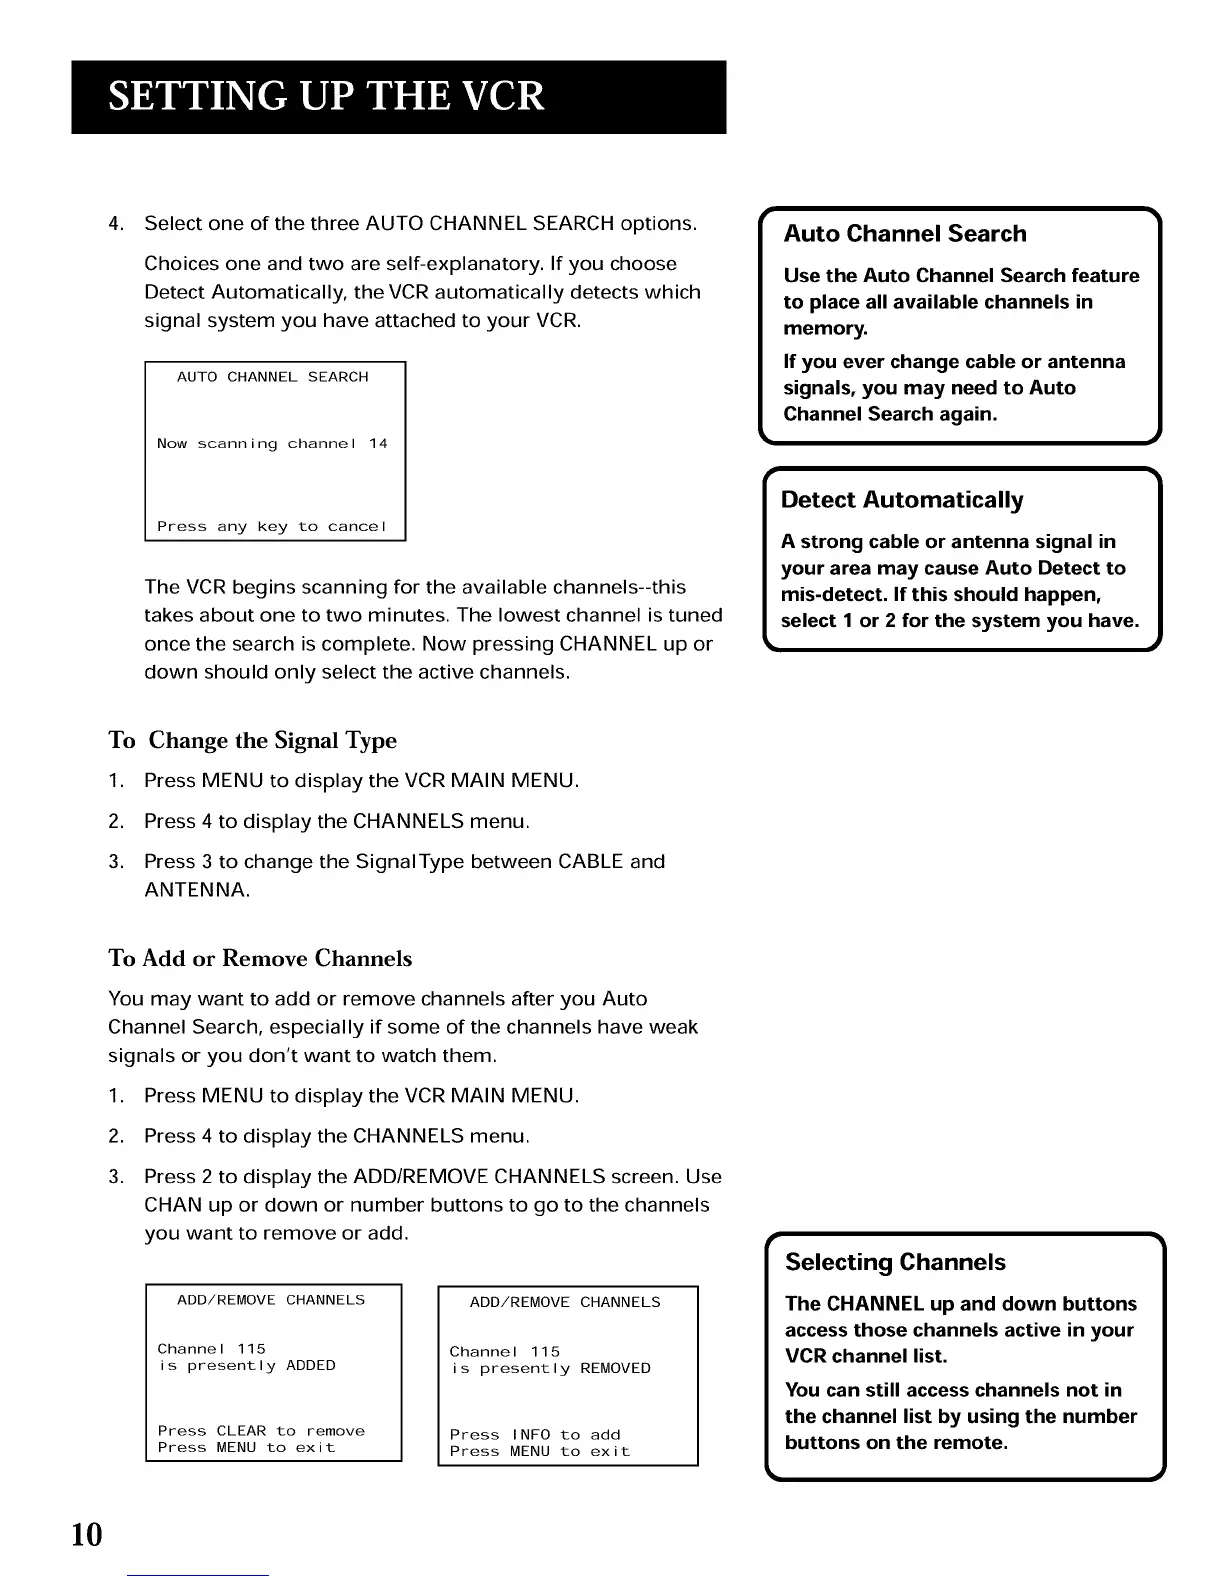
4. Select one of the three AUTO CHANNEL SEARCH options.
Choices one and two are self-explanatory. If you choose
Detect Automatically, the VCR automatically detects which
signal system you have attached to your VCR.
AUTO CHANNEL SEARCH
Now scanning channel 14
Press any key to cancel
The VCR begins scanning for the available channels--this
takes about one to two minutes. The lowest channel is tuned
once the search is complete. Now pressing CHANNEL up or
down should only select the active channels.
Auto Channel Search
Use the Auto Channel Search feature
to place all available channels in
memory.
If you ever change cable or antenna
signals, you may need to Auto
Channel Search again.
Detect Automatically
A strong cable or antenna signal in
your area may cause Auto Detect to
mis-detect. If this should happen,
select 1 or 2 for the system you have.
To Change the Signal Type
1. Press MENU to display the VCR MAIN MENU.
2. Press 4 to display the CHANNELS menu.
3. Press 3 to change the SignalType between CABLE and
ANTENNA.
To Add or Remove Channels
You may want to add or remove channels after you Auto
Channel Search, especially if some of the channels have weak
signals or you don't want to watch them.
,
2.
3.
Press MENU to display the VCR MAIN MENU.
Press 4 to display the CHANNELS menu.
Press 2 to display the ADD/REMOVE CHANNELS screen. Use
CHAN up or down or number buttons to go to the channels
you want to remove or add.
ADD/REMOVE CHANNELS
Channel 115
is presently ADDED
Press CLEAR to remove
Press MENU to exit
ADD/REMOVE CHANNELS
Channel 115
is presently REMOVED
Press INFO to add
Press MENU to exit
Selecting Channels
The CHANNEL up and down buttons
access those channels active in your
VCR channel list.
You can still access channels not in
the channel list by using the number
buttons on the remote.
10